Configure a Local Python MCP Server in VS Code
MCP (Model Context Protocol) servers extend AI assistants with custom capabilities and resource access. While using an MCP server in Claude Desktop is fantastic for general research and content discovery, there’s even more value in integrating these same tools directly into your development environment.
Since I write my blog posts in Markdown and manage them through GitHub, having the MCP server available right in VS Code means I can search for related content, fact-check references, and maintain consistency without leaving my editor.
So let’s also configure our MCP in an IDE to improve our writing and editing process.
Recap
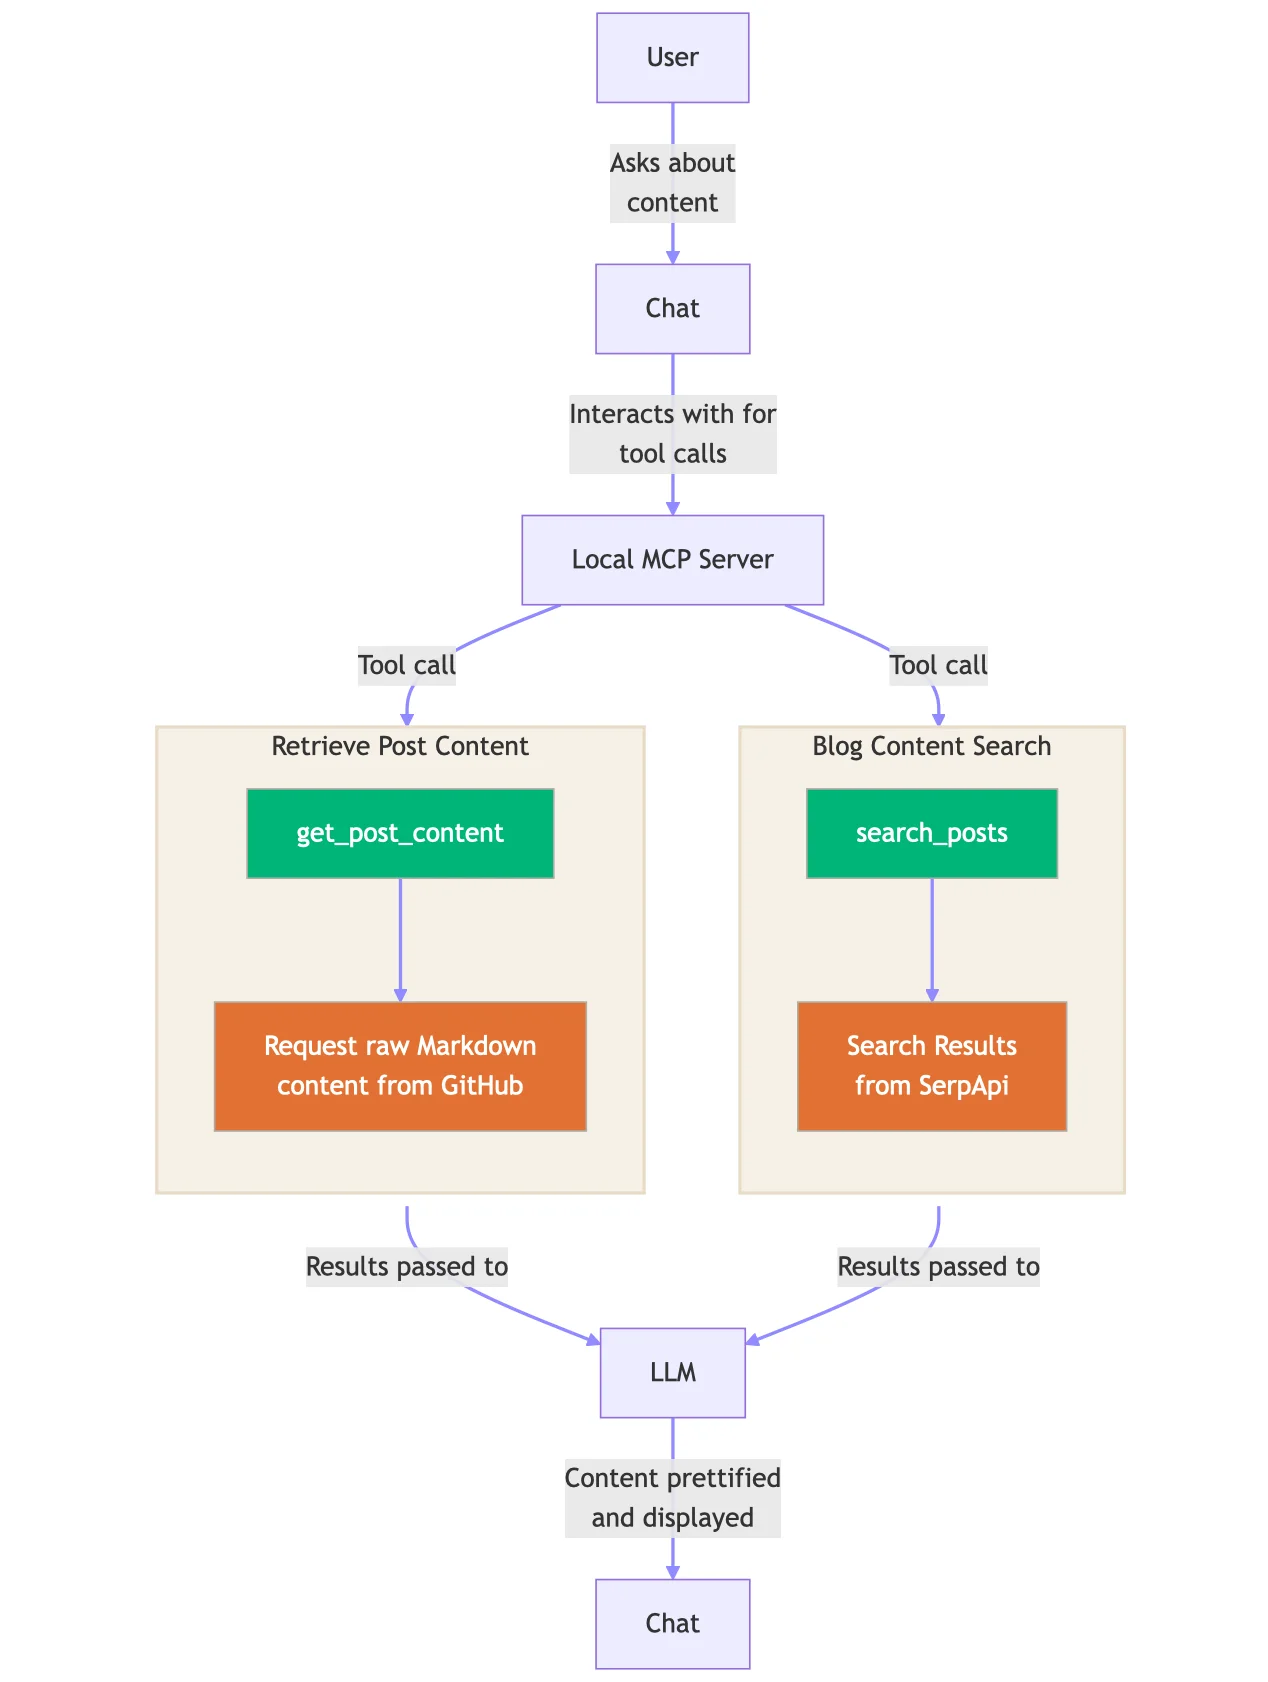
In a previous blog post we created an MCP server with two tools:
search_posts: searches through blog posts using SerpAPI to find content matching a specific queryget_post_content: retrieves the full markdown content of a specific blog post by title
This blog search and content retrieval MCP allows us to use our AI assistant to quickly find and access information from our blog, making it easier to reference previous work and maintain consistency across posts.
In that previous post, we built a Python MCP server that leverages SerpAPI for site-specific searches and uses the llms.txt standard to index and retrieve full post content. The server enables seamless integration between AI assistants and blog content, turning your blog into a searchable knowledge base.
If you want to learn more about tool calling checkout the video below or this blog post.
MCP Servers in VS Code
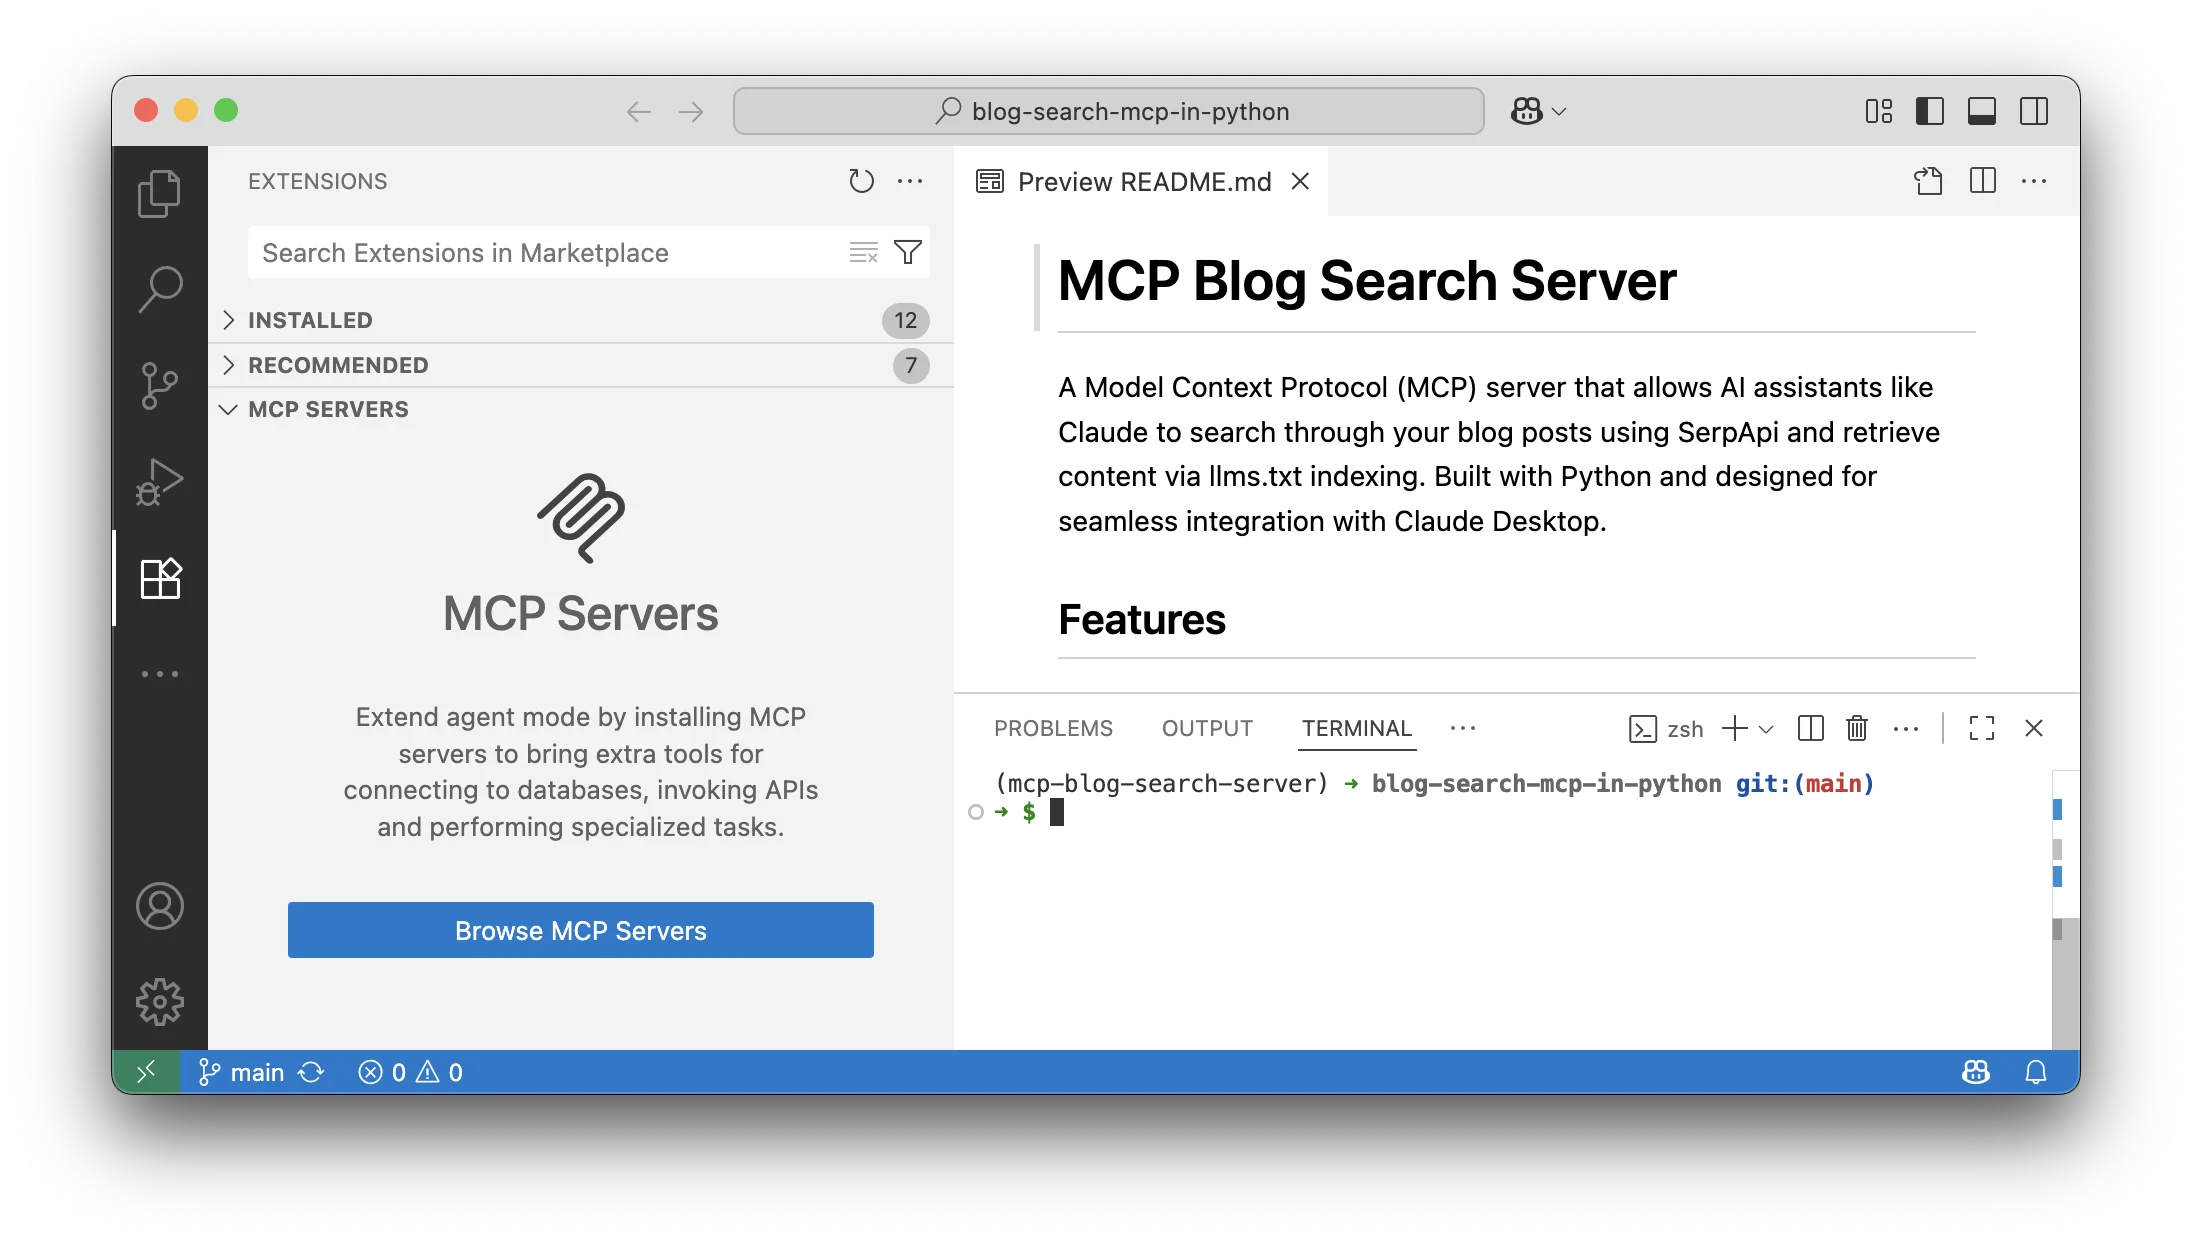
If you navigate to the Extensions tab in VS Code, you’ll see a dedicated section for MCP servers. This integration brings the power of Model Context Protocol directly into your development environment, allowing you to leverage custom tools and capabilities while coding, writing, or managing your projects.
The MCP extension for VS Code automatically detects configured servers and provides a seamless interface for interacting with them through GitHub Copilot Chat. This means you can access your custom tools without leaving your editor, making your workflow more efficient and integrated.
Prerequisites
Before we begin, make sure you have:
- Python 3.8+ installed on your system
- uv package manager (installation guide)
- VS Code with the GitHub Copilot extension enabled
- A SerpAPI key for search functionality (get one here)
Set Up Your Local Server
Before configuring the MCP server in VS Code, you’ll need to set up the project locally. Here are the steps:
- Clone the repository:
git clone https://github.com/jtemporal/blog-search-mcp-in-python.git cd blog-search-mcp-in-python - Install dependencies using uv:
uv sync -
Configure your environment: Create a
.configfile based on the.config.examplewith your SerpAPI key and blog URL. - Test the server:
uv run src/server.py
Once your server is working locally, you’re ready to integrate it with VS Code.
Adding the MCP Configuration
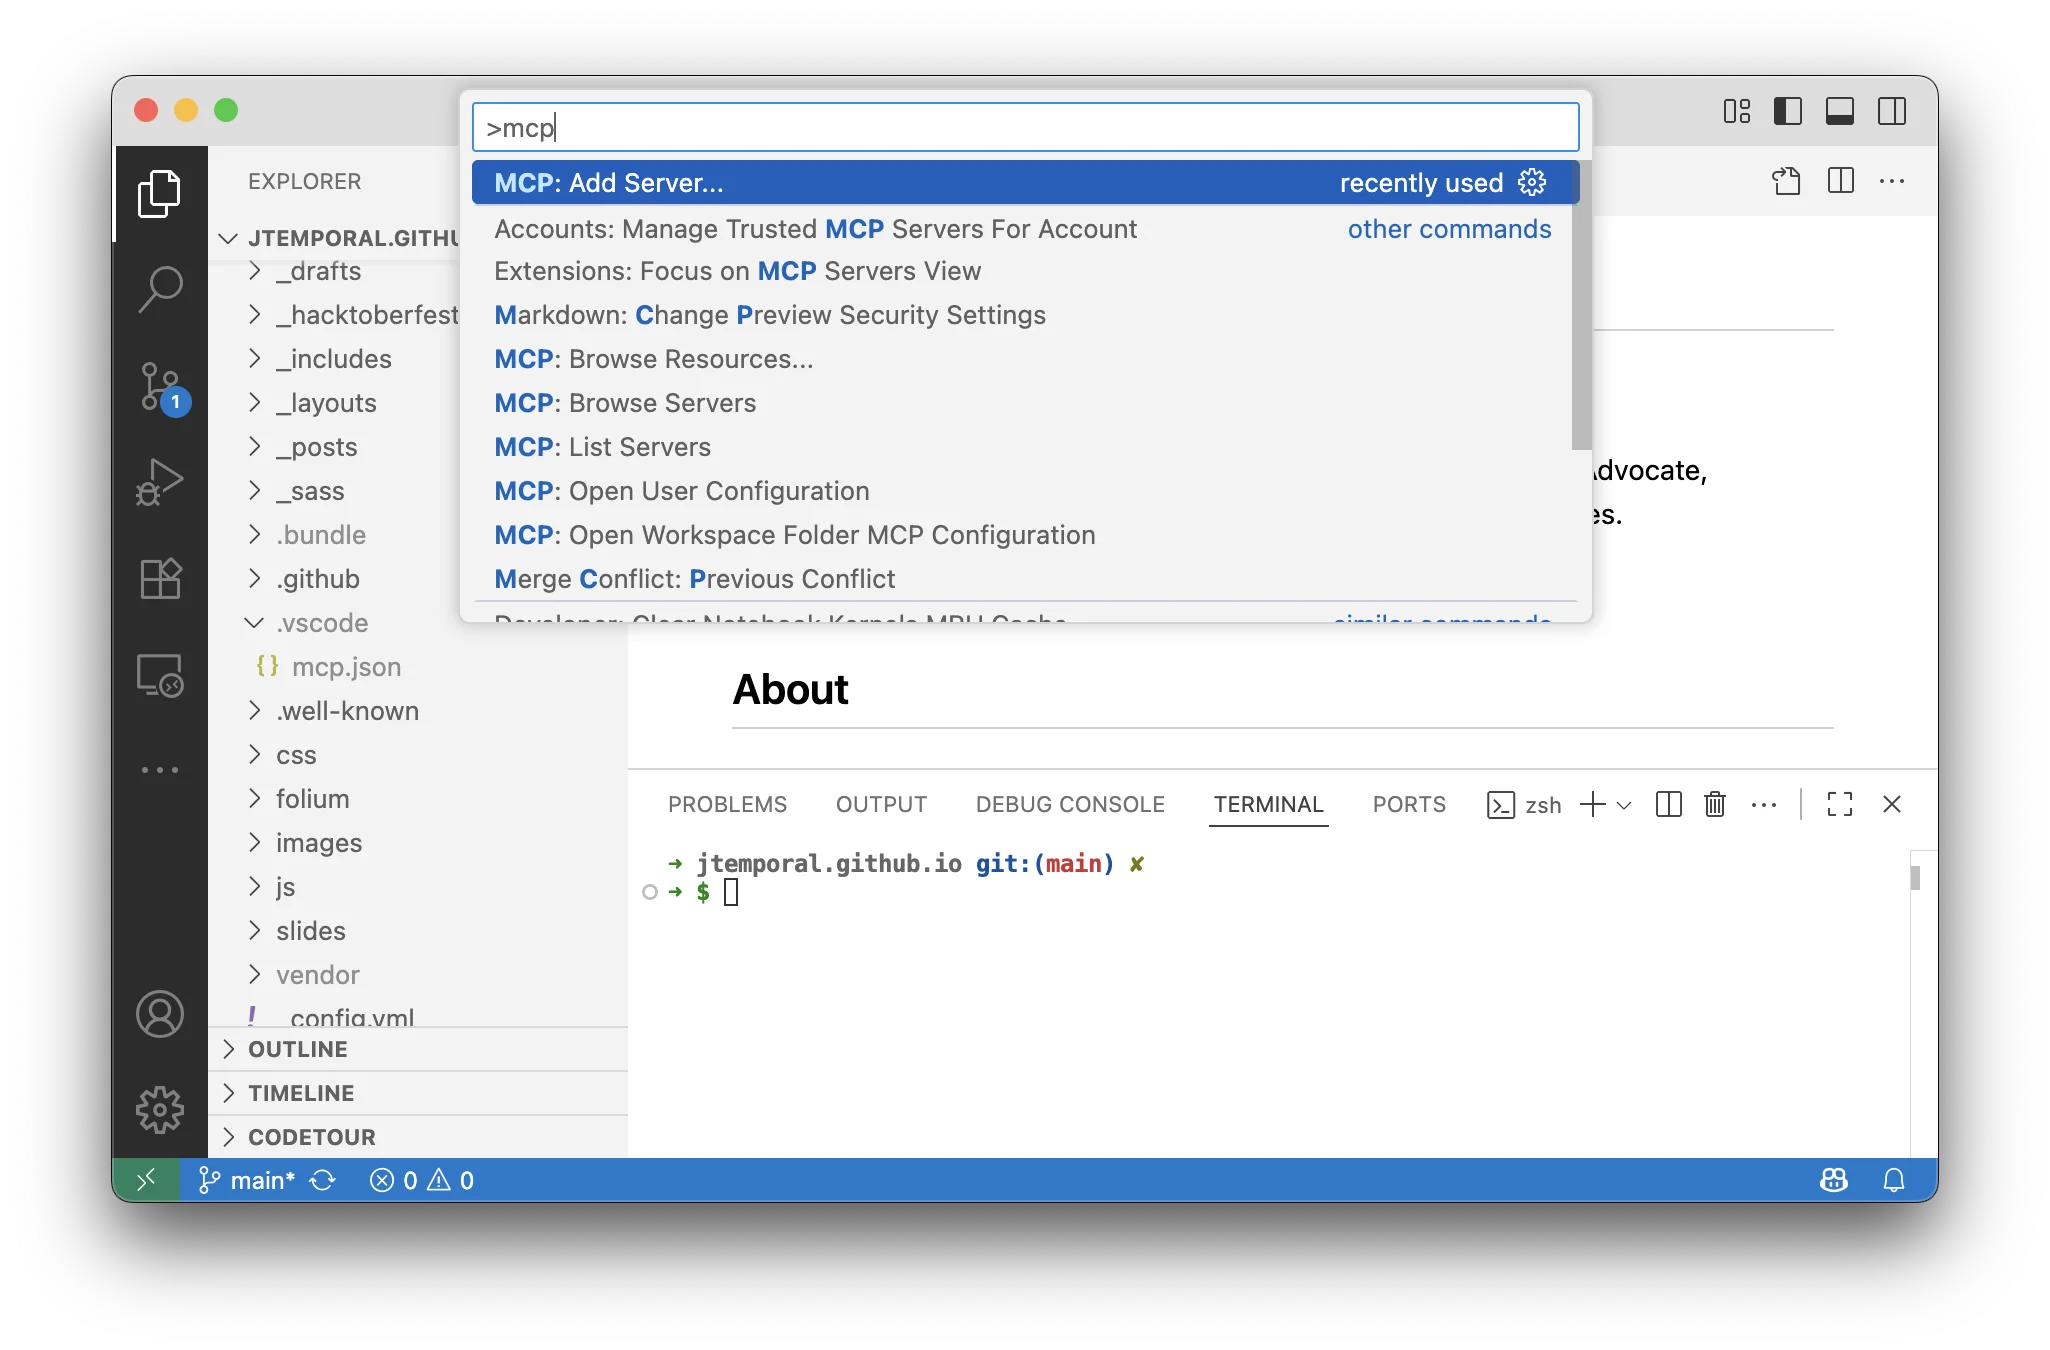
To add your MCP server to VS Code, press Cmd+Shift+P (Mac) or Ctrl+Shift+P (Windows/Linux) to open the command palette, then type “MCP” and select “MCP: Add Server” from the list. This will launch the MCP configuration wizard.
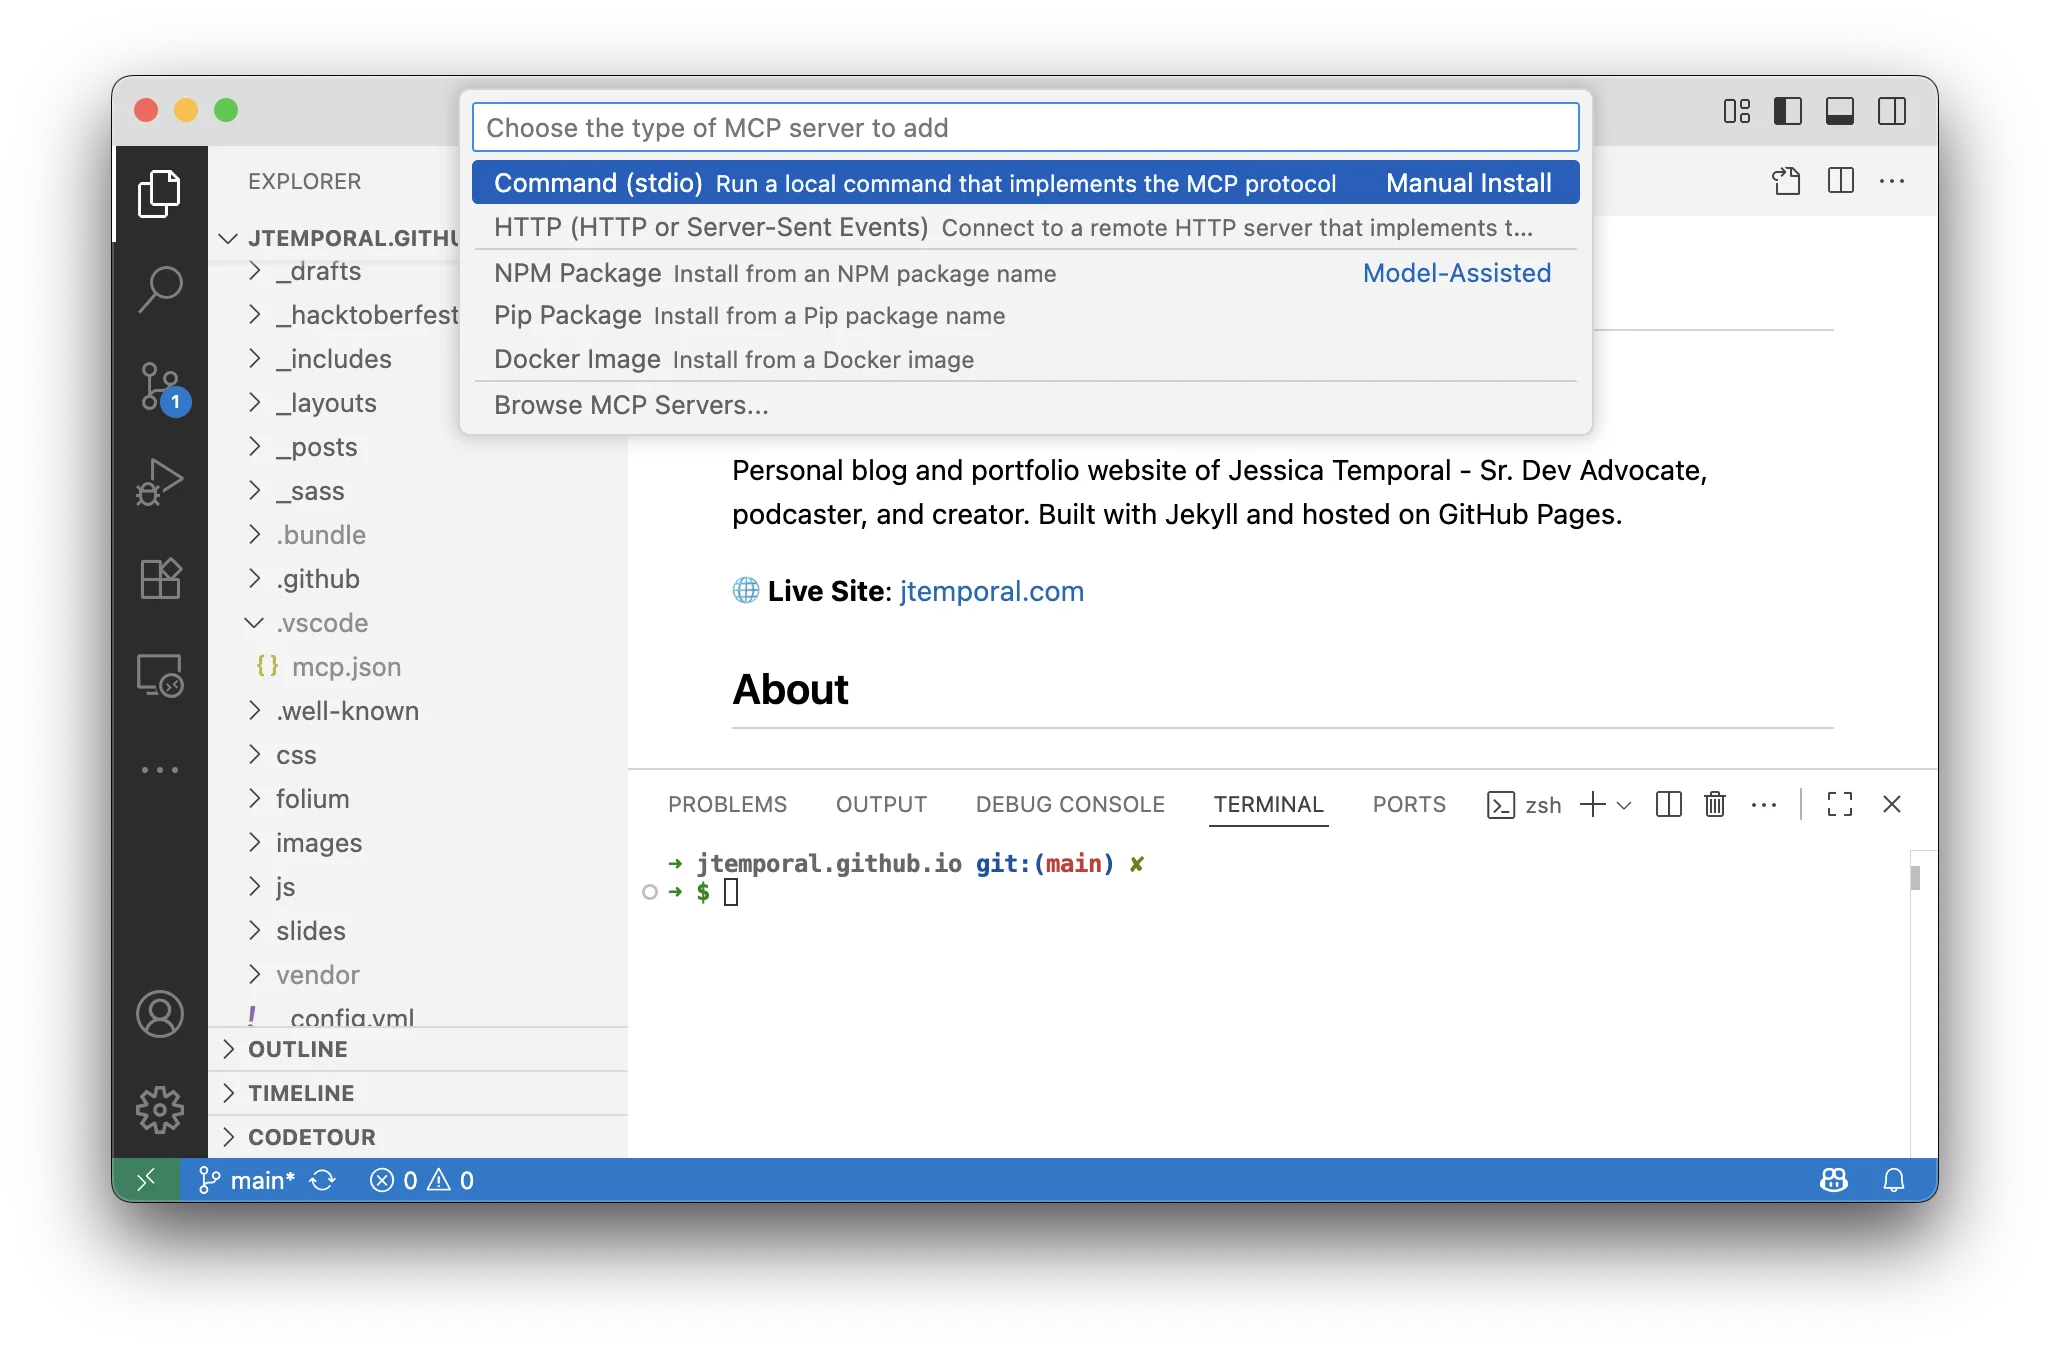
The first step is to choose the transport layer. For our local Python server, select “stdio” as the transport method. This allows VS Code to communicate with your server through standard input/output streams.
Adding the Command to Run Your MCP
Next, you’ll need to specify the command that VS Code should use to start your MCP server. Since our server has external dependencies (SerpAPI), we need to include them in the command.
Note: The exact path to uv may vary depending on your installation method. If you installed via pip, it might be in a different location. You can find your uv path by running which uv in your terminal.
~/.local/bin/uv run --with google-search-results --with mcp[cli] mcp run ~/path/to/repository/blog-search-mcp-in-python/src/server.py
Make sure to replace ~/path/to/repository/blog-search-mcp-in-python/ with the actual path to your cloned repository.
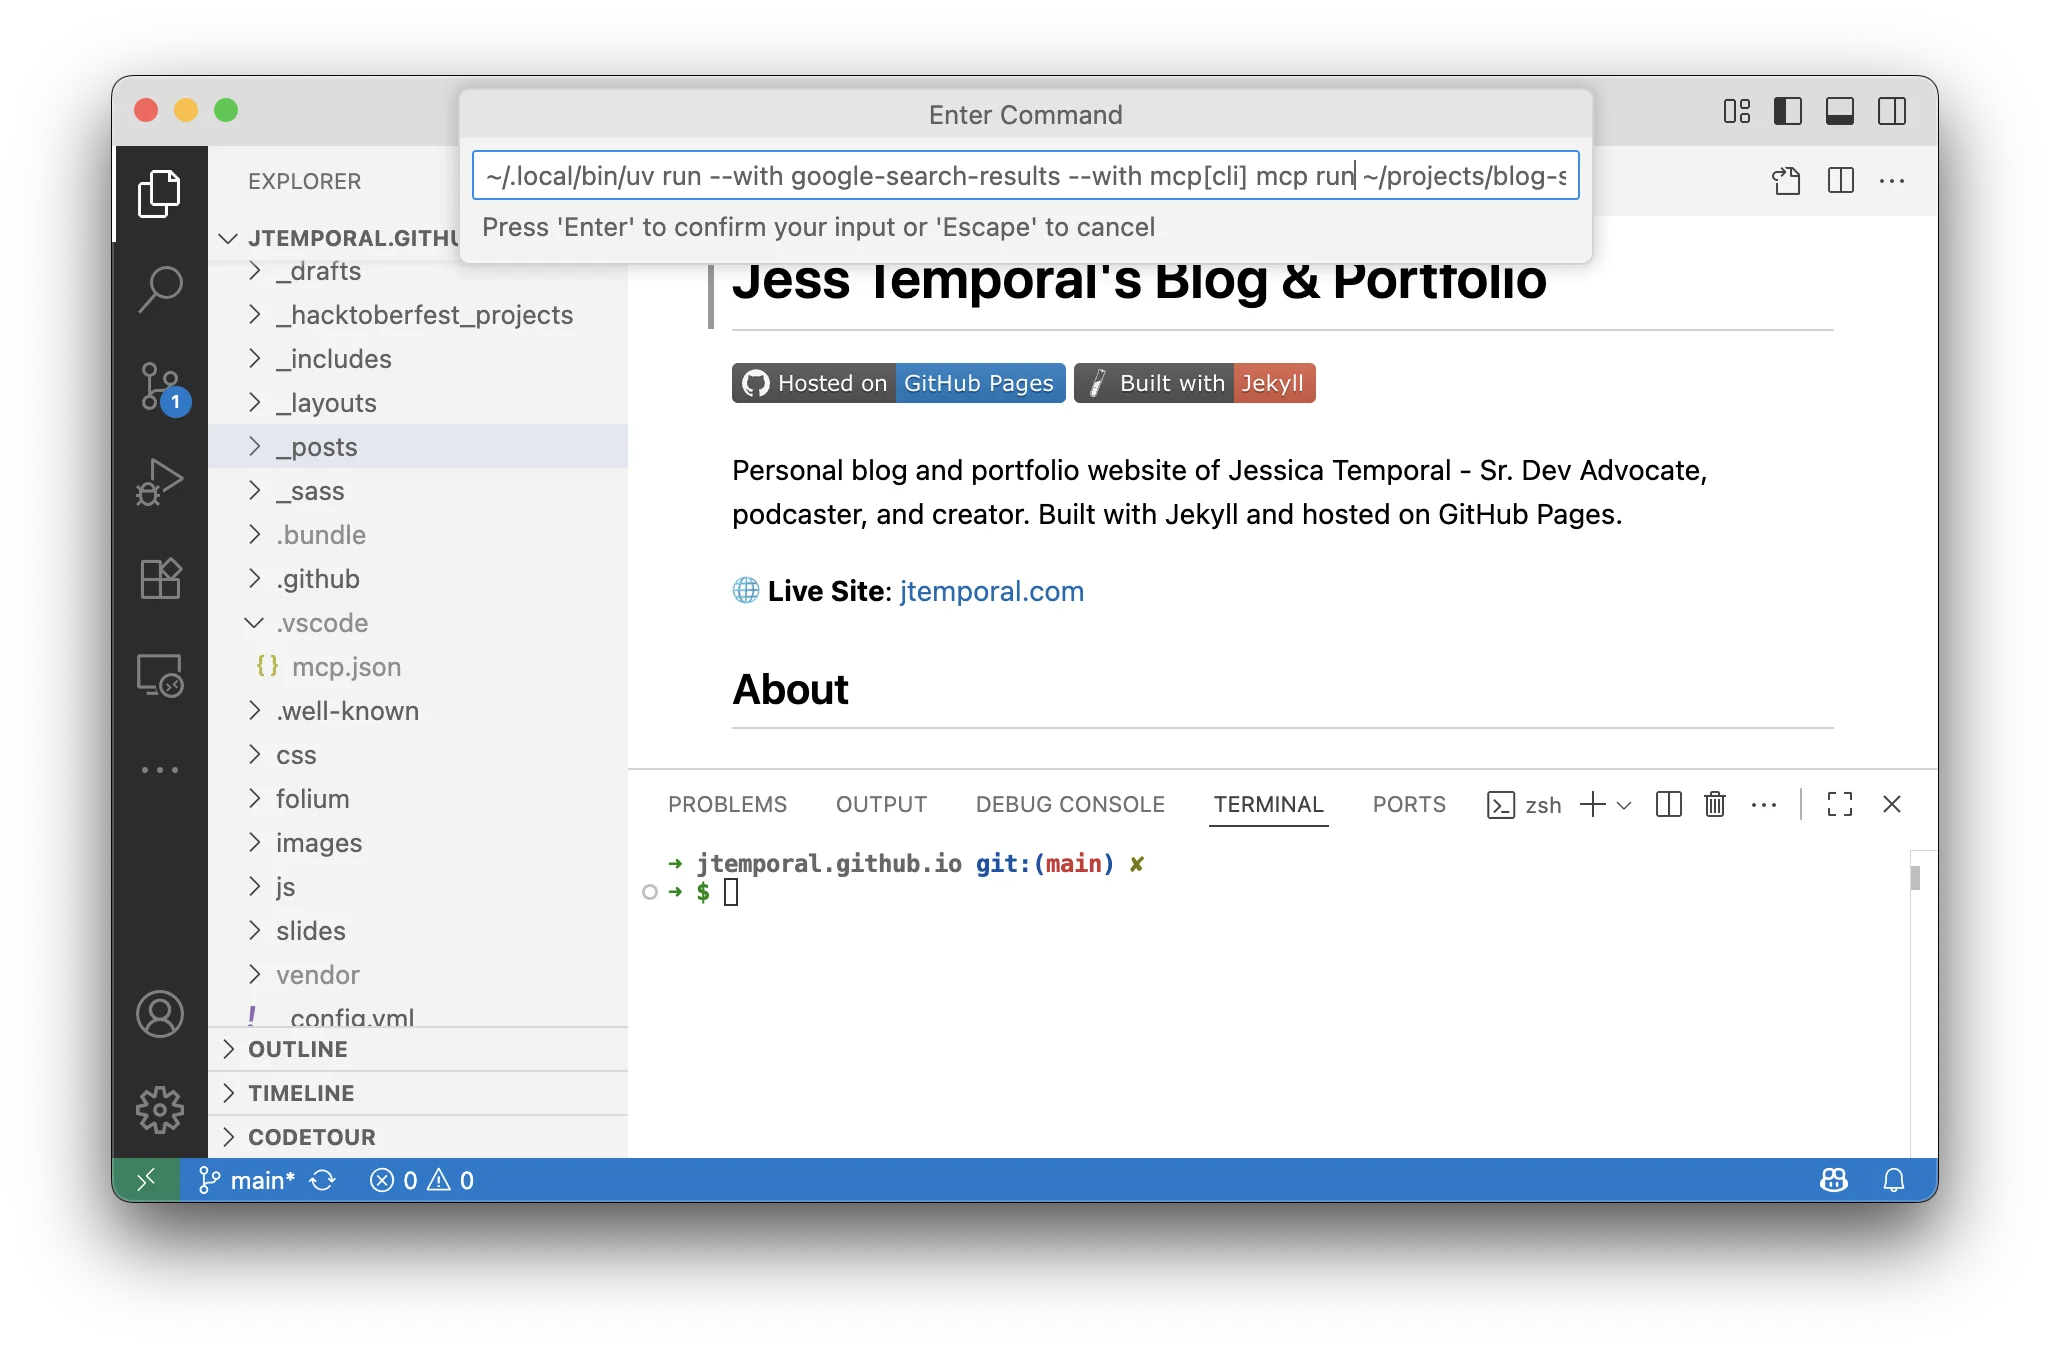
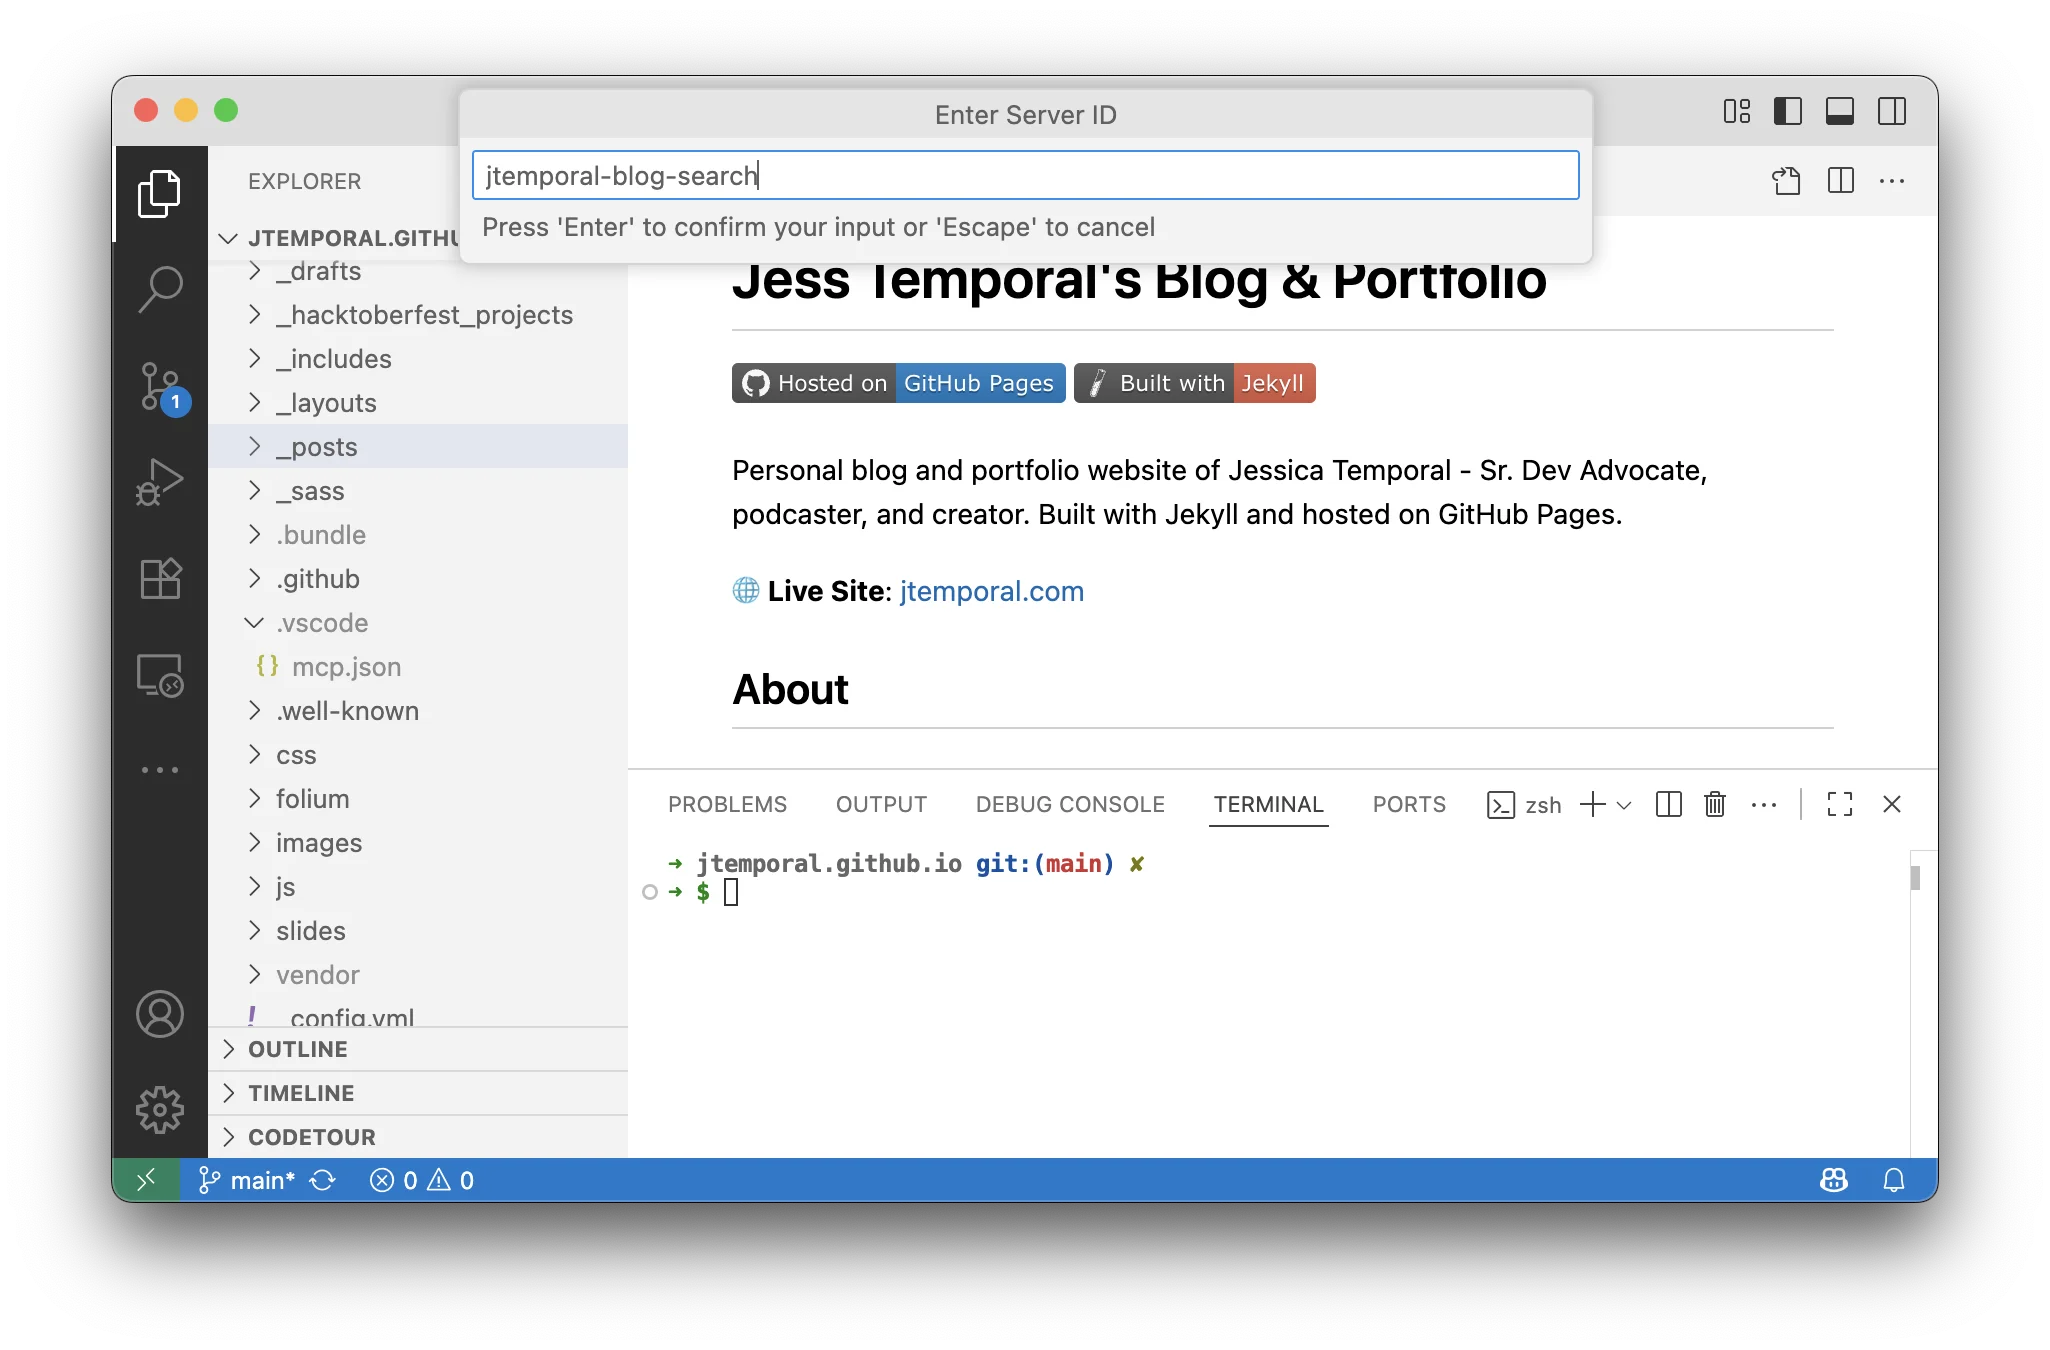
After entering the command, give your MCP server a descriptive name that will help you identify it in the VS Code interface.
Define Where the Configuration Should Be Applied
VS Code will ask you where to save the MCP configuration. You can choose between applying it globally (for all workspaces) or just for the current workspace.
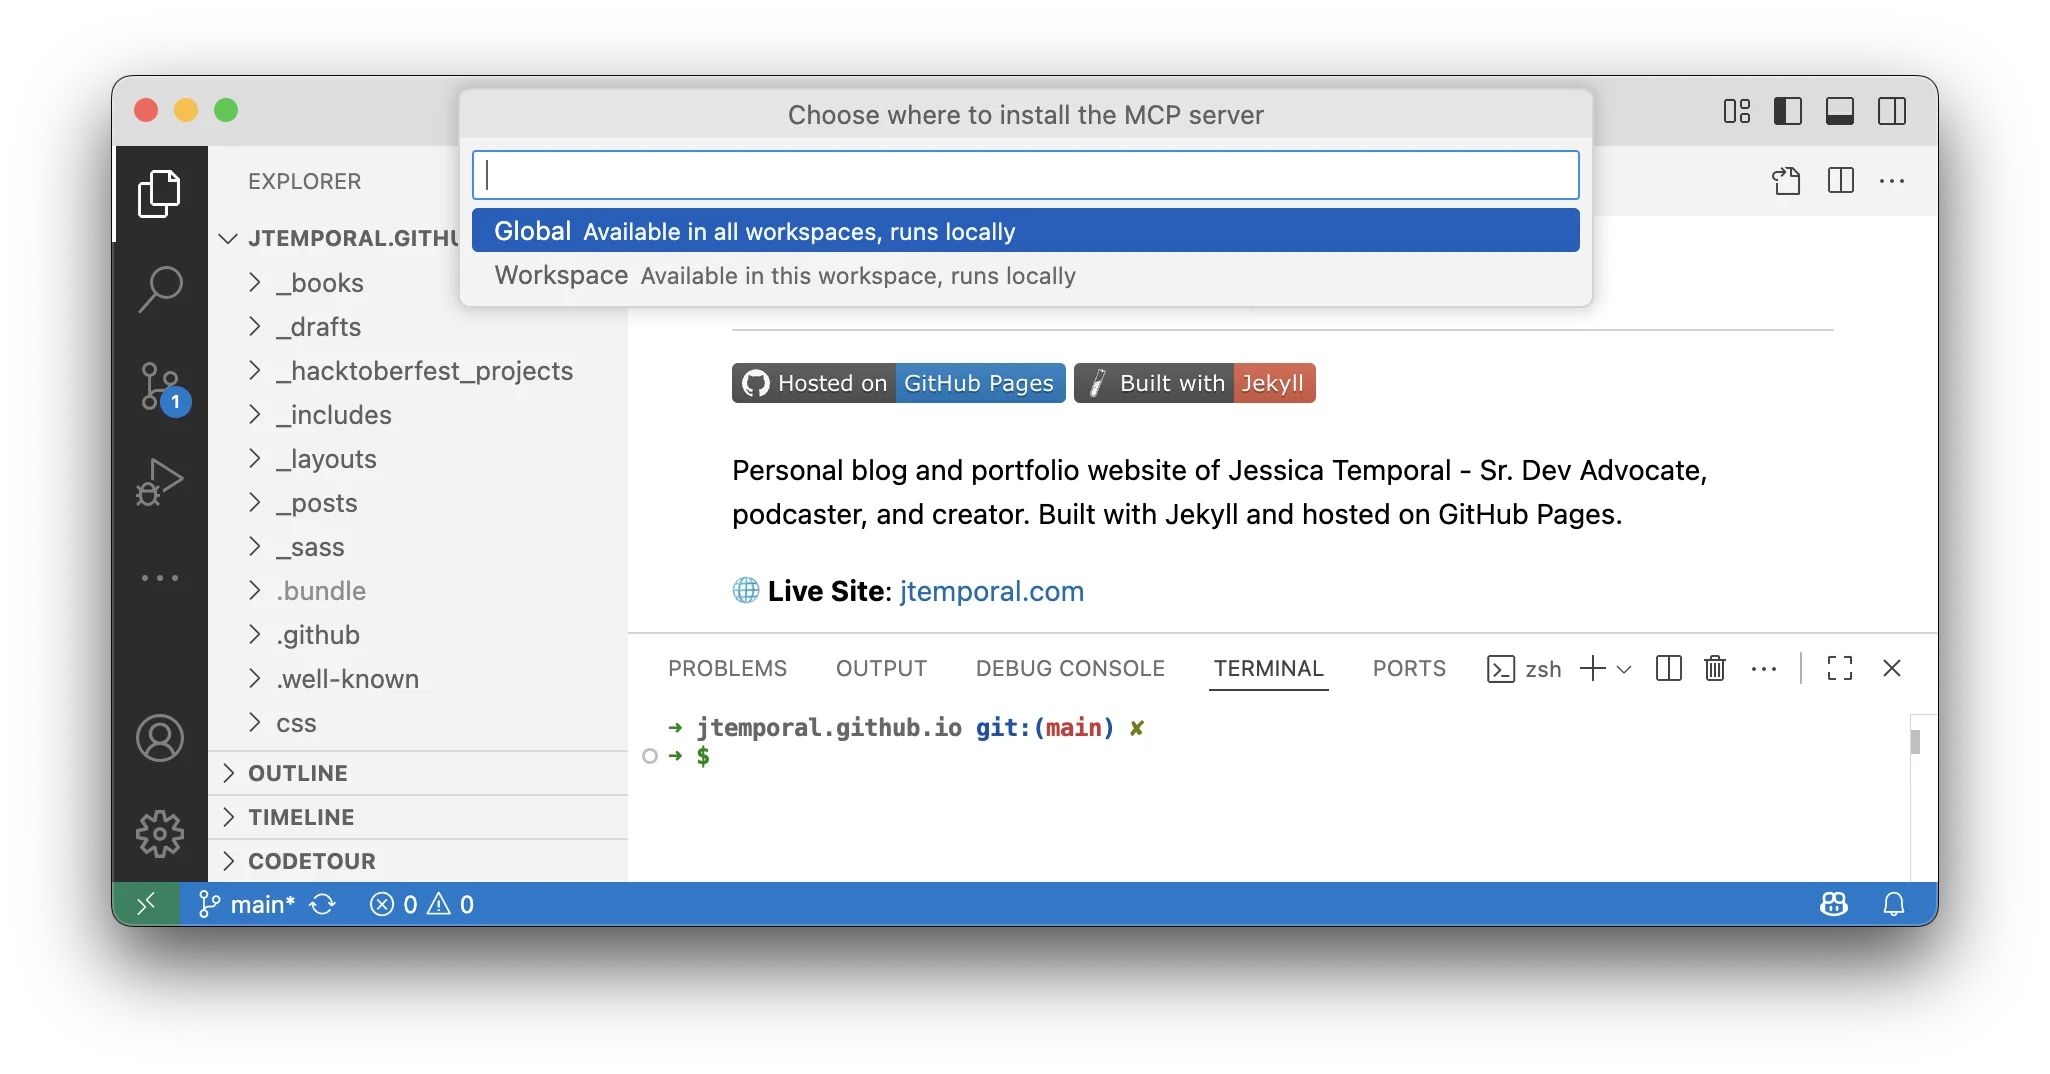
Following the principle of least privilege, it’s recommended to pick “Workspace” instead of global. This keeps the configuration scoped to your current project and prevents potential conflicts with other projects.
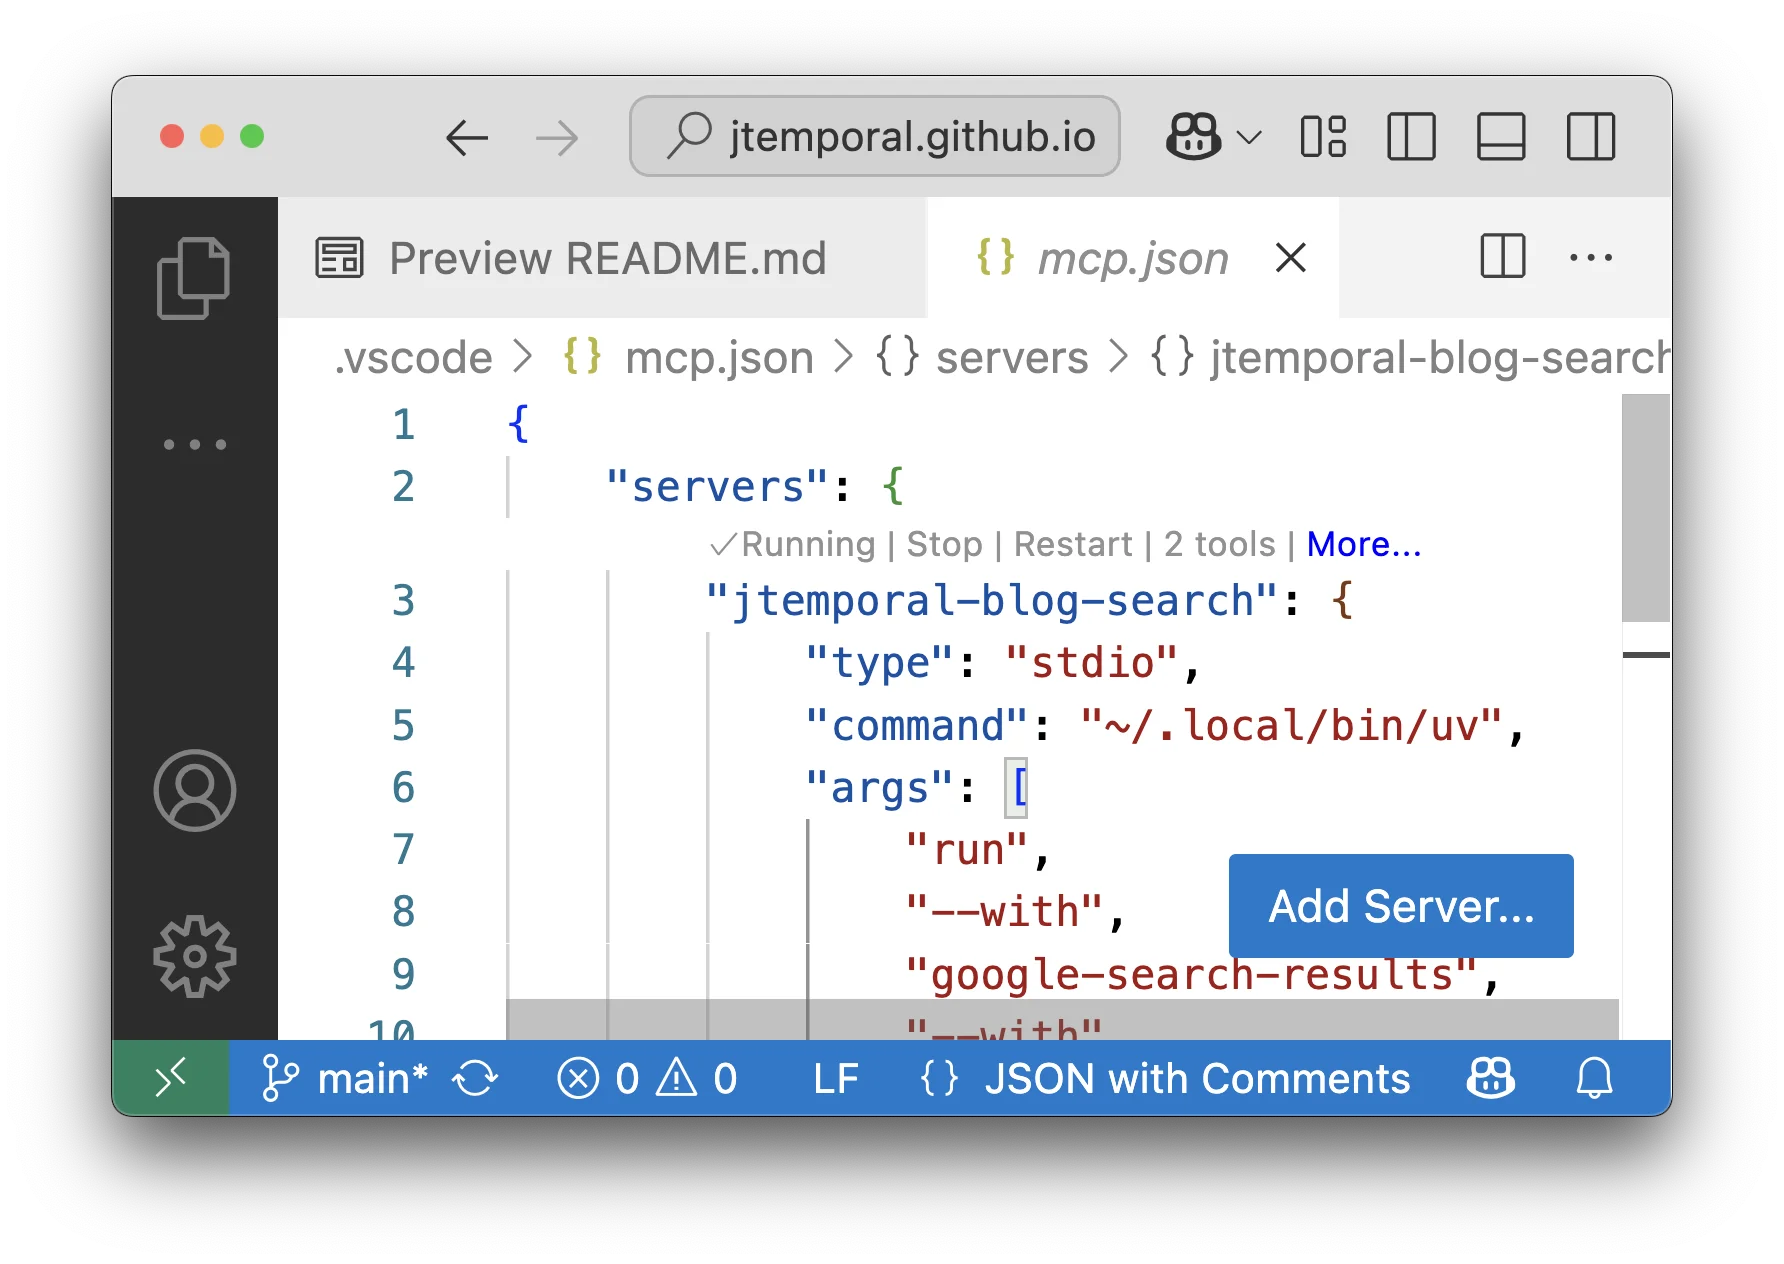
This will create a .vscode/ folder if it doesn’t already exist in your repository, and create a corresponding mcp.json file with the configuration. It should look something like this:
{
	"servers": {
		"jtemporal-blog-search": {
			"type": "stdio",
			"command": "~/.local/bin/uv",
			"args": [
				"run",
				"--with",
				"google-search-results",
				"--with",
				"mcp[cli]",
				"mcp",
				"run",
				"~/projects/blog-search-mcp-in-python/src/server.py"
			]
		}
	},
	"inputs": []
}
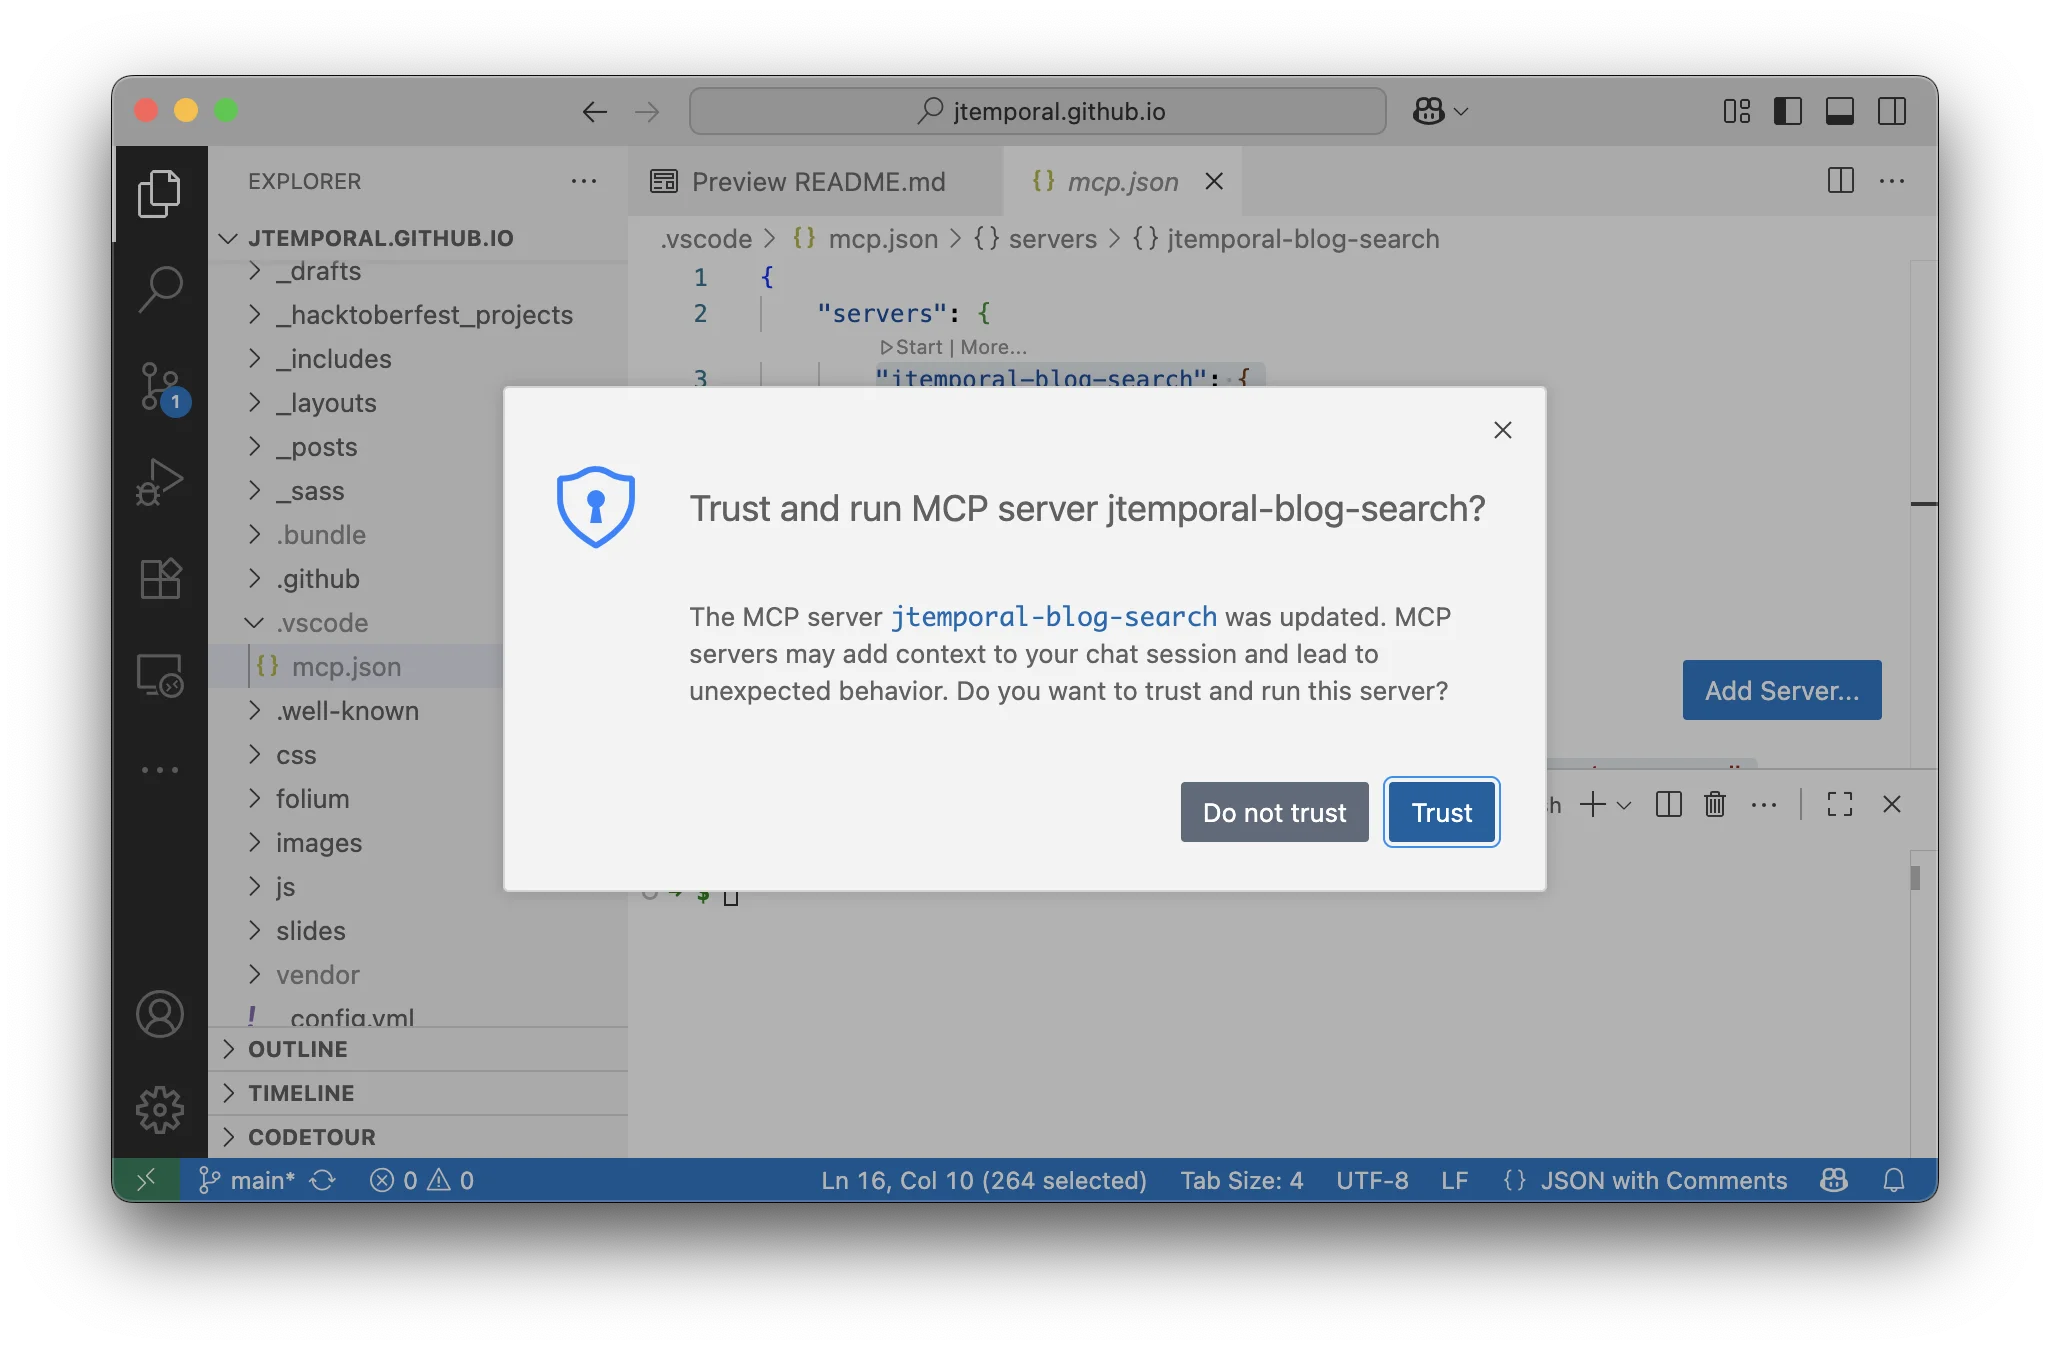
Taking MCP Action Directly from mcp.json
Once configured, not only will you see the configuration file, but VS Code will also show you an inline menu within the file. This provides quick access to common MCP server operations.
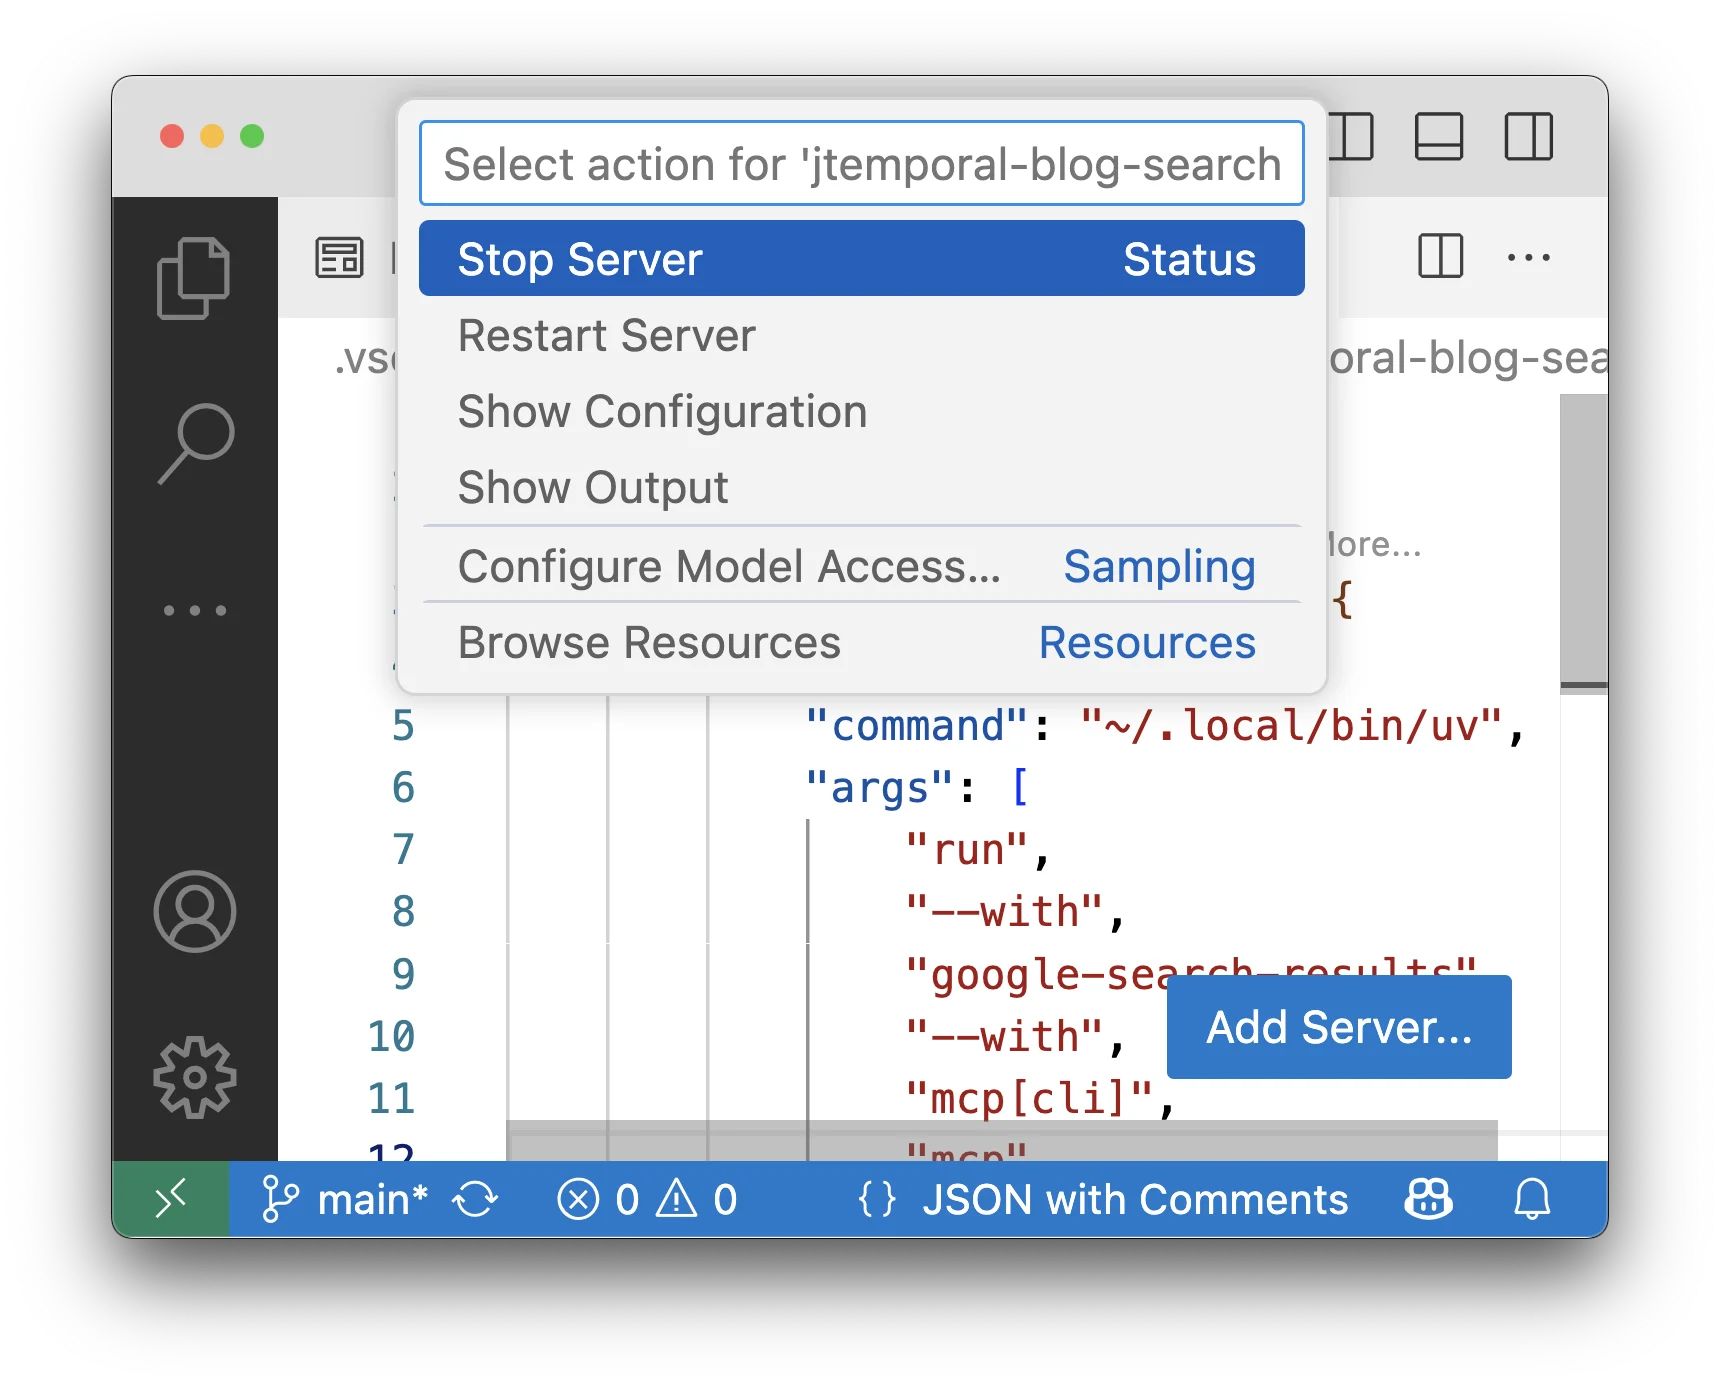
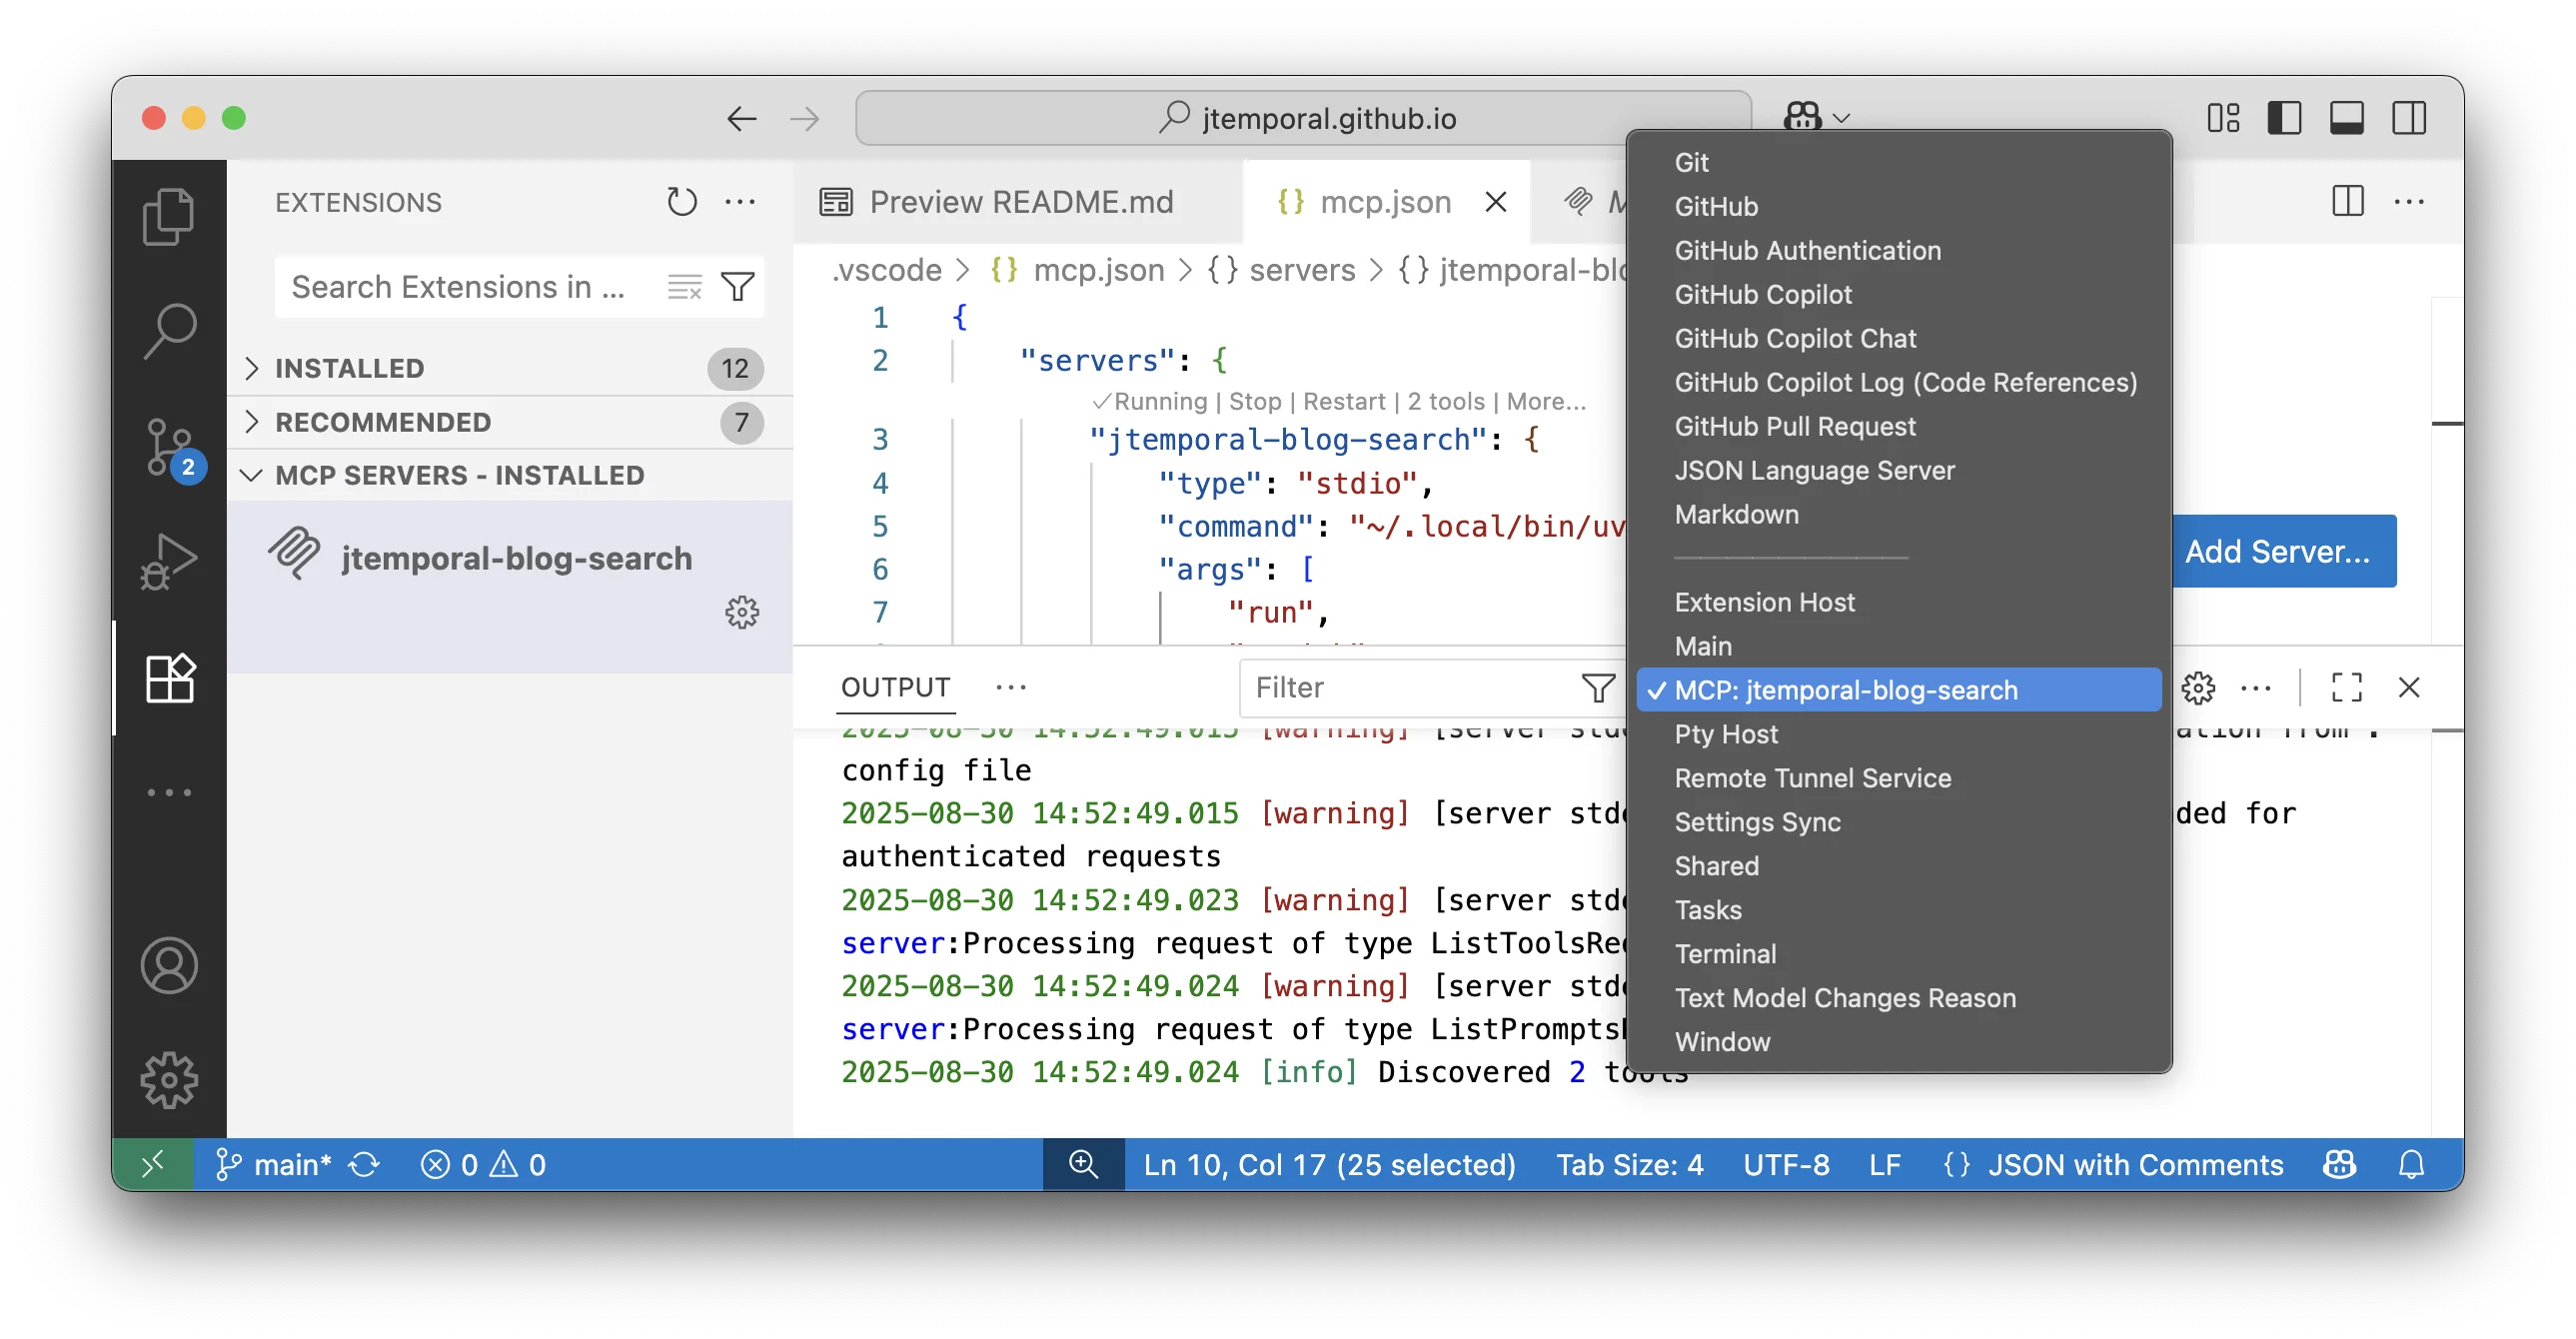
If you select the More... button on the inline menu, you’ll see additional options in a dialog menu that provides more advanced operations for managing your MCP server.
Debugging Tips
If you select “Show output” from the MCP server menu, you’ll be taken to the log output in the lower panel of the VS Code window. This is invaluable for debugging issues with your MCP server.
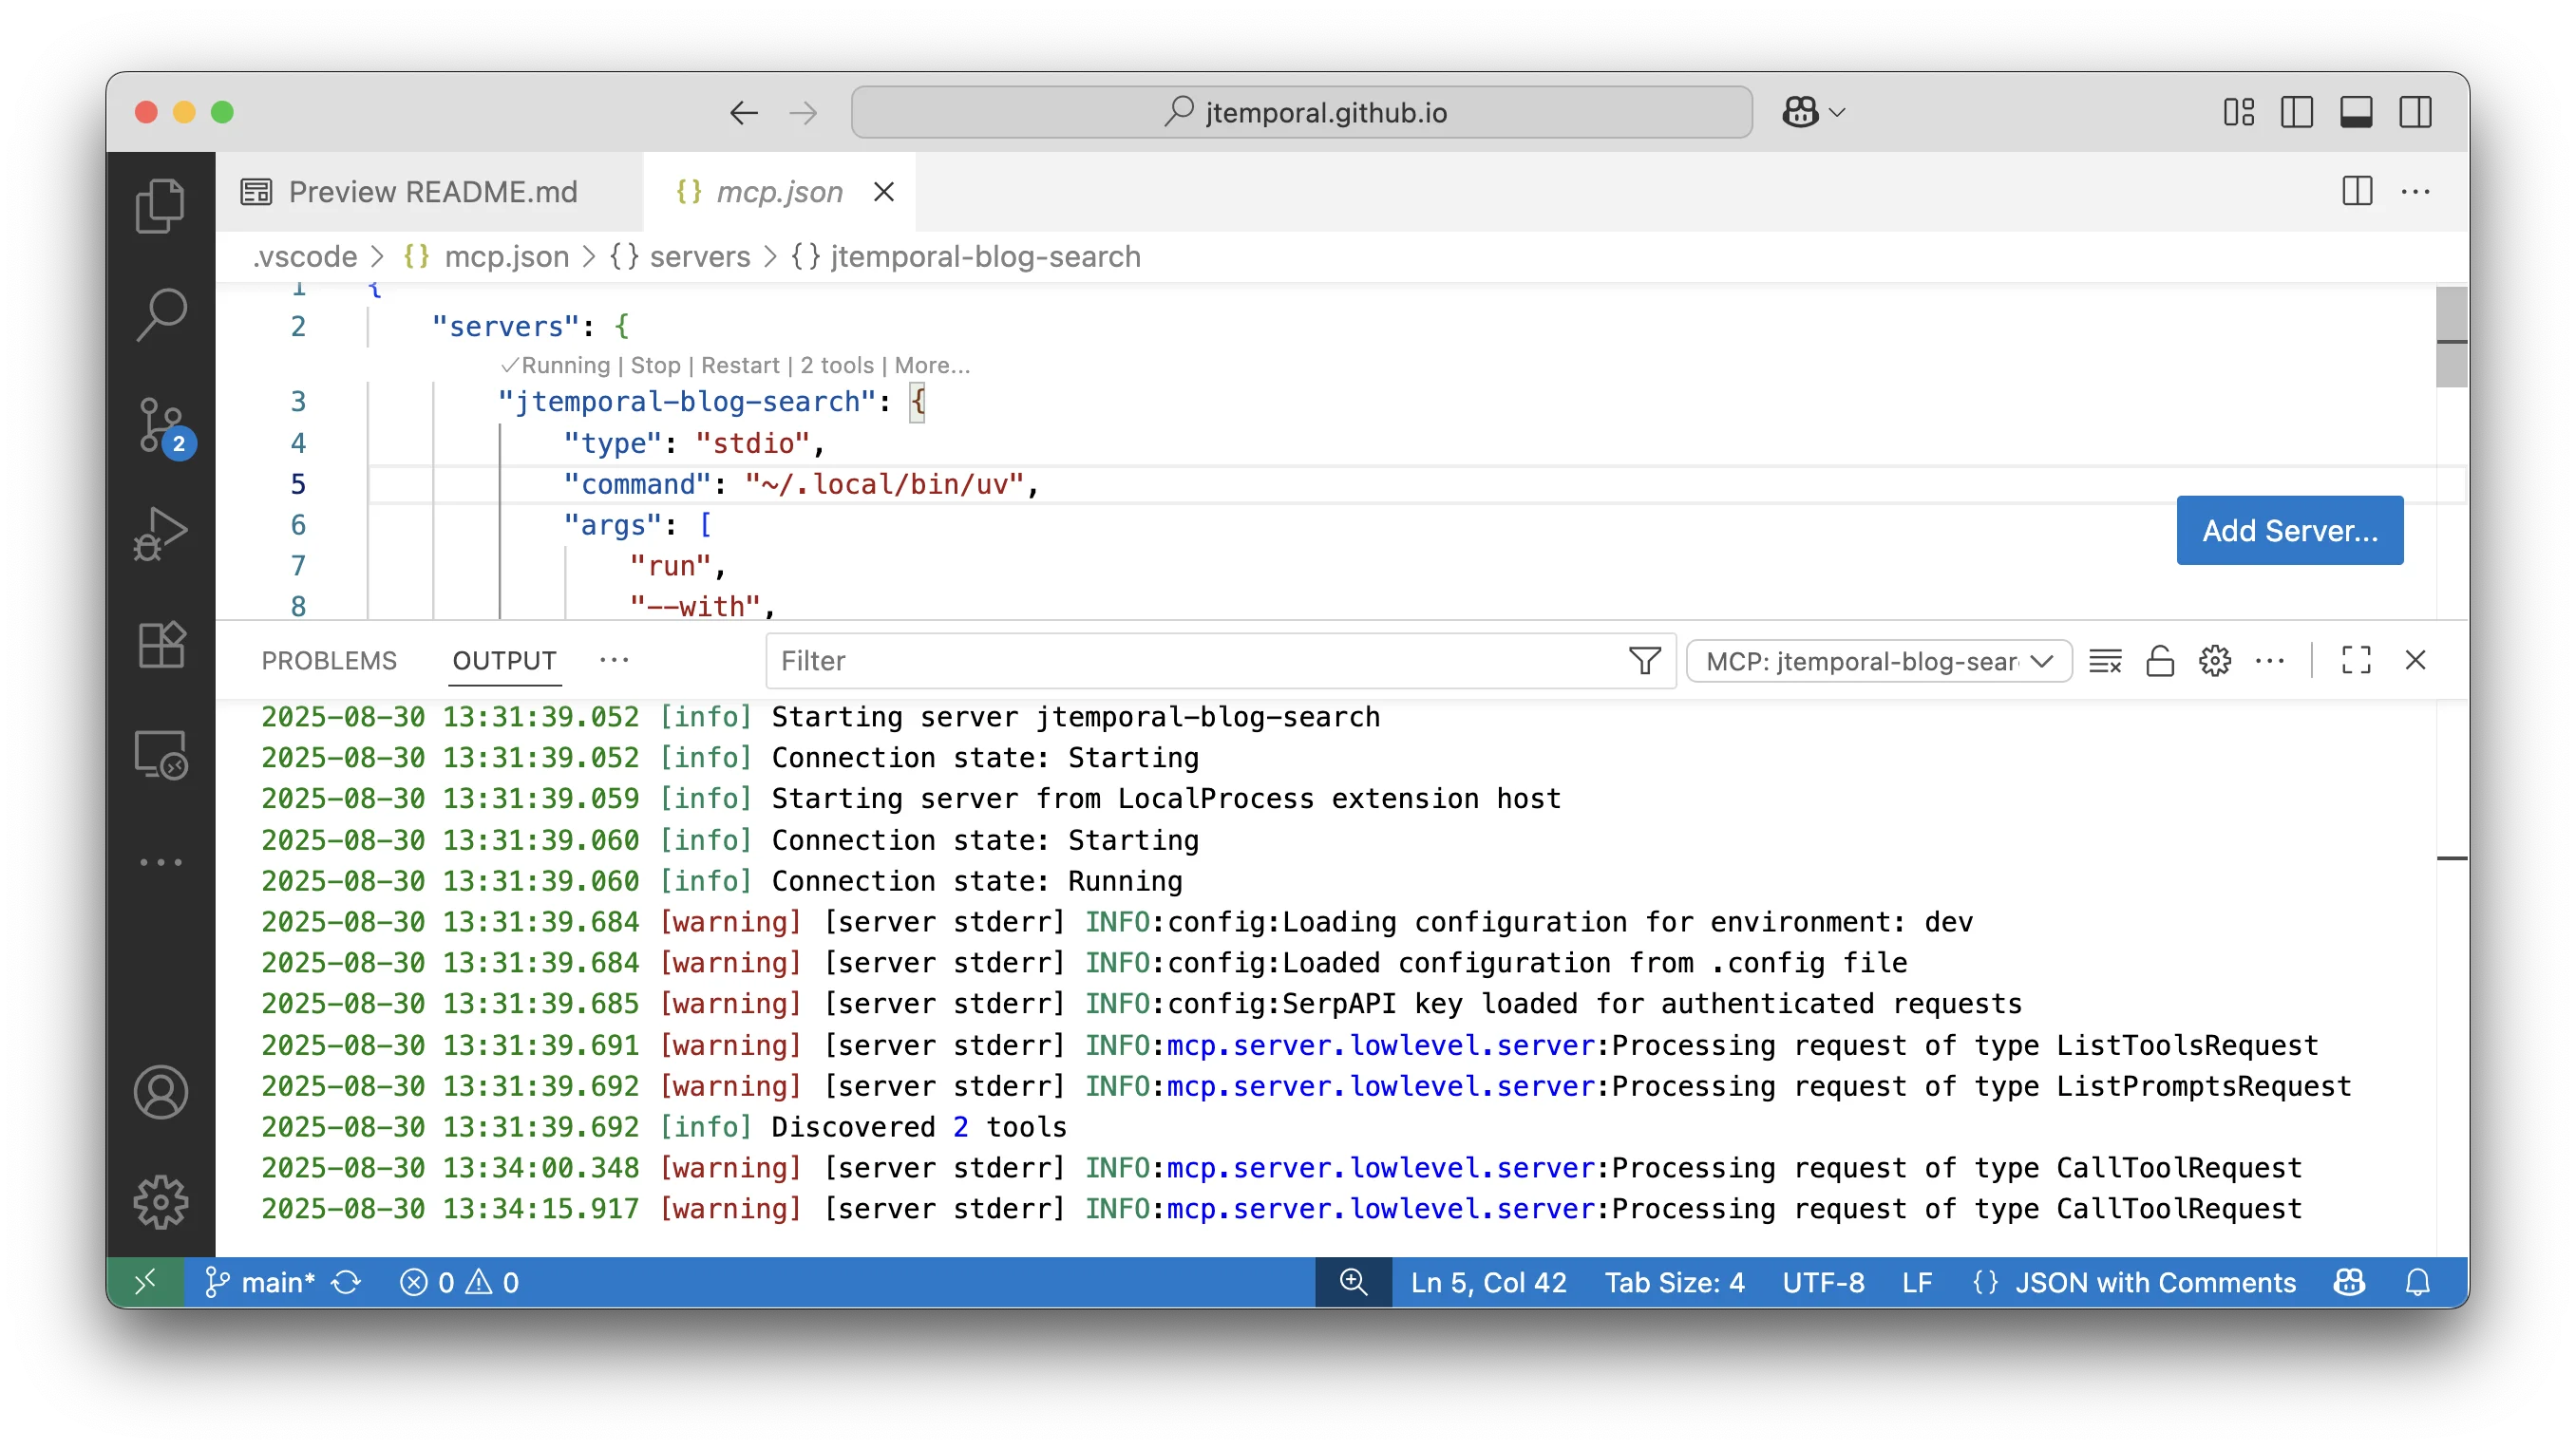
The logs will show you detailed information about server startup, tool calls, and any errors that occur. This is particularly useful when developing or troubleshooting your MCP server.
If you improperly configure your server (for example, if you forget part of the --with flags in the command), you’ll see an error message directly in the configuration file interface:
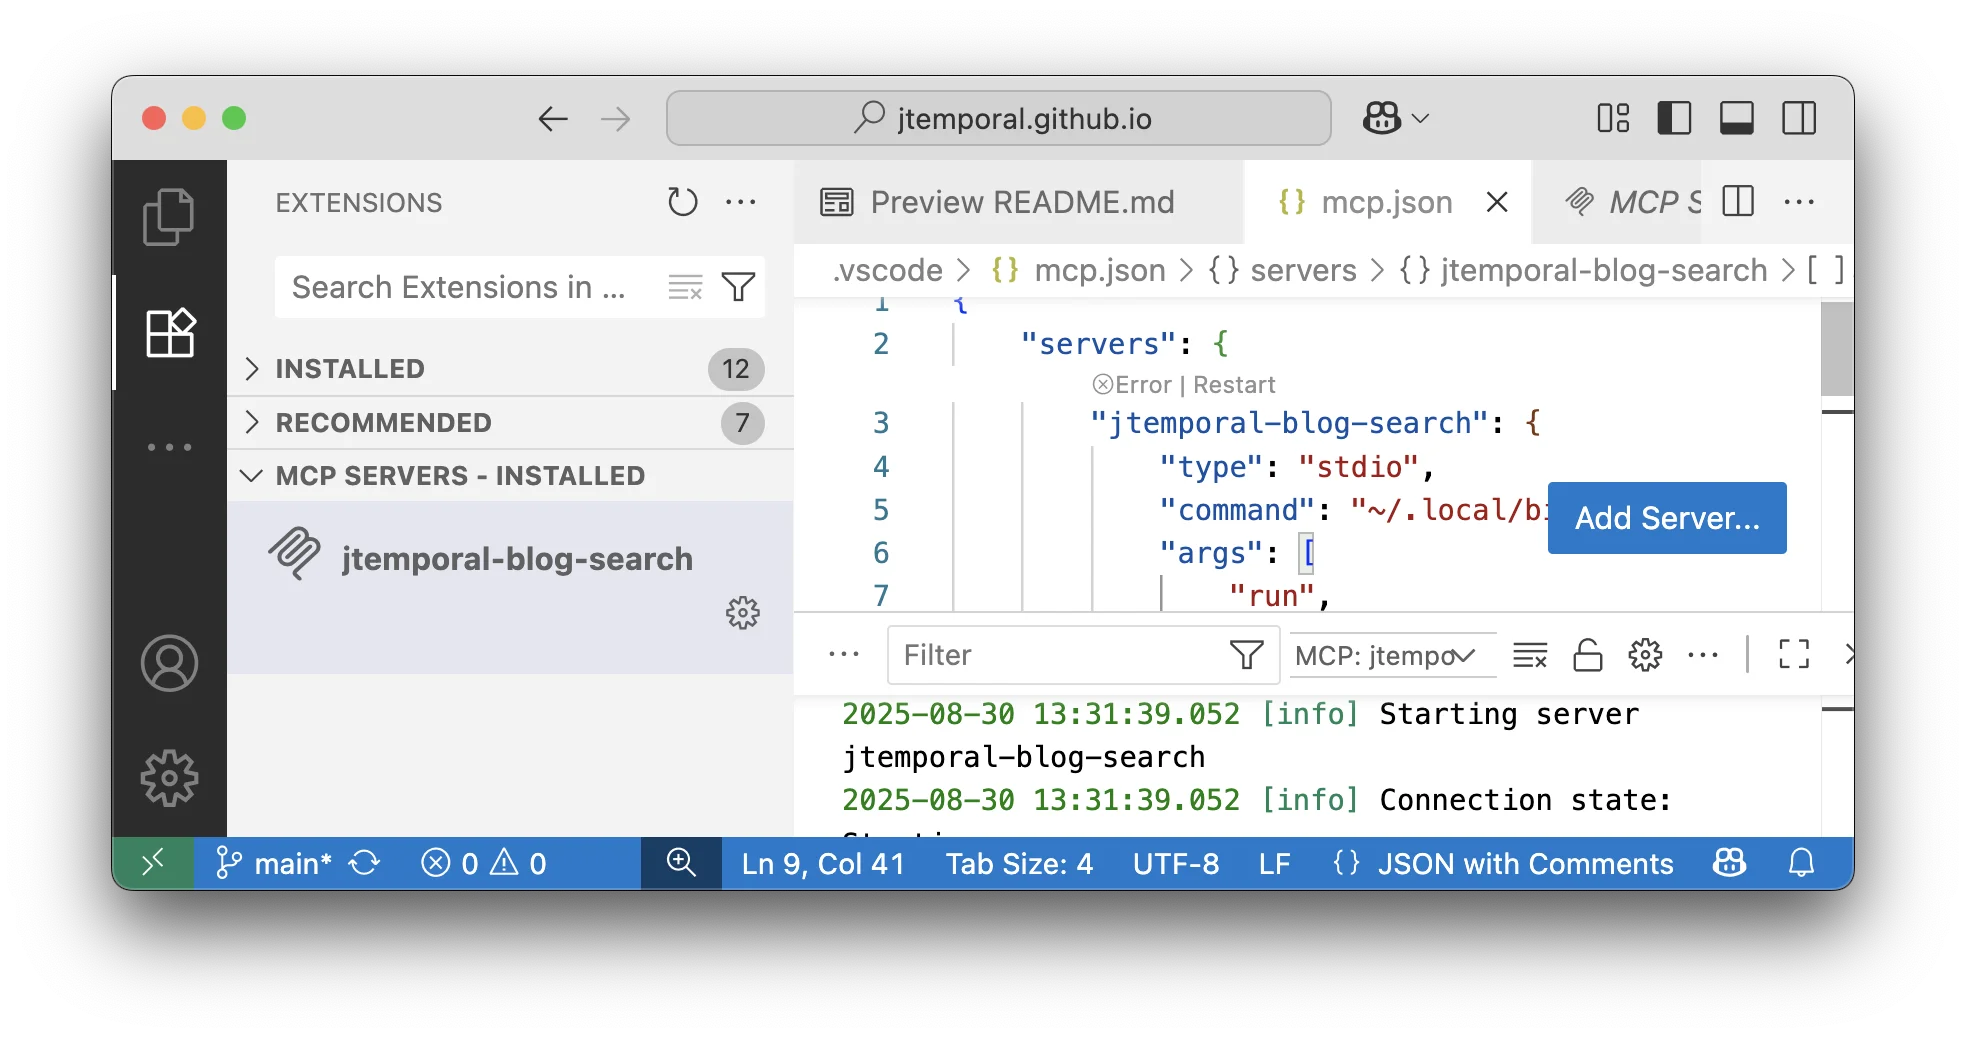
These inline error messages make it easy to spot and fix configuration issues without having to dig through log files.
With that said, if you don’t know what the error is, you can also access the log files by going to the lower panel in the Output tab and selecting the name of the server in the dropdown menu:
Finding Your MCP Server
Now go back to the Extensions tab and you should see your MCP server listed in the MCP servers section like this:
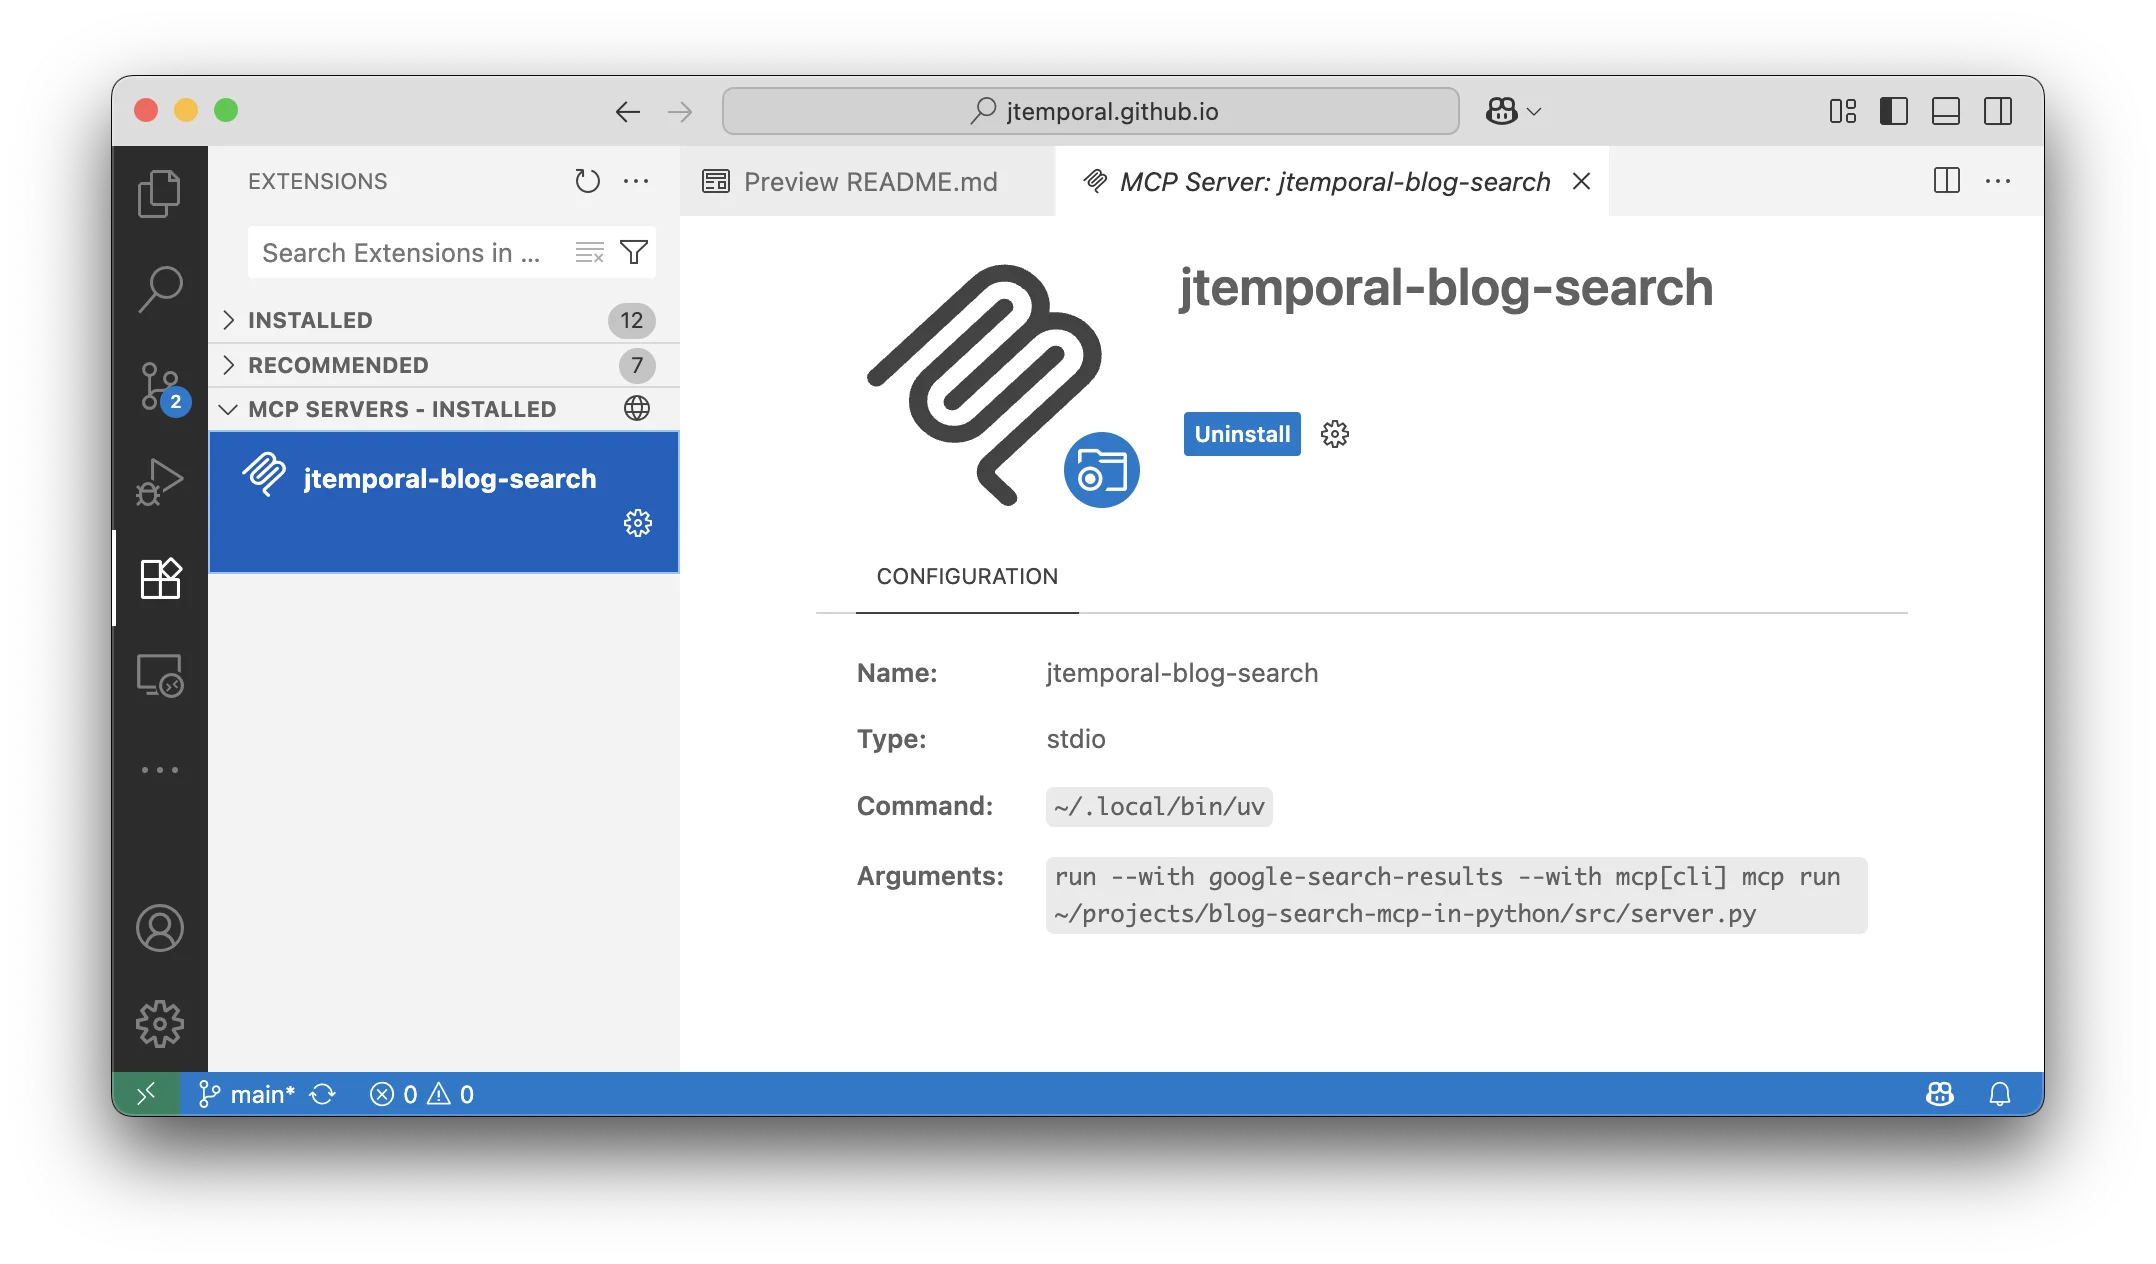
From here, you can investigate the details of the server, view its available tools, and even adjust its configuration if necessary. This provides a centralized location to manage all your MCP servers within VS Code.
Using Your MCP Server
All of this setup work is great, but the real goal is to be able to search your blog content in a chat scenario right within VS Code. Let’s put our MCP server to work by doing a search through GitHub Copilot Chat:
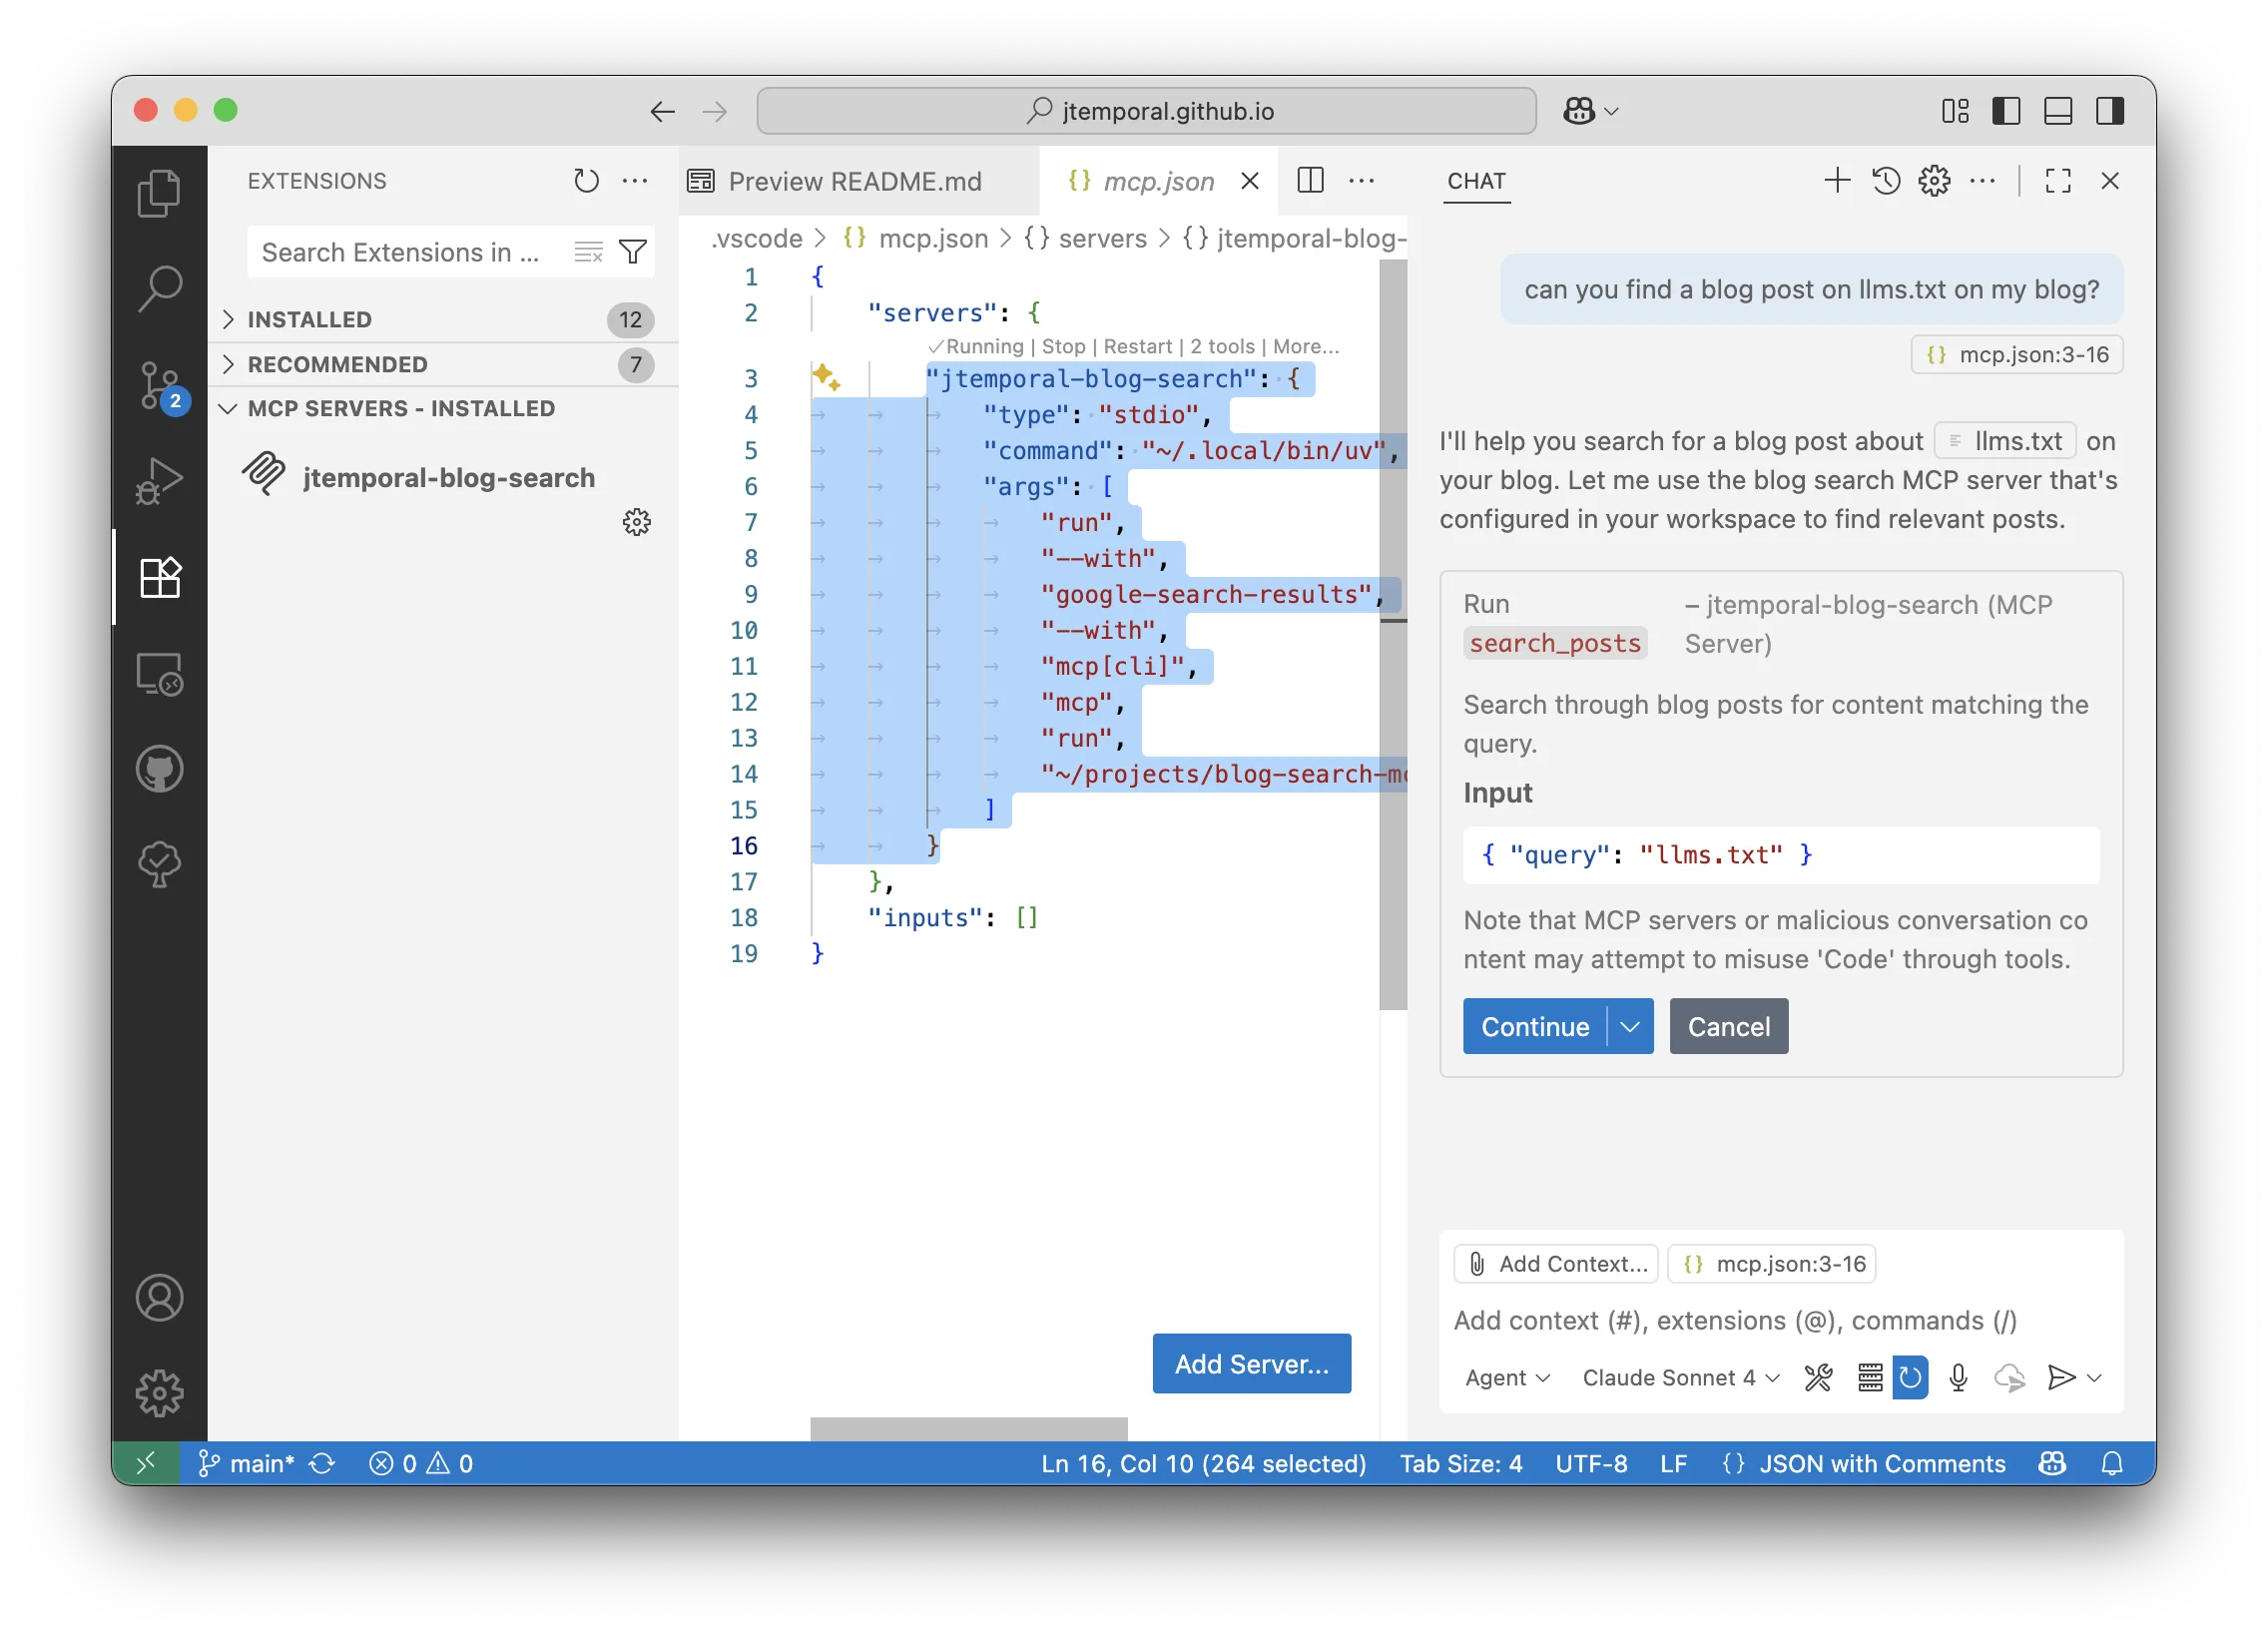
The interface shows the tool it’s intending to call (search_posts) as well as the input parameters—in this case, the topic we want to find blog posts about. This transparency helps you understand exactly what the AI is doing on your behalf.
Now here’s a neat trick: normally you’d have to ask for the content after you get the results from the first tool call, but if you’re using GitHub Copilot in agent mode, the agent is actually smart enough to offer the execution of additional tools to obtain the full content:
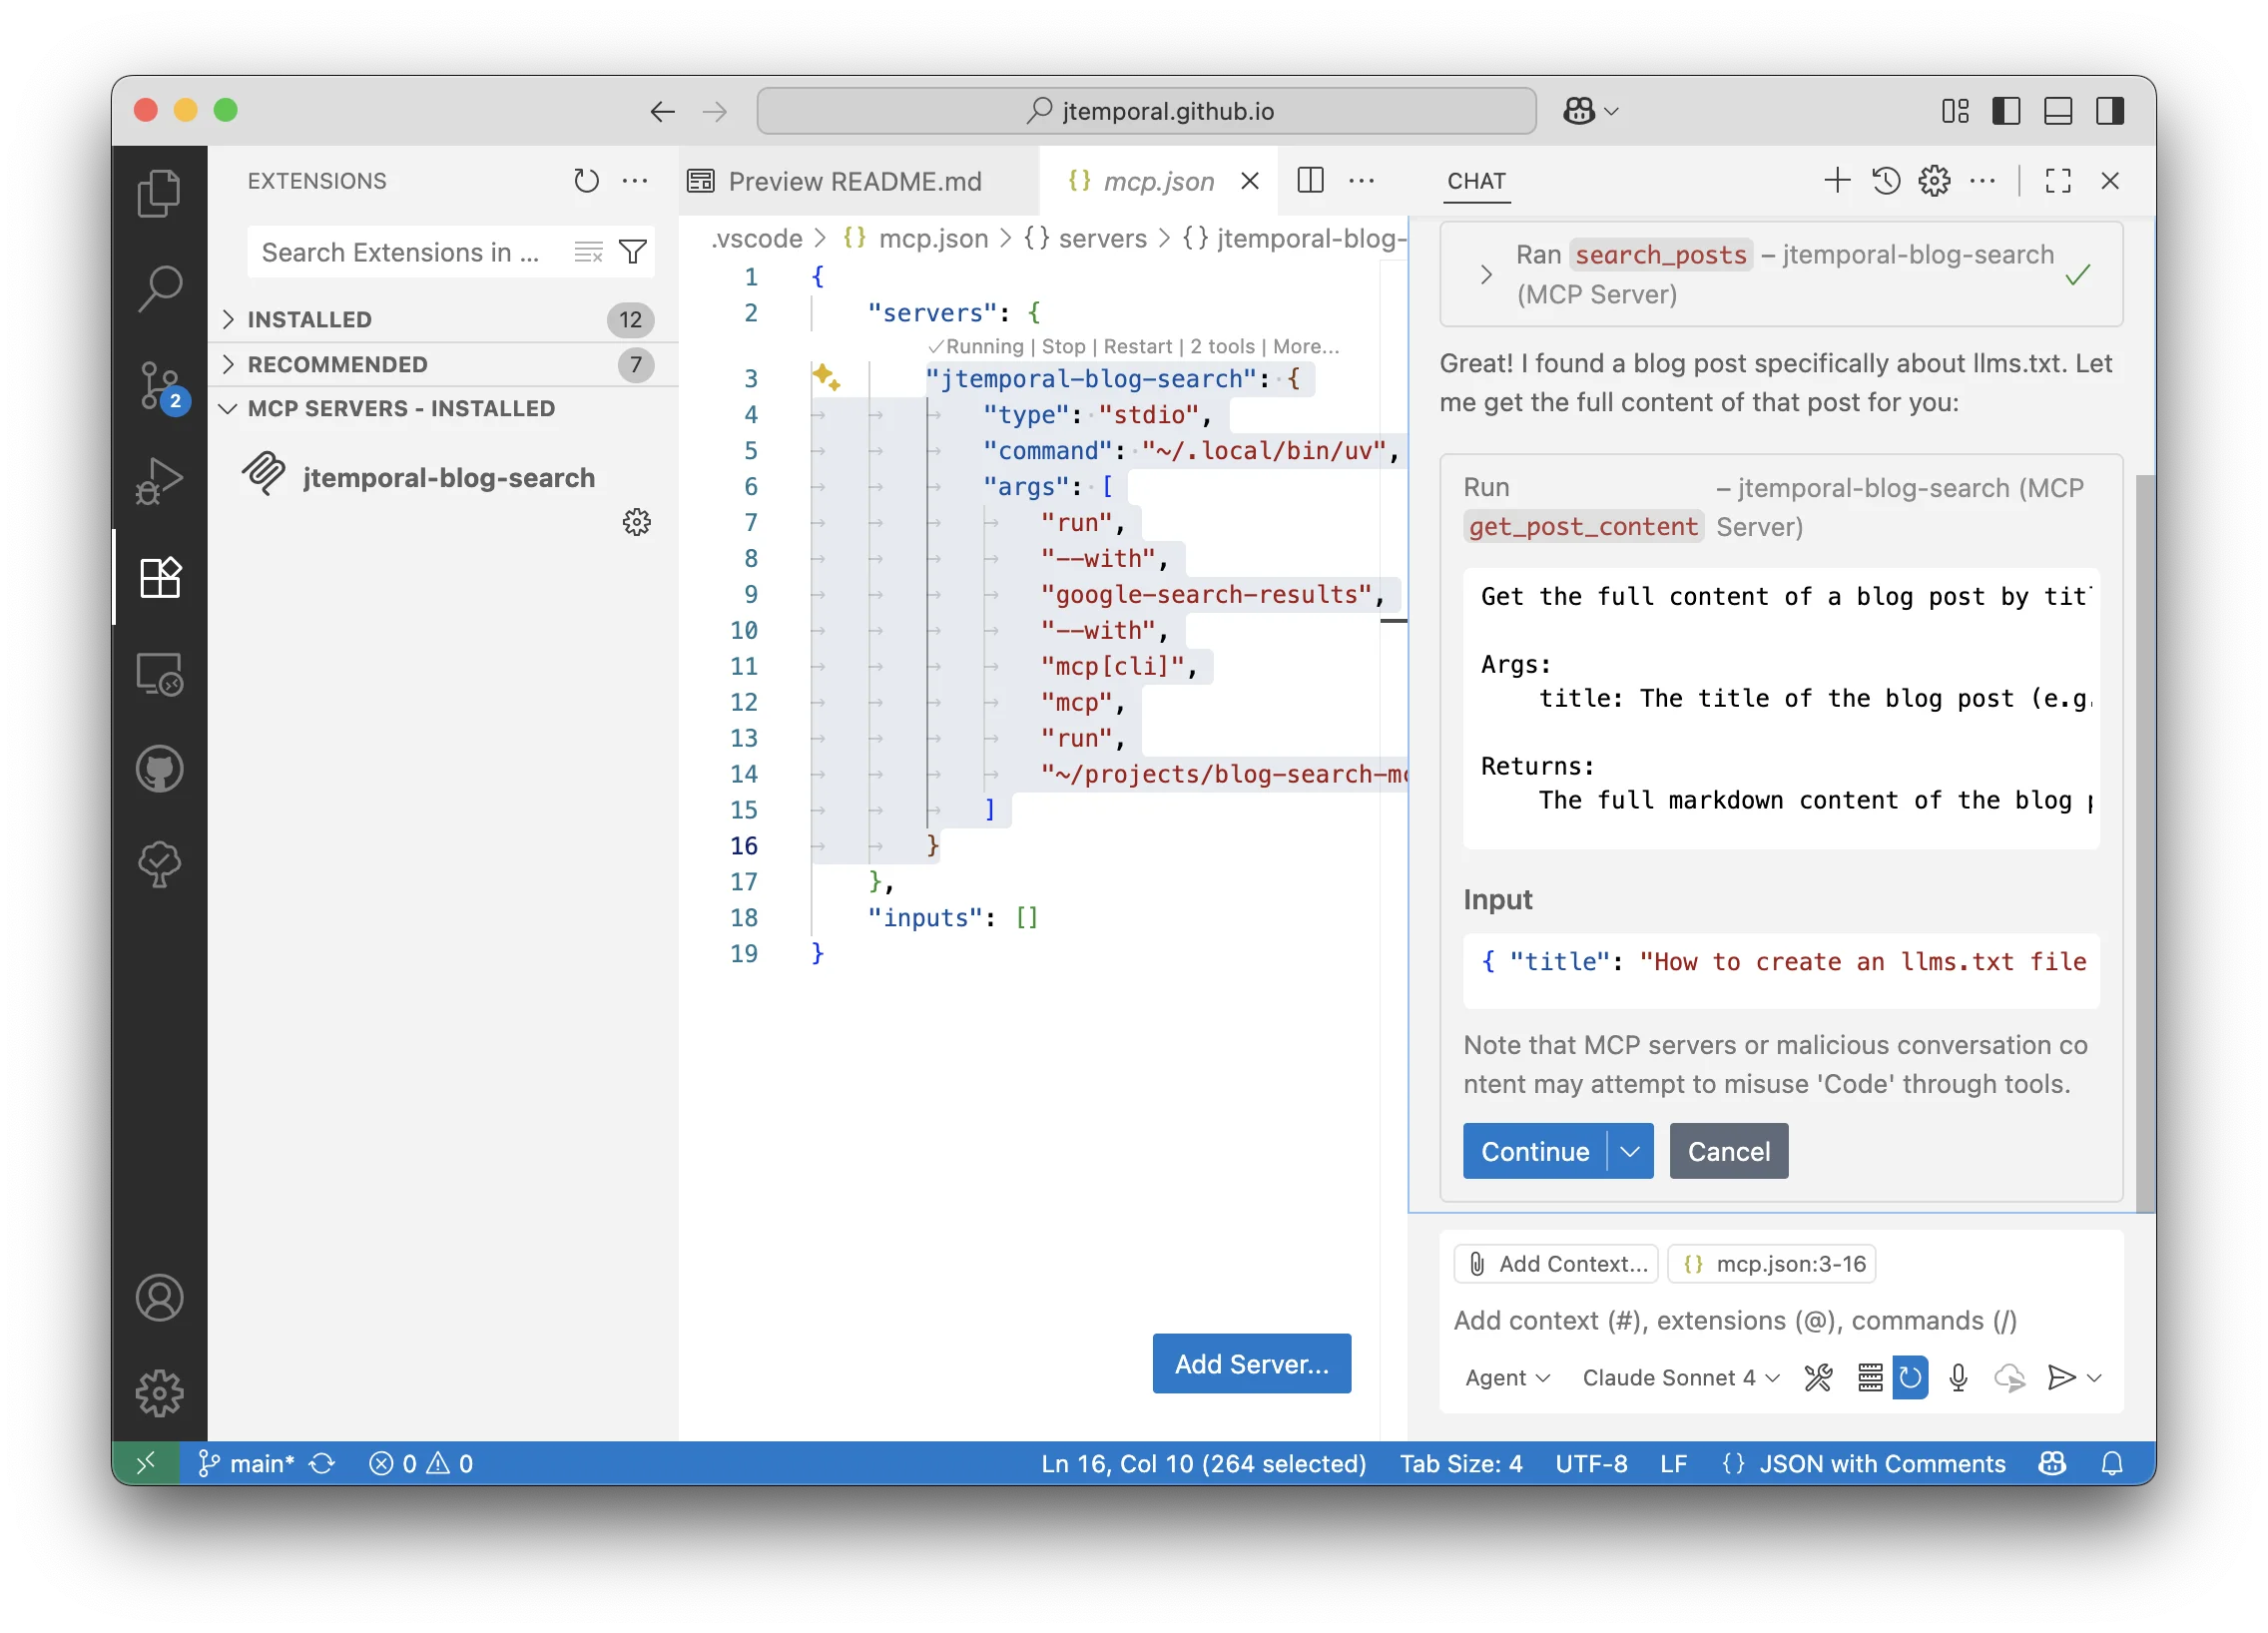
This time it shows the get_post_content function being called, complete with the docstring description and the input parameters for retrieving the specific content.
Finally, the results are displayed in the chat just like any other tool interaction would be:
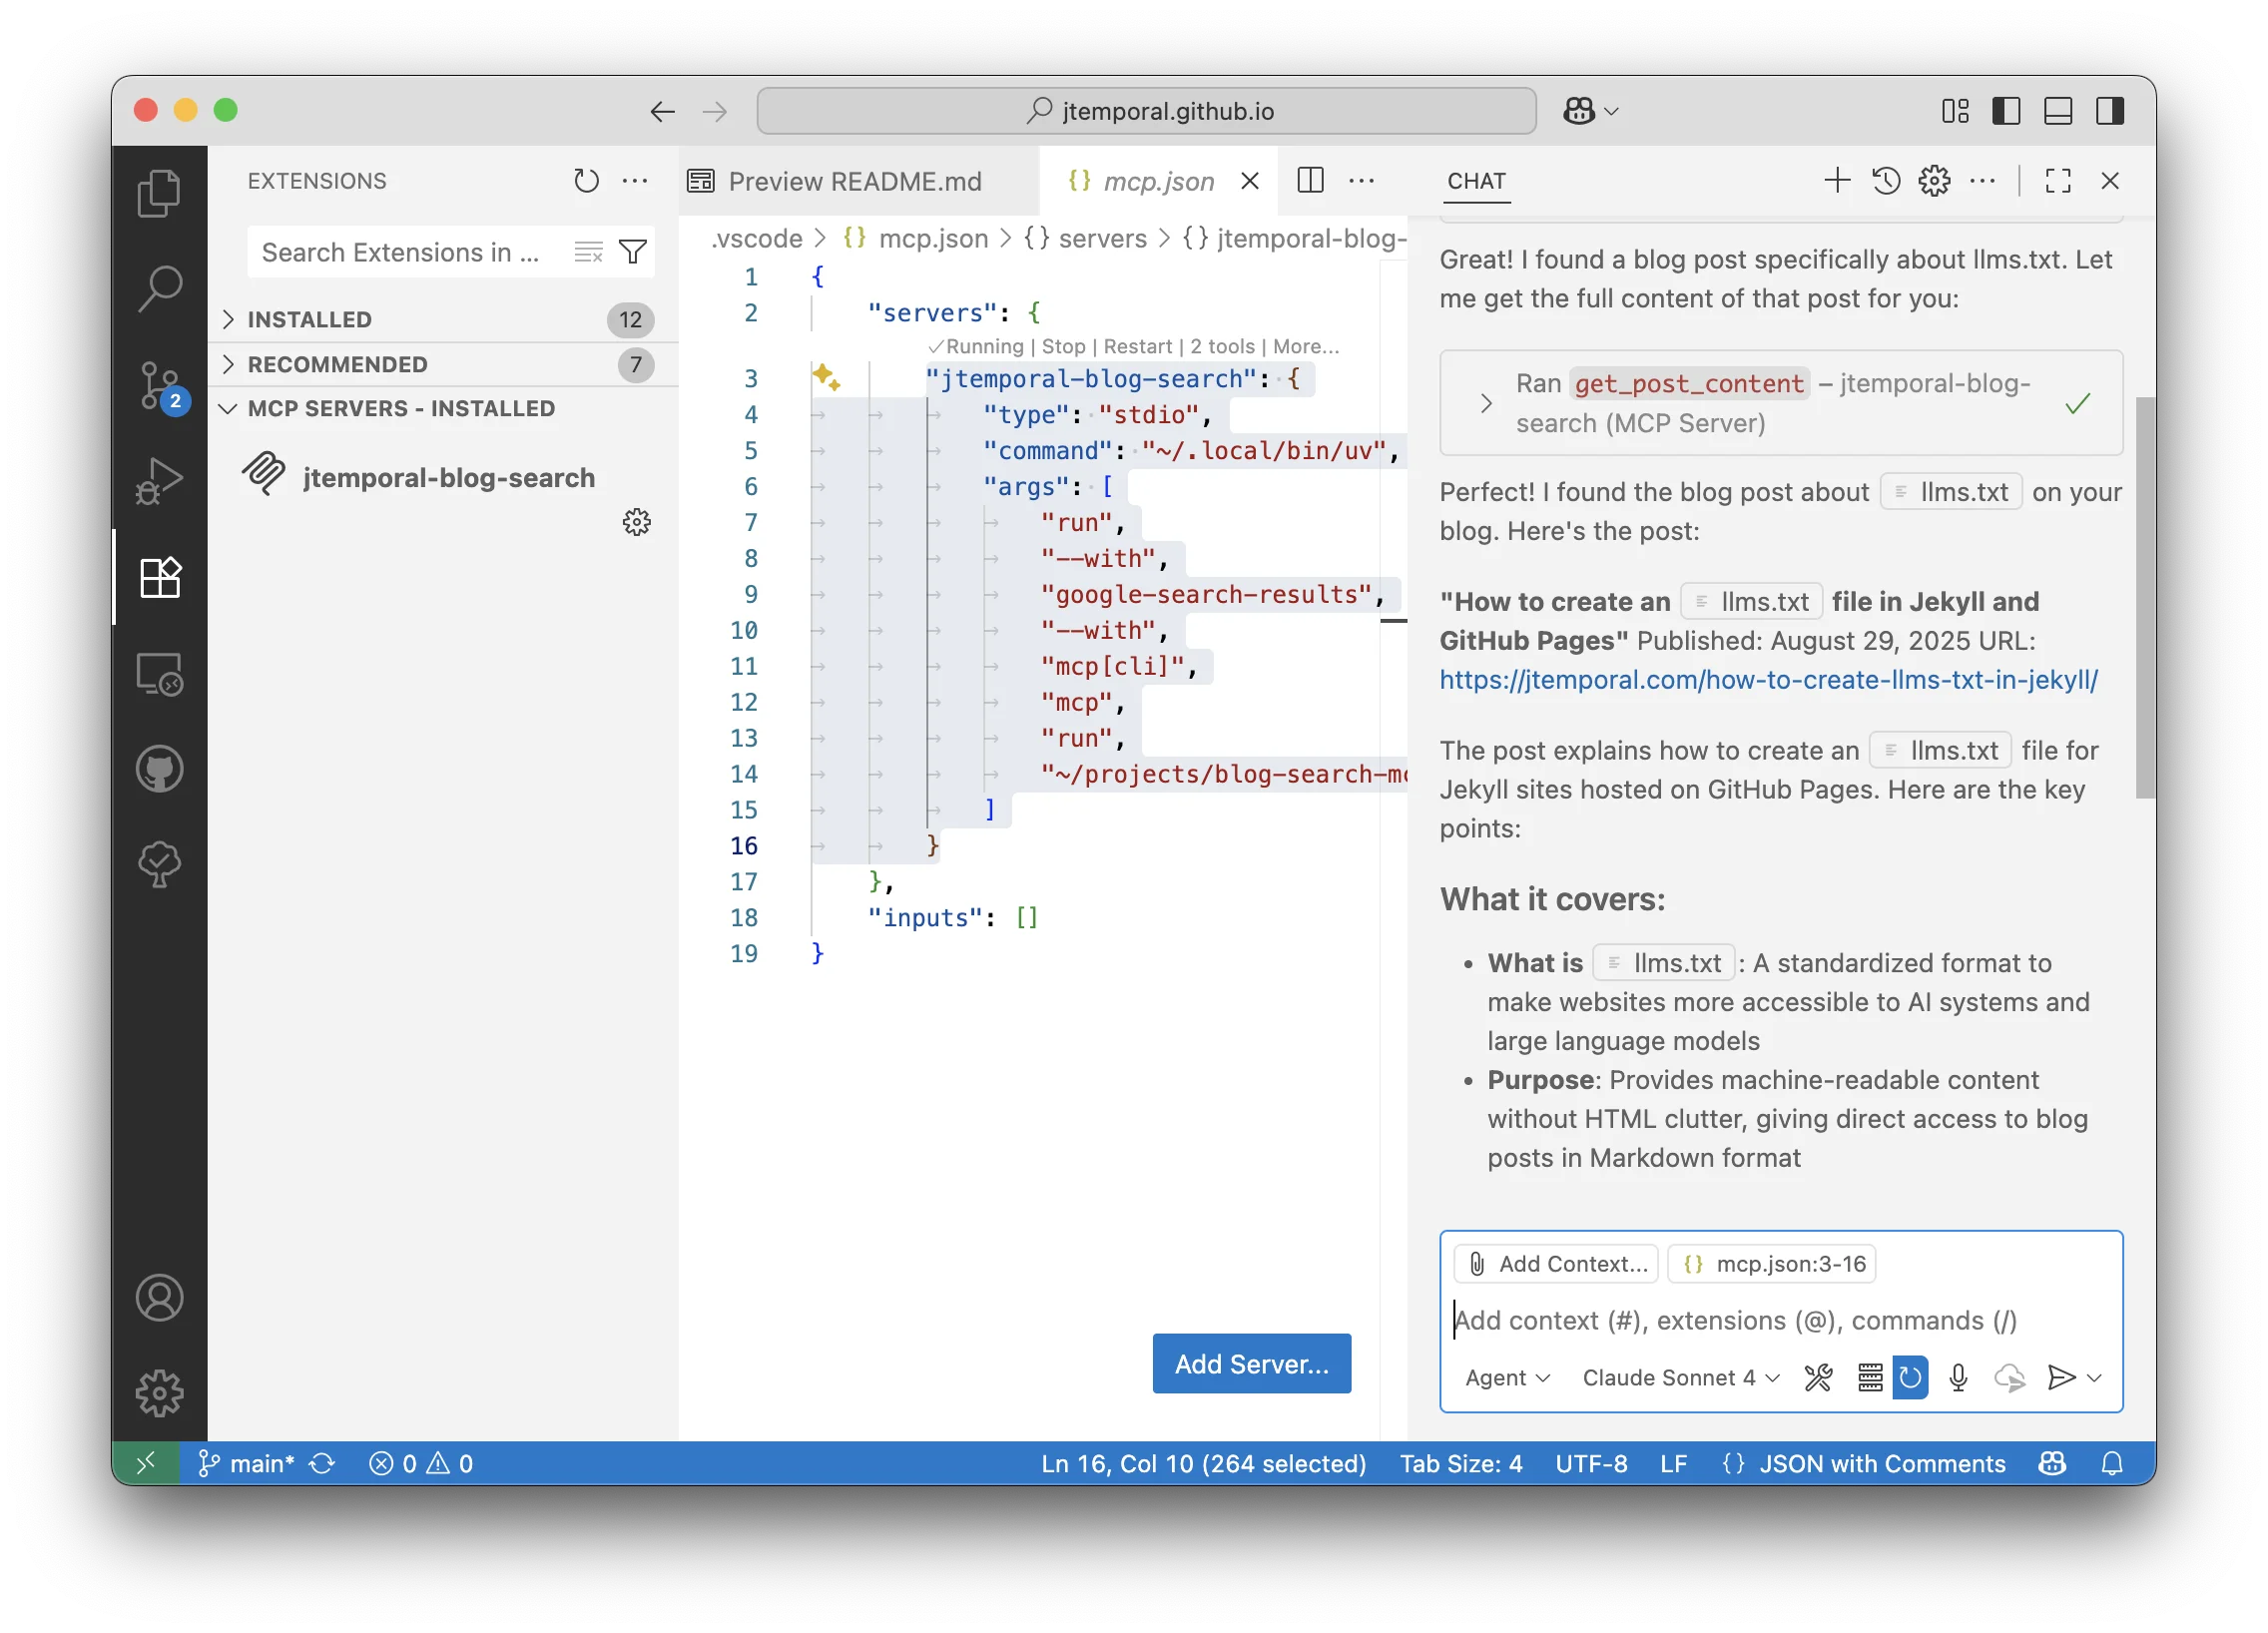
This seamless integration means you can search your blog, retrieve content, and incorporate it into your current work without ever leaving VS Code.
Security Considerations
When running local MCP servers, keep these security best practices in mind:
- Workspace-level configuration: Always choose workspace-level over global configuration to limit exposure
- Review dependencies: Ensure you trust all packages and dependencies your MCP server uses
- Network access: Be aware that MCP servers can make network requests (like our SerpAPI calls)
- File access: MCP servers have access to files within their configured scope
Learnings
Having your MCP server integrated directly in your development environment creates a streamlined workflow where you can search, reference, and incorporate your existing content without context switching. This is particularly valuable for content creators, technical writers, and developers who need to maintain consistency across their work.
No matter what IDE you’re using, remember these steps:
- Local Setup: clone your MCP server repository and ensure all dependencies are properly installed using
uv sync - Configuration: use the VS Code MCP extension to configure your server with the proper command, including all necessary flags and dependencies
- Scope Management: choose workspace-level configuration over global to follow security best practices
- Debugging: leverage the built-in logging and error reporting features to troubleshoot issues
The combination of custom MCP server with GitHub Copilot in agent mode will help you maintain your flow state which as developers is all we really want.
Now I just need to figure out the best approach to have this server without having to clone a repo and set it up manually, but that will happen on a later blog post.