How to create an llms.txt file in Jekyll and GitHub Pages
Have you ever wanted to make your blog content more accessible to AI systems and large language models? Or maybe you’ve wondered how to provide a clean, machine-readable version of your posts without the HTML clutter?
The llms.txt is the solution. It provides a standardized way for websites to expose their content to AI systems. And if you’re using Jekyll with GitHub Pages, you can create this file automatically with just a few lines of Liquid templating.
If you’re new to Jekyll, it’s a static site generator written in Ruby that’s perfect for blogs specially when used in GitHub Pages. You can learn more about Jekyll and how to get started in this other post: Publishing a website with Jekyll.
What is llms.txt
The llms.txt file is a simple text format designed to make websites more accessible to AI systems and large language models (LLMs). Based on the specification at llmstxt.org, it provides a standardized way to expose your site’s content in a machine-readable format.
The basic structure includes:
- A brief description of your site
- Key information about your projects, services, or content
- Links to important pages or content
- Any other information you’d like AI systems to know about your site
For a Jekyll blog, this is perfect for providing LLMs with direct access to your blog posts in their original Markdown format, making it easier for AI to understand and reference your content accurately.
Create an llms.txt
Creating an llms.txt file for your Jekyll site is straightforward. You’ll create a new file in the root of your Jekyll project that uses Liquid templating to automatically generate the content.
Here’s how to set it up step-by-step:
- Create the file: In your Jekyll root directory, create a new file called
llms.txt - Add the template: Use the following template as your starting point:
---
layout: null
---

# LLM Feed for jtemporal.com
_Generated: {{ site.time | date_to_rfc822 }}_


## All posts
The links below take you to the raw Markdown content.

{% for post in site.posts %}- [{{ post.title }}](https://raw.githubusercontent.com/jtemporal/jtemporal.github.io/refs/heads/main/{{ post.path }})
{% endfor %}
Some things to pay attention:
layout: nullensures the file is output as plain text, not HTML{{ site.time | date_to_rfc822 }}adds a timestamp showing when the file was last generated- The loop
{% for post in site.posts %}automatically creates a list of all your blog posts {{ post.path }}gives the relative path to each post’s Markdown file- The GitHub raw URL format allows direct access to the source Markdown
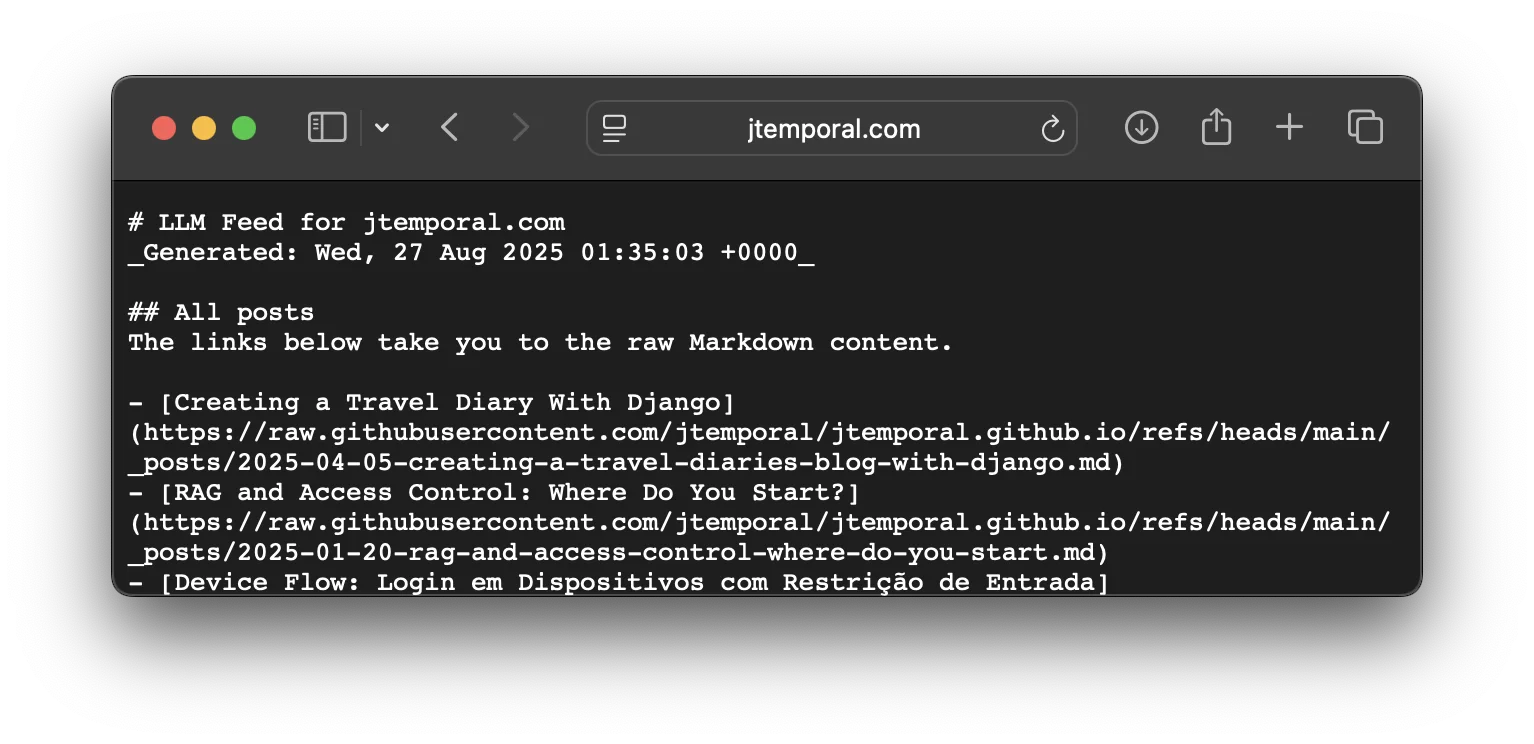
Here’s what the generated file looks like on my site:

Add to _config.yml
Look for the includes list on your _config.yml file, that list has all files that should be served with your website once it is built. Mine looked like this before:
# Include list
include: [.well-known, EnJtResume.pdf, folium]
And now it also has the llms.txt at the end of the array:
# Include list
include: [.well-known, EnJtResume.pdf, folium, llms.txt]
Test your changes
Before deploying your changes, it’s a good idea to test them locally. Here’s how:
- Build your site locally:
bundle exec jekyll build - Serve your site:
bundle exec jekyll serve - Check your llms.txt file: Once your site is running (usually at
http://localhost:4000), navigate tohttp://localhost:4000/llms.txtto see your generated file.
You should see a plain text file with your site information and a list of all your blog posts with links to their raw Markdown content on GitHub. If everything looks good, you’re ready to deploy!
Recap
Creating an llms.txt file for your Jekyll site is a painless three-step process:
- Create the file: Add
llms.txtto your Jekyll root directory with the Liquid template - Configure Jekyll: Add
llms.txtto theincludelist in your_config.yml - Build and deploy: Your file will be available at
yoursite.com/llms.txt
This approach automatically keeps your llms.txt file up-to-date as you add new blog posts, and provides AI systems with direct access to your content in its original Markdown format. It’s a great way to make your Jekyll blog more accessible to the growing ecosystem of AI tools and services.
The best part? Once set up, it requires zero maintenance: Jekyll handles everything automatically when you build your site!


