Solving conflicts in Git
Resolving conflicts can be an arduous and complicated task when it comes to git projects. In this article you will learn a foolproof step-by-step guide to resolving conflicts.
If you already know what conflicts are and just want to see the list of steps and commands to resolve a conflict, I suggest you skip to the conclusion by clicking here.
What is a conflict in git
When a project has multiple people working at the same time, it’s possible that two people need to make changes to the same piece of a file. When more than one person changes the same piece of a file on different branches, that’s when conflicts appear.
The conflict symbolizes that two or more changes happened to the same chunk of a file and git doesn’t know which of the changes to keep.
How a conflict is formed
In the image below we have a diagram that I have affectionately nicknamed the “conflict anatomy”. It shows the steps until a conflict is formed. It is worth mentioning that usually, during the project development cycle, changes are more significant and sometimes in greater quantity.
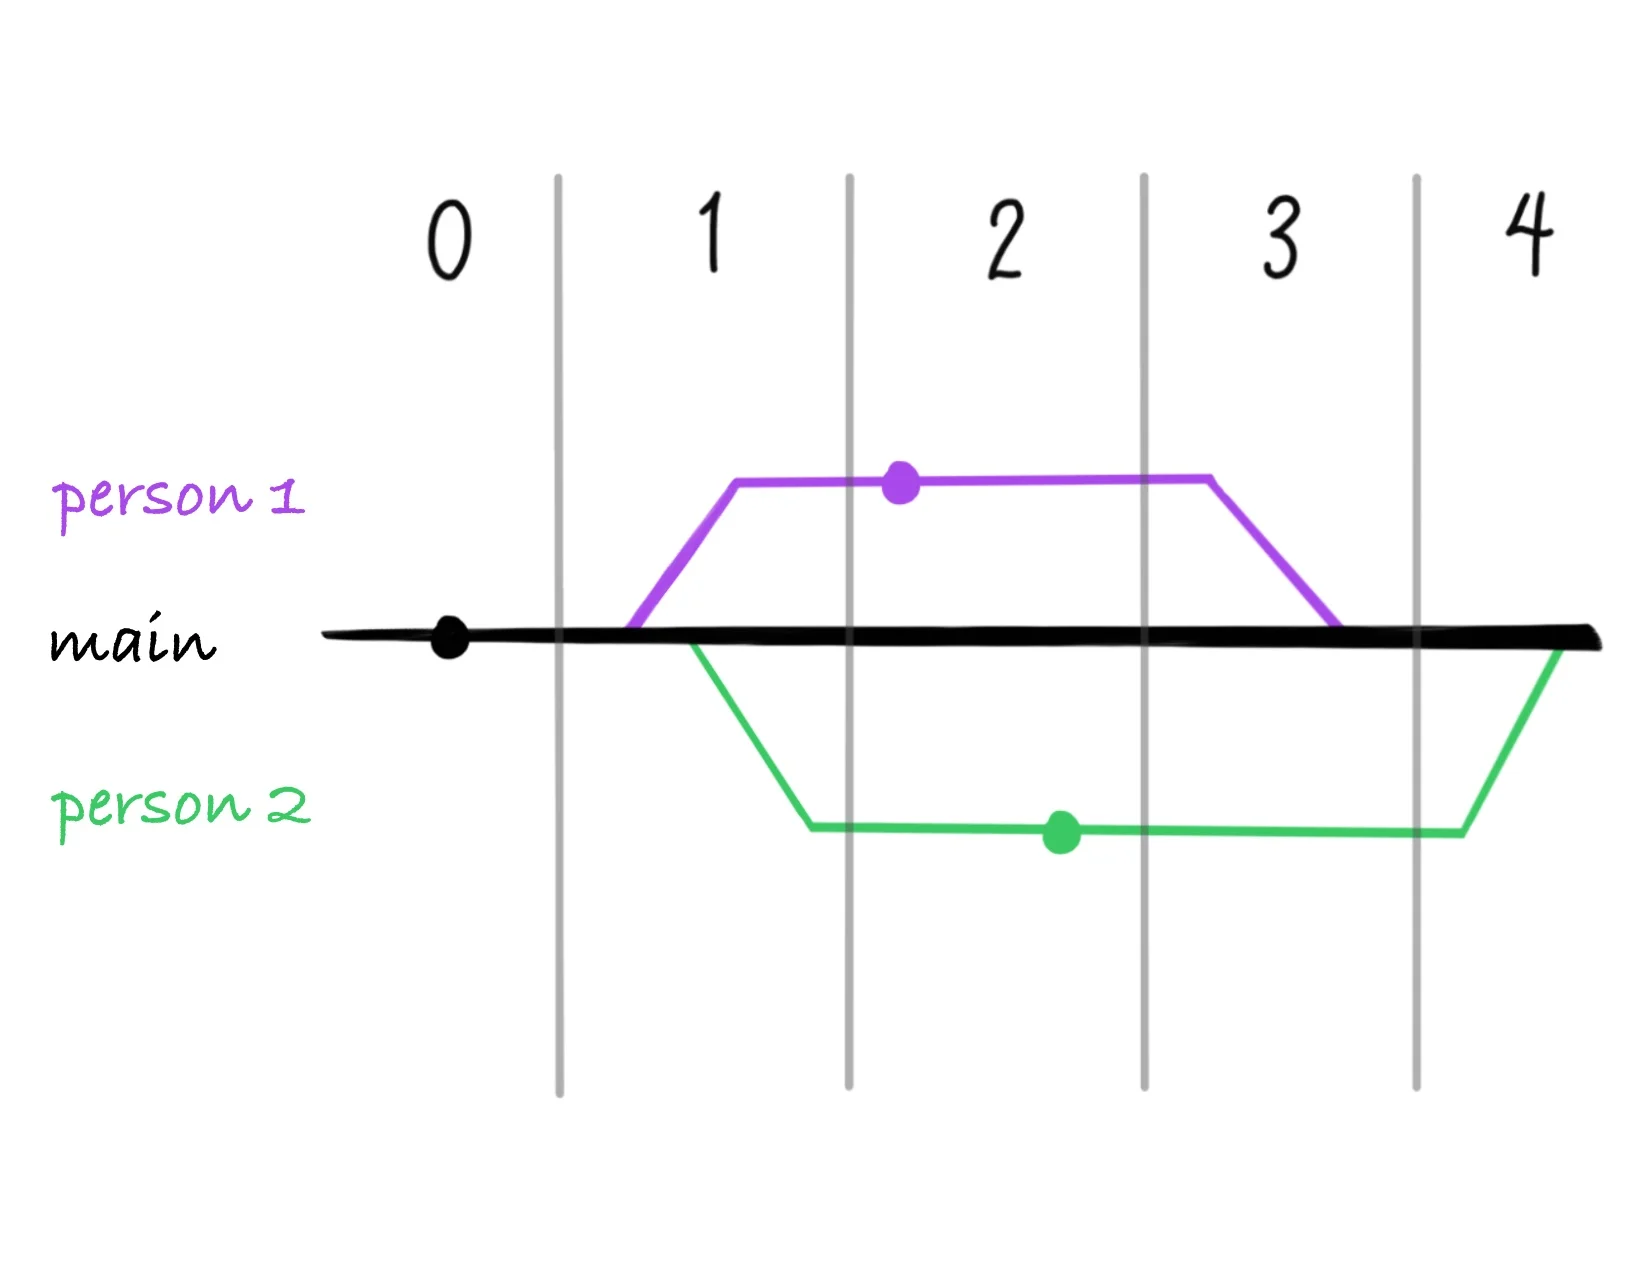
0 - In our project we have a README.md that was added by the initial commit in the repository. After creating this file, two changes need to be made to add some more information to the same file and two people will make this change;
1 - Each person then created a branch from main to work on their changes, these new branches were created more or less at the same time, that is, they have the same starting point;
2 - For some time each person works on their branch implementing their change, in this case, each person is adding the line “Person x was here.” in the README.md file where x is the person’s id;
3 - Person 1 makes a pull request and has this pull request approved and also merged into main;
4 - Person 2, on the other hand, makes the pull request to main, but this pull request cannot be merged because it has conflicts.
Creating a conflict on purpose
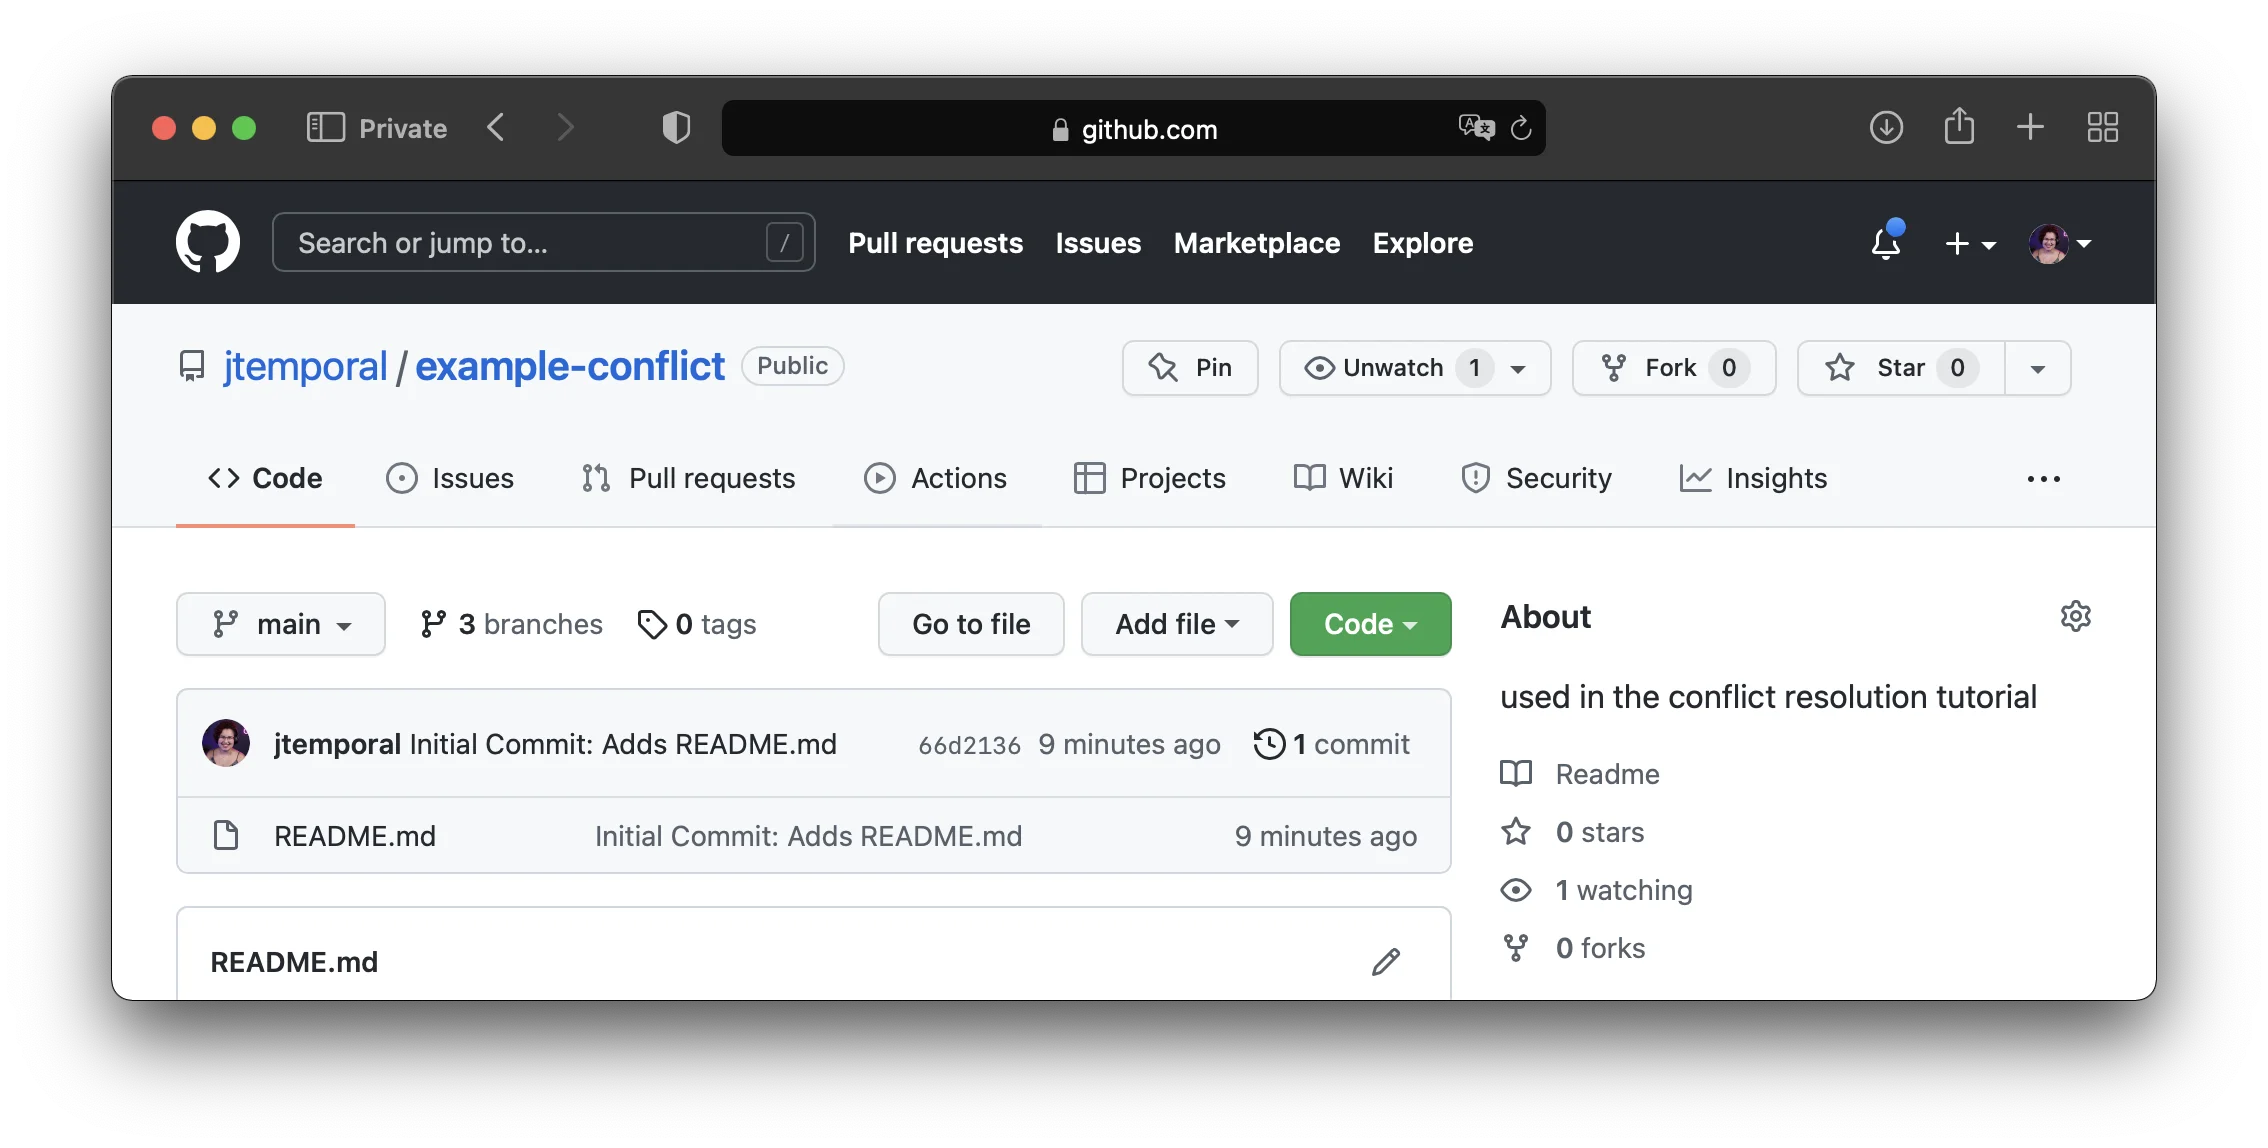
To demonstrate how this looks, I created a repository with a scenario similar to the one described in the previous section that you can find here. The initial file and the two branches, one for each person, were created from main, see:
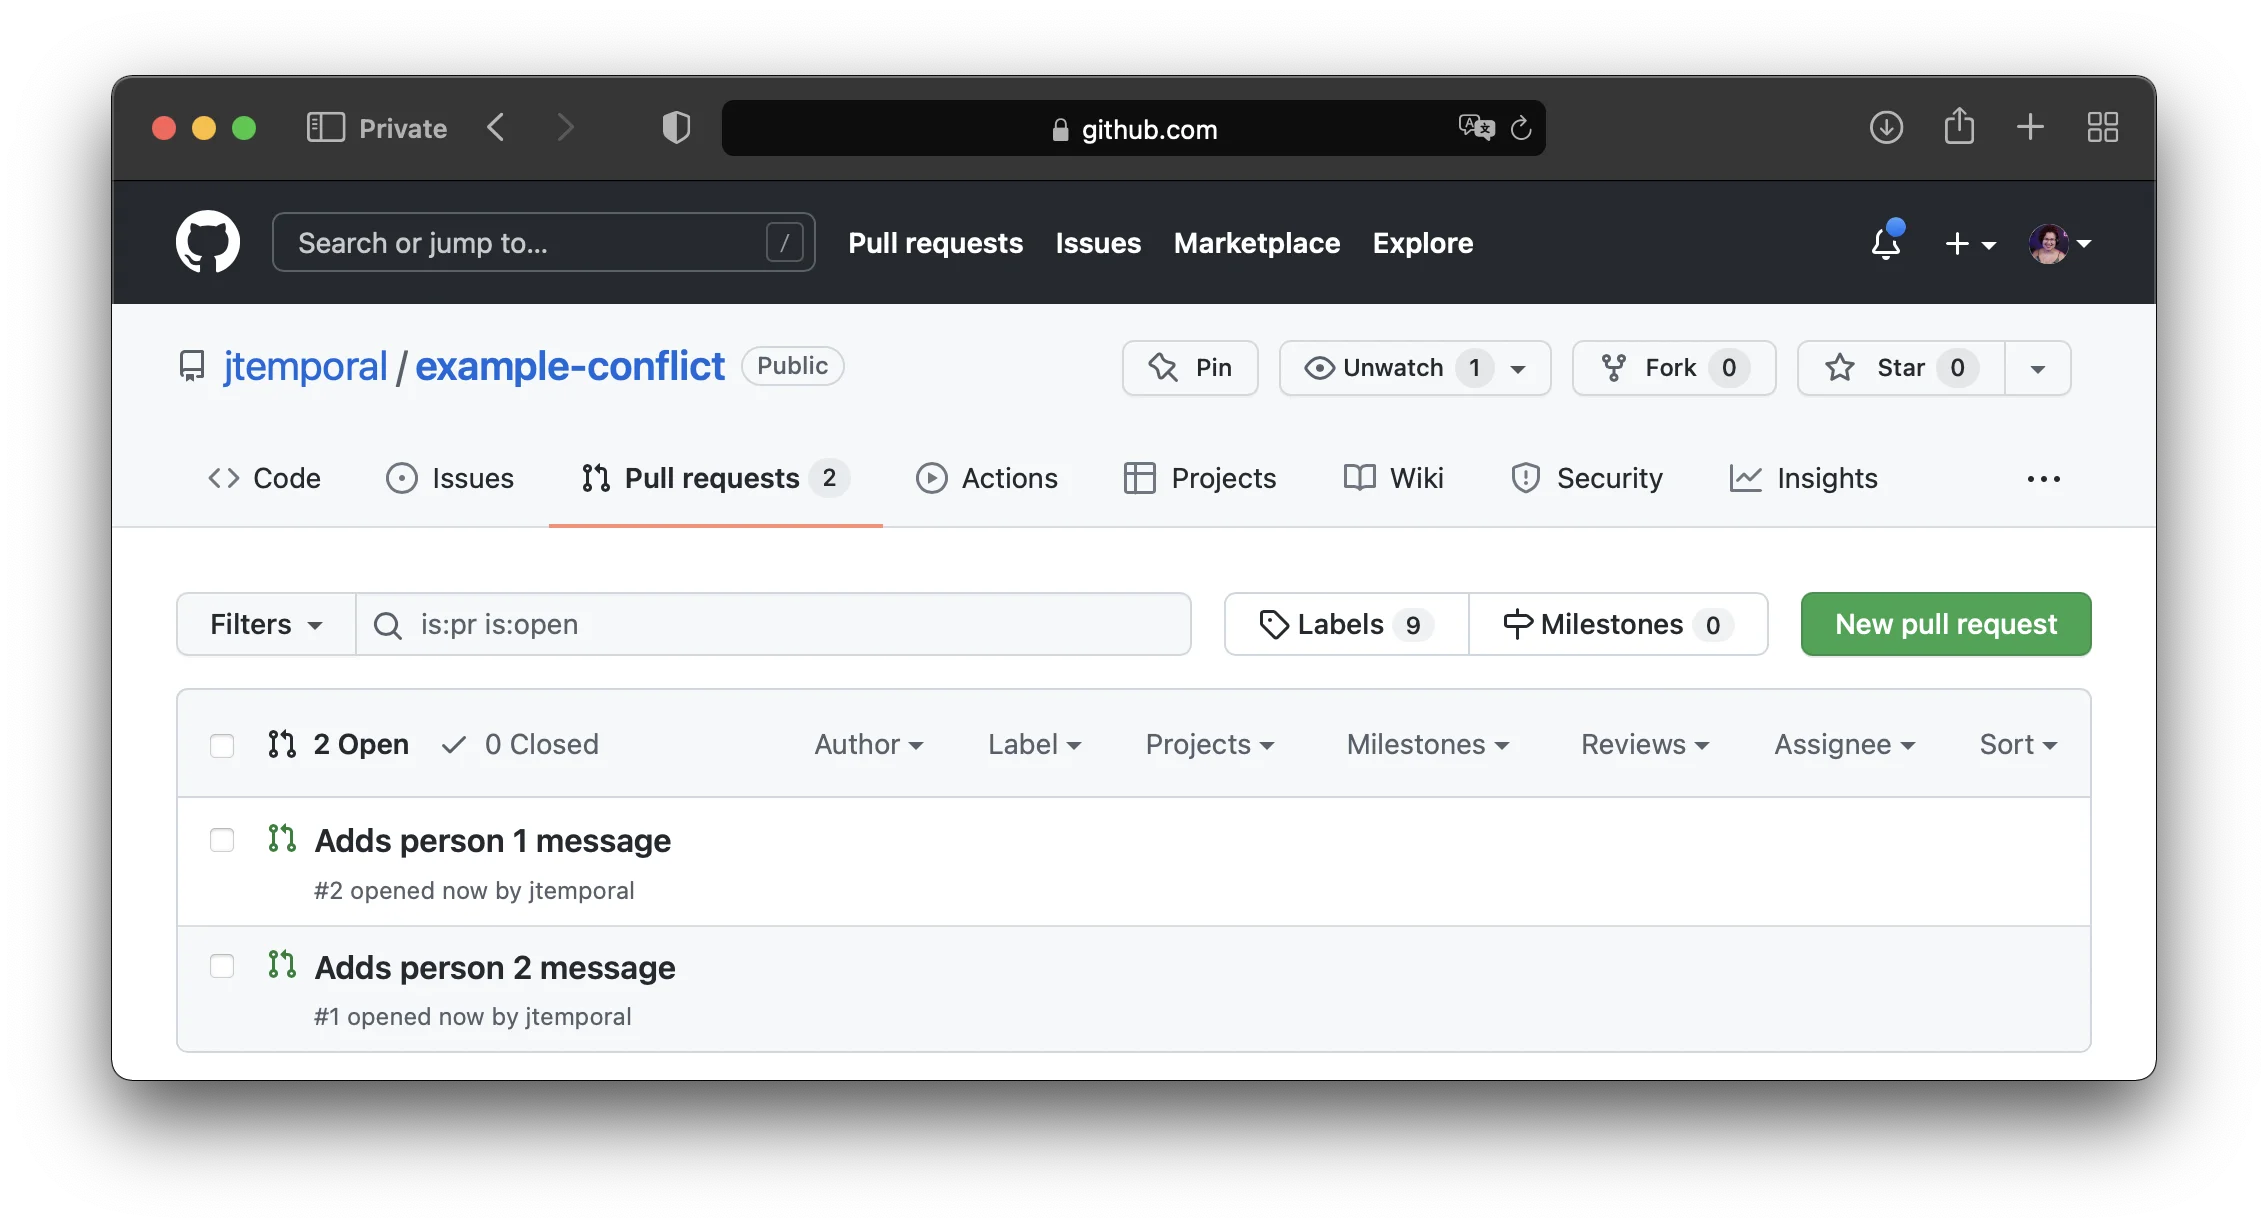
Then I made the changes for each person. In the branch person1 I added the description “Person 1 was here!” in the last line of README.md and similarly I did the same process for the branch person2. So I opened both pull requests:
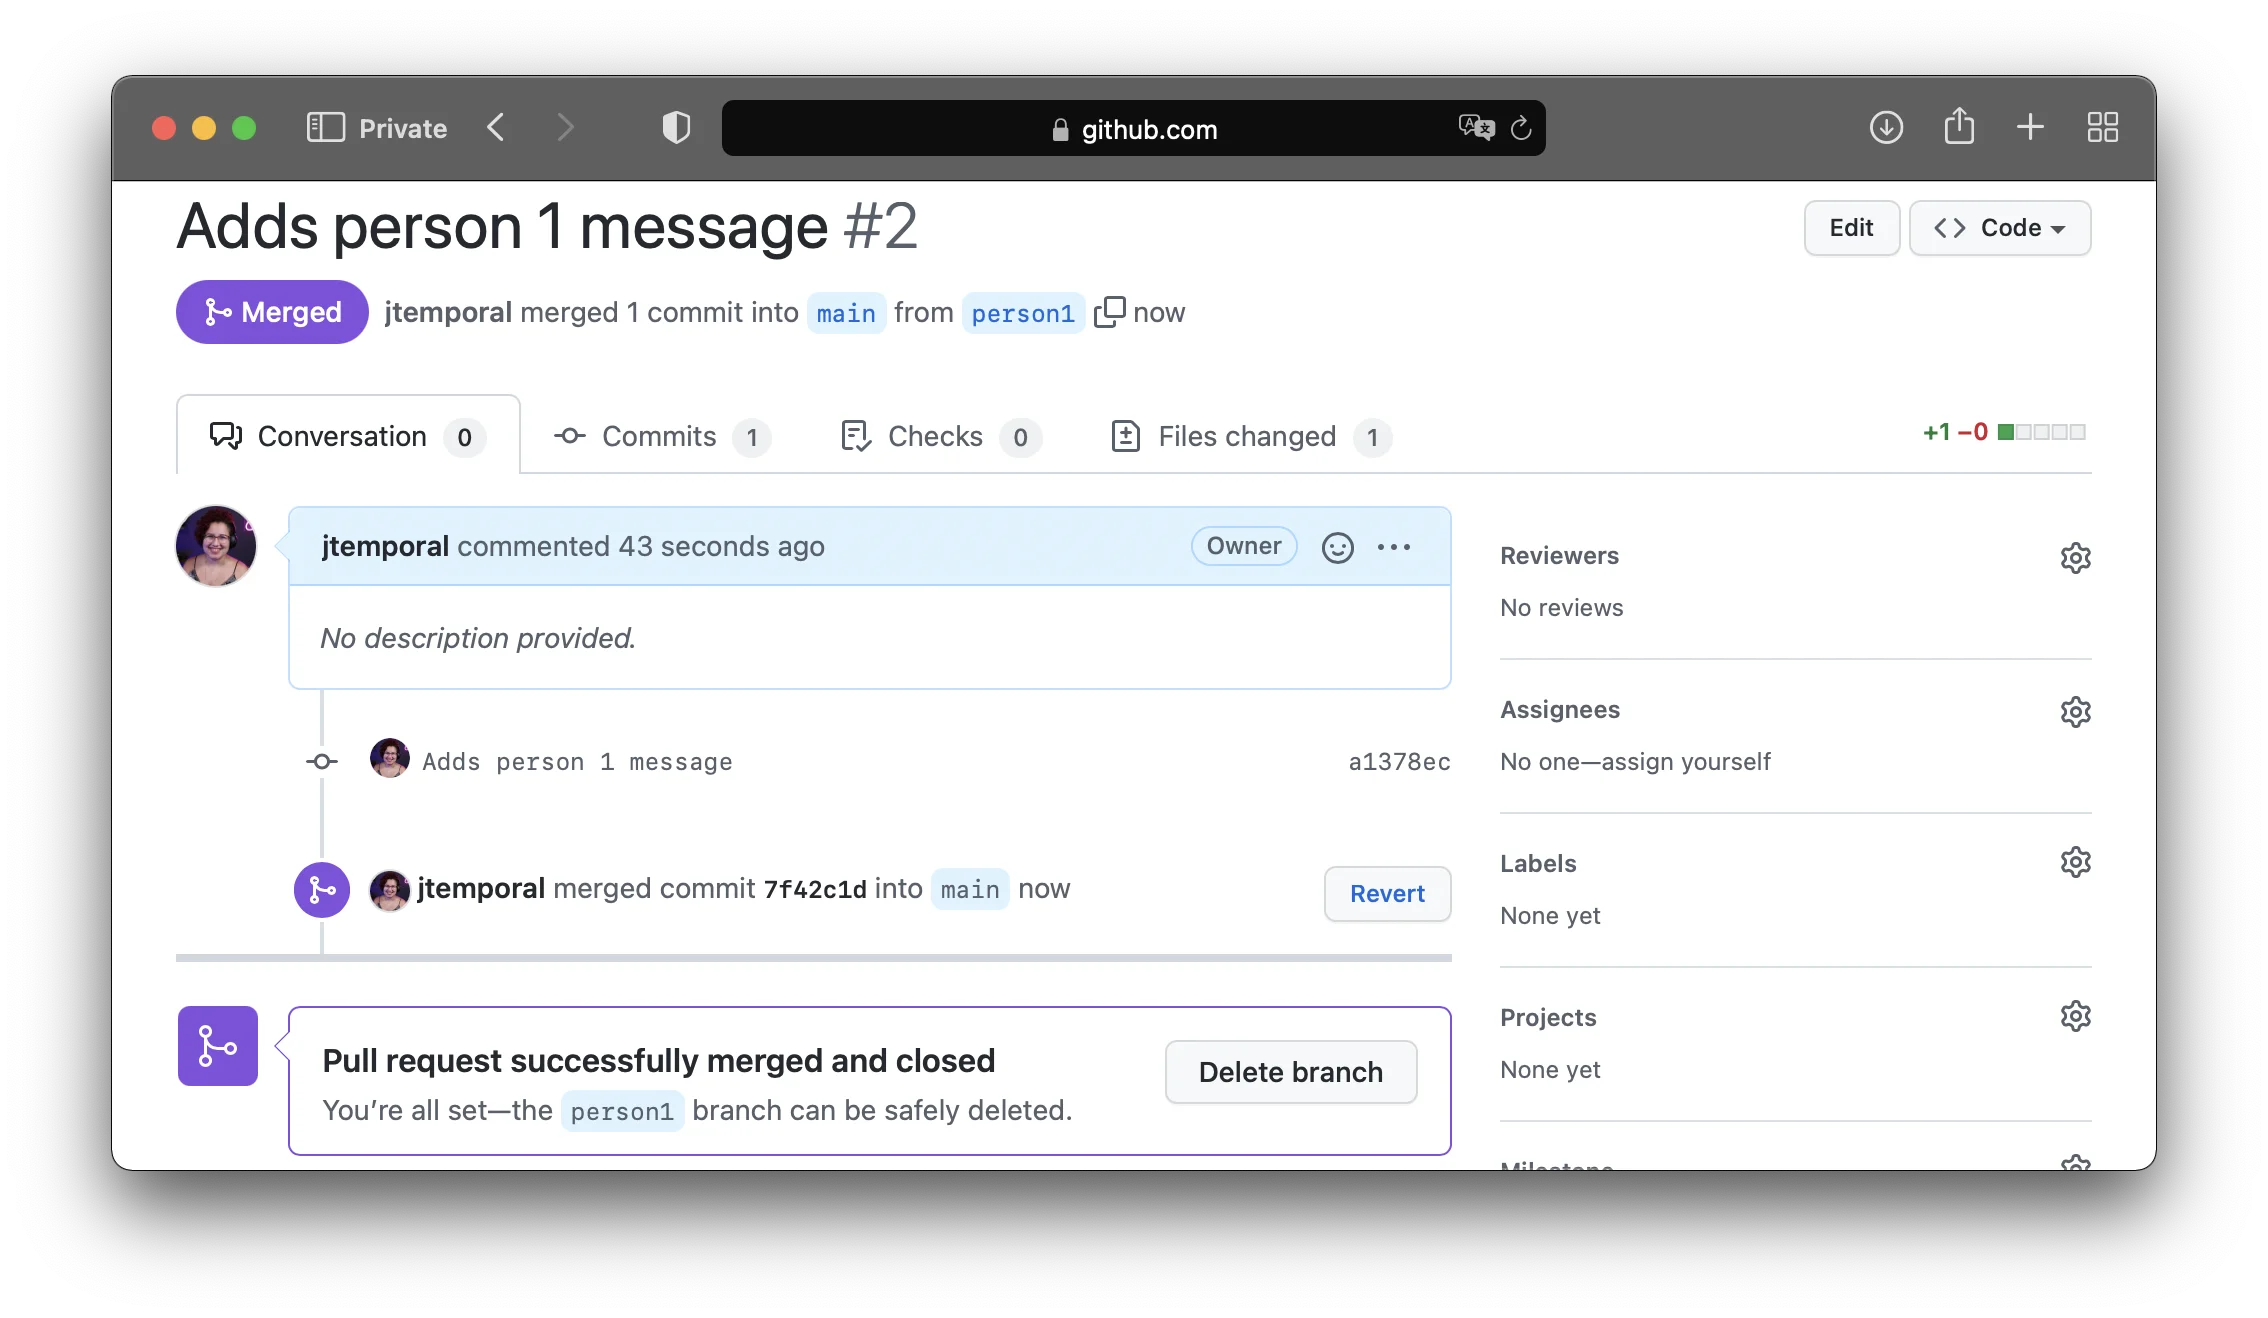
I reviewed and merged the person1’s PR:
And then I went back to person2’s PR and I could see the indication that the pull request contains a conflict, see:
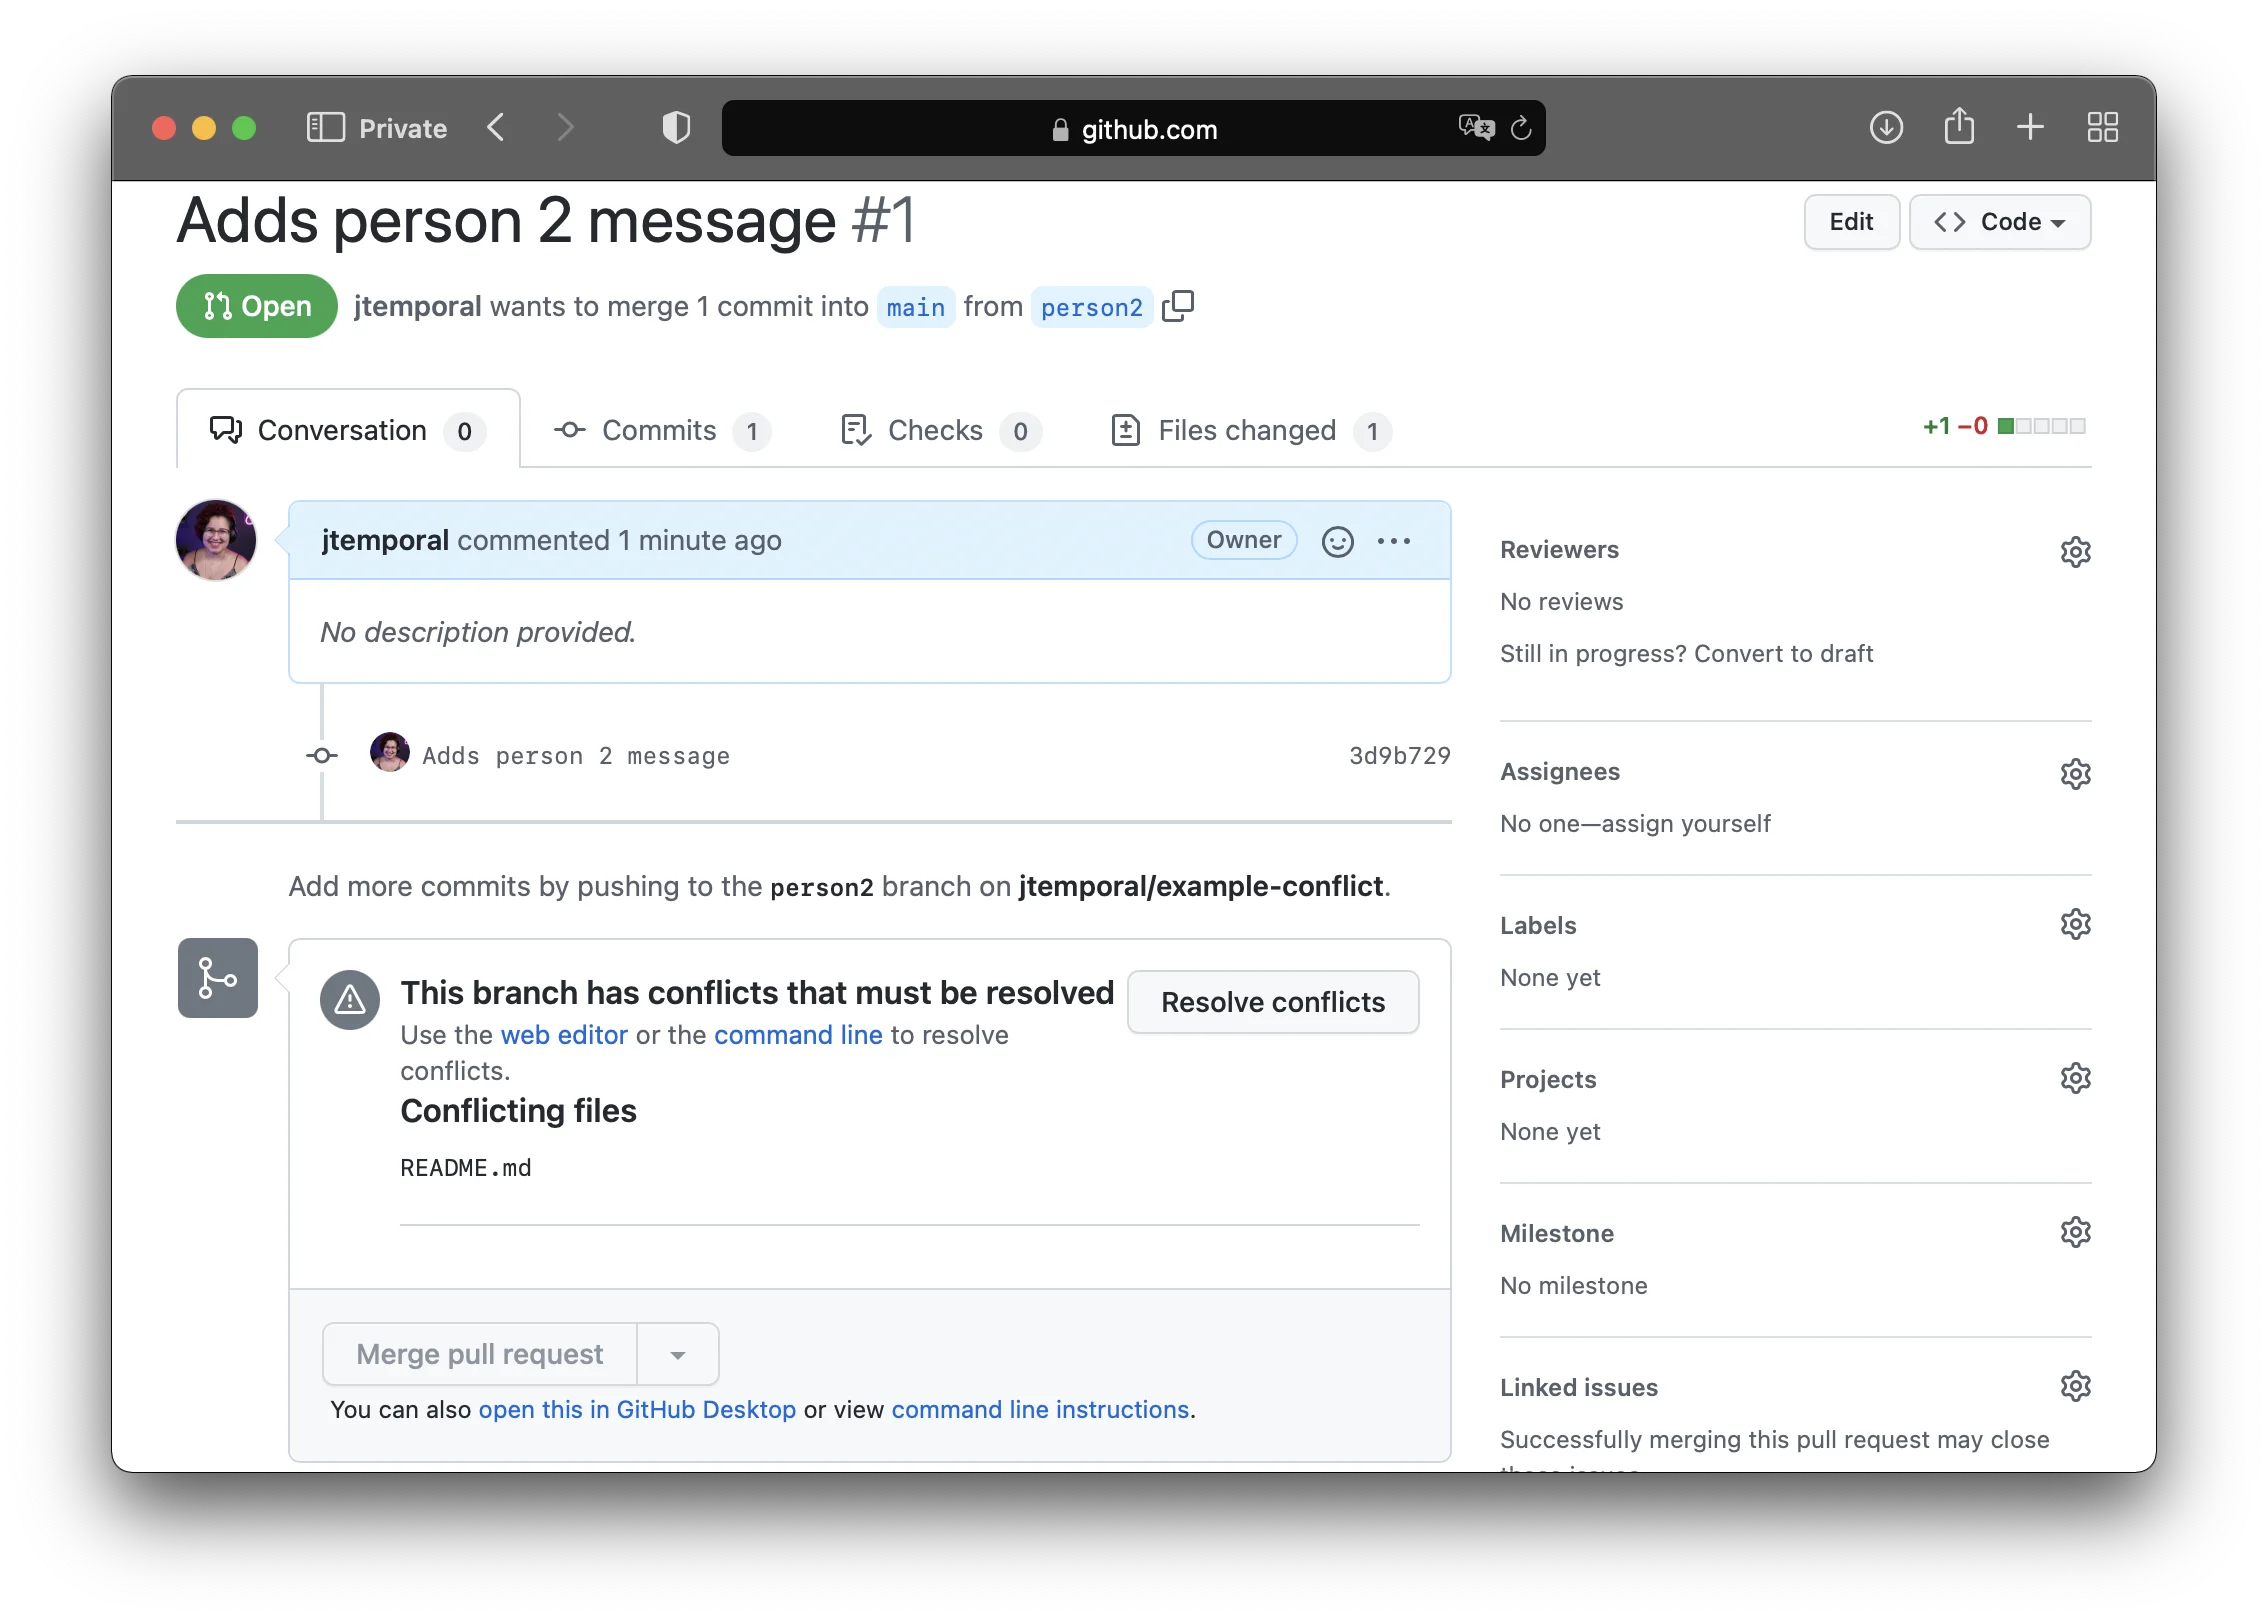
And now with a brand new conflict in our hands, it’s time to resolve it.
Resolving a conflict in Git
Before starting it is important to note that this type of conflict is also possible to resolve through the GitHub interface, but the focus here is on the commands, so let’s go!
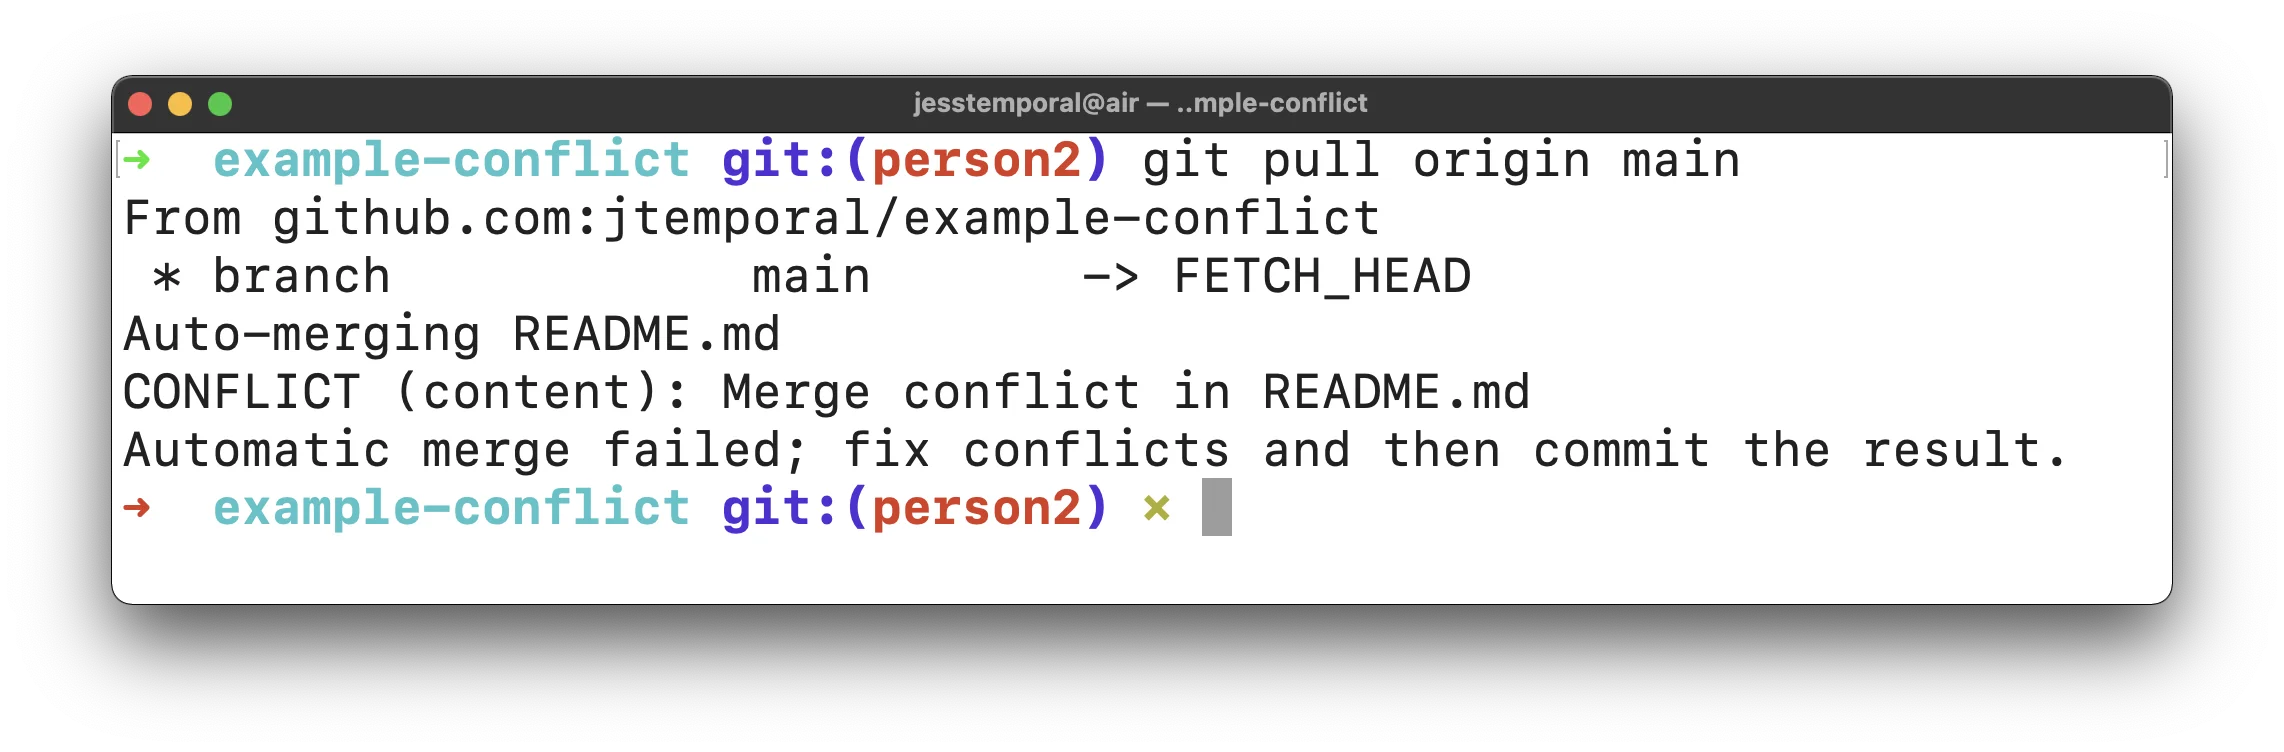
The first important thing is to decide on which branch to resolve the conflict, a rule that usually works is to resolve conflicts on the branch that presents the changes, in this case, this branch is person2, with that you must update your local repository, and this particular branch with adjustments from main, for that you can do:
git checkout person2
git pull origin main
This will bring the conflict to your local machine giving you a warning that there are conflicts, that you should resolve the conflict and commit the result:
If you open README.md in a code editor, you will notice that are markers indicated by successive greater than signs (>), less than signs (>) and equal signs (=), here is an example of the conflict shown in Vim:

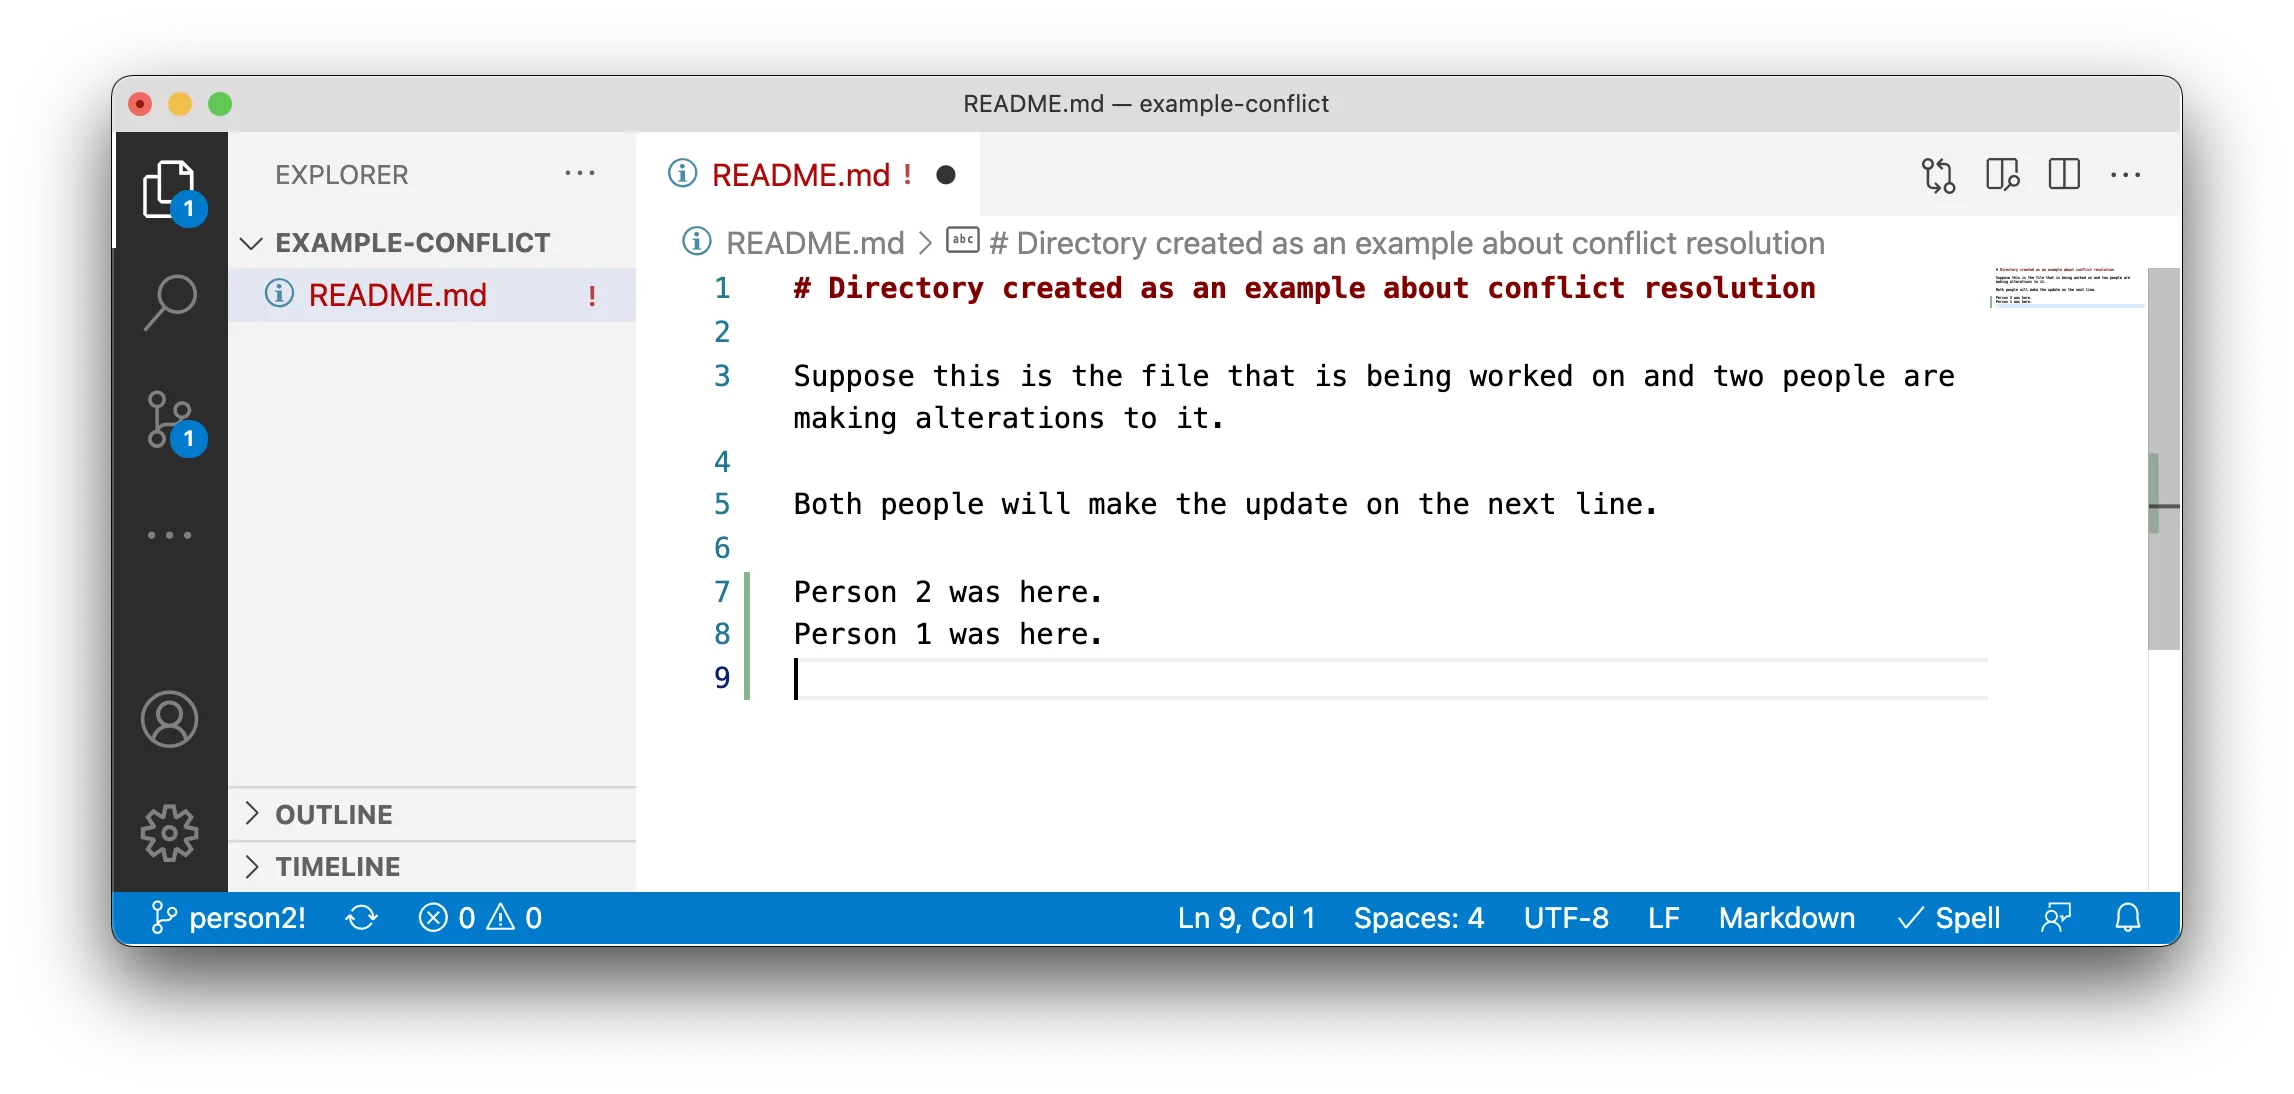
It is also possible that you use VS Code that shows the conflict in a more friendly way as it visually marks, with different colors, each change of different source and still gives you options on how to resolve the conflict by accepting part of the changes, or both, or none of them:

To understand what each button presented by VS Code means, let’s dissect this representation format. A conflict can be divided into two parts:
- Our changes: those on the current branch also called current changes;
- Others’ changes: Those we brought to the local machine by doing
git pullalso called incoming changes.
In this format, each block is delimited by a greater or lesser sign up to the block of repeated equal signs, so for example in this case we have the following blocks.
The one with current changes:
<<<<<<< HEAD
Person 2 was here!
=======
And the one with the incoming changes:
=======
Person 1 was here!
>>>>>>> 3c20251a794ec572e2c3202017d843e2d8769843
Since we want to leave both changes we can just delete the lines with the markers and save the file, if you are using simpler editors. In VS Code we can press “Accept both changes” and continue with the following commands. After accepting all the changes, either manually or using the buttons in VS Code, you should have a file like this:
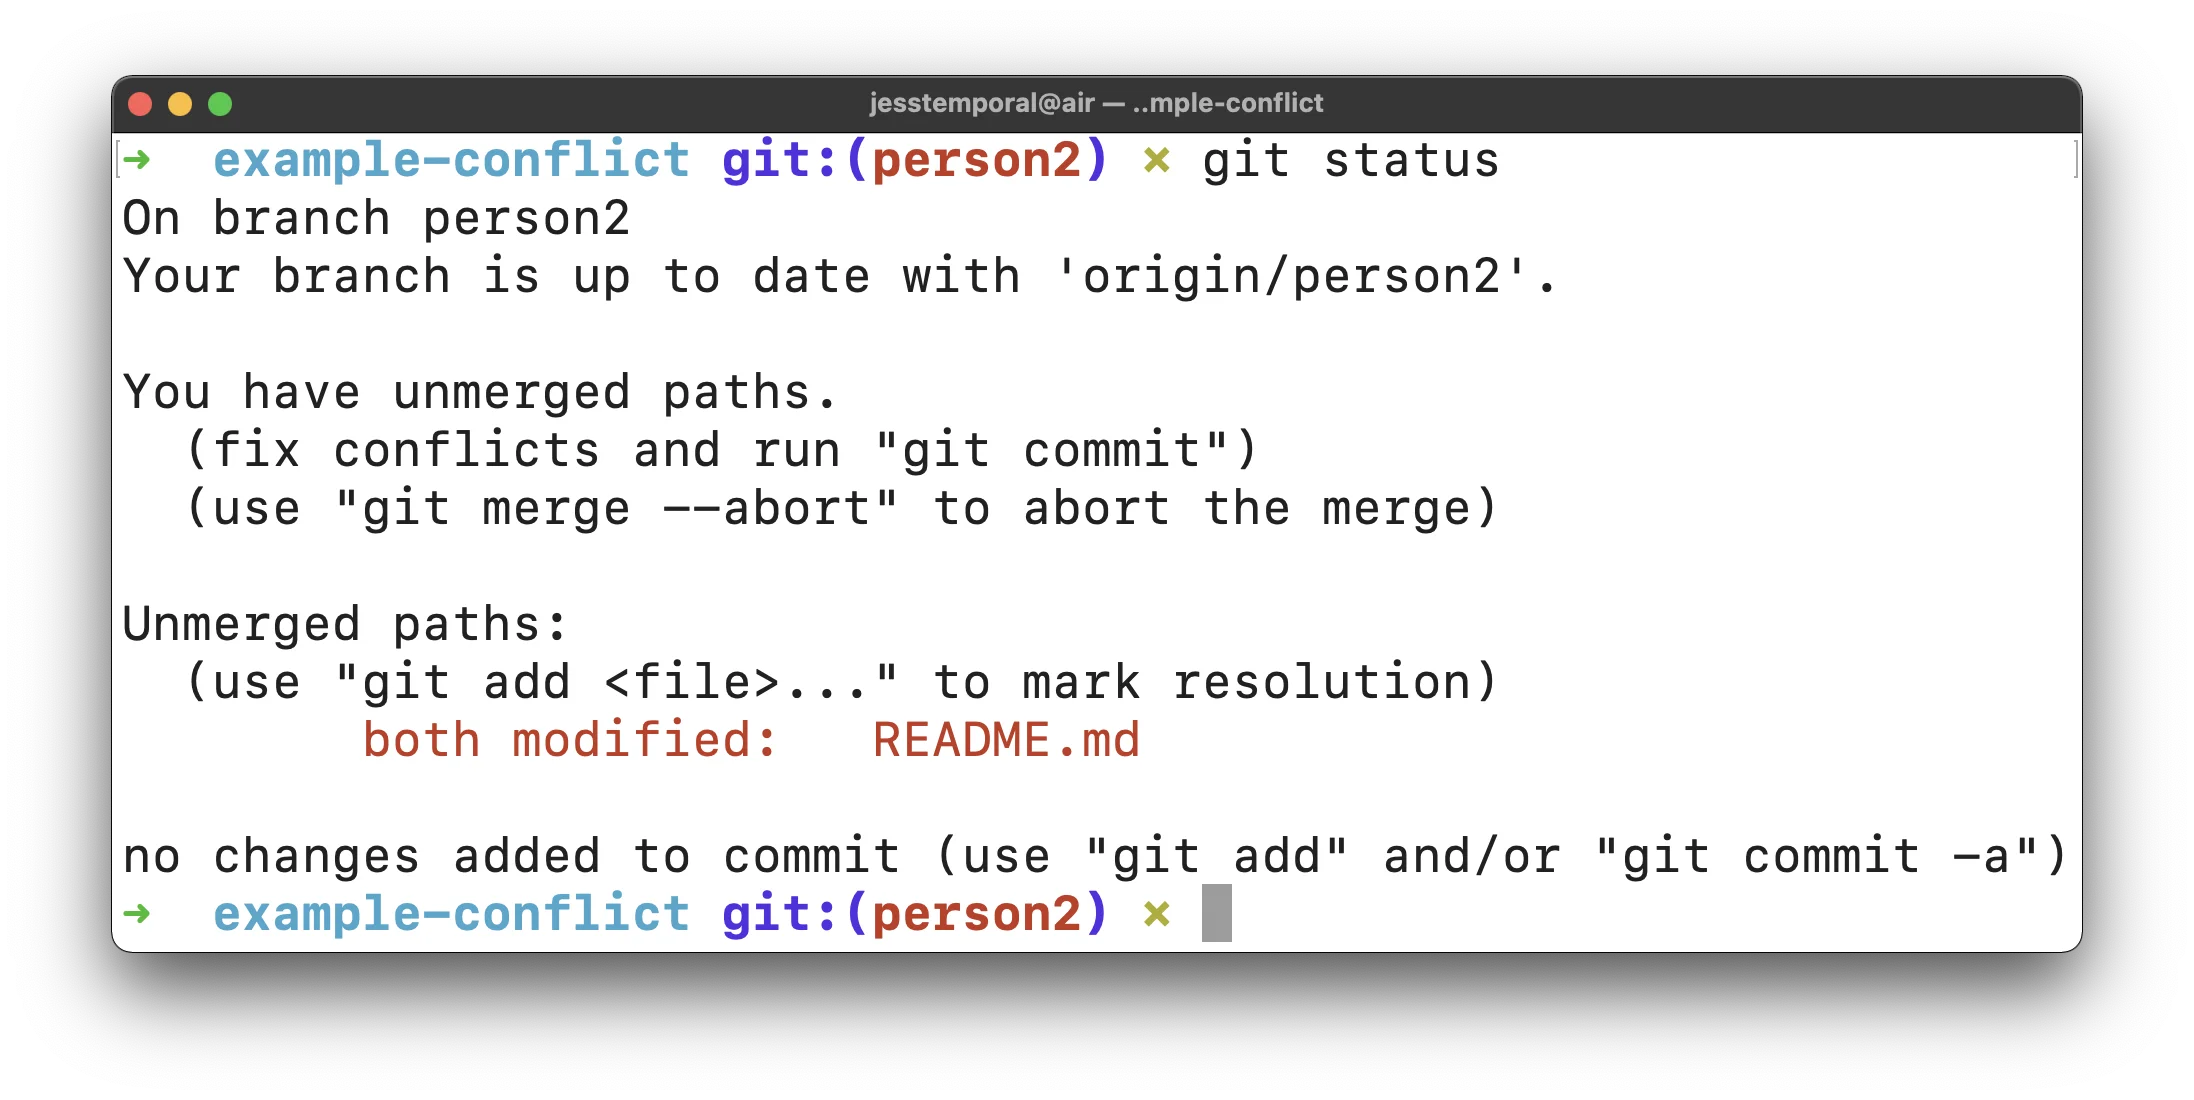
Remember to save the file. Then go back to the terminal, if you run the command git status you will see that the README.md file shows changes.
Now you can add this staging file with the following command:
git add README.md
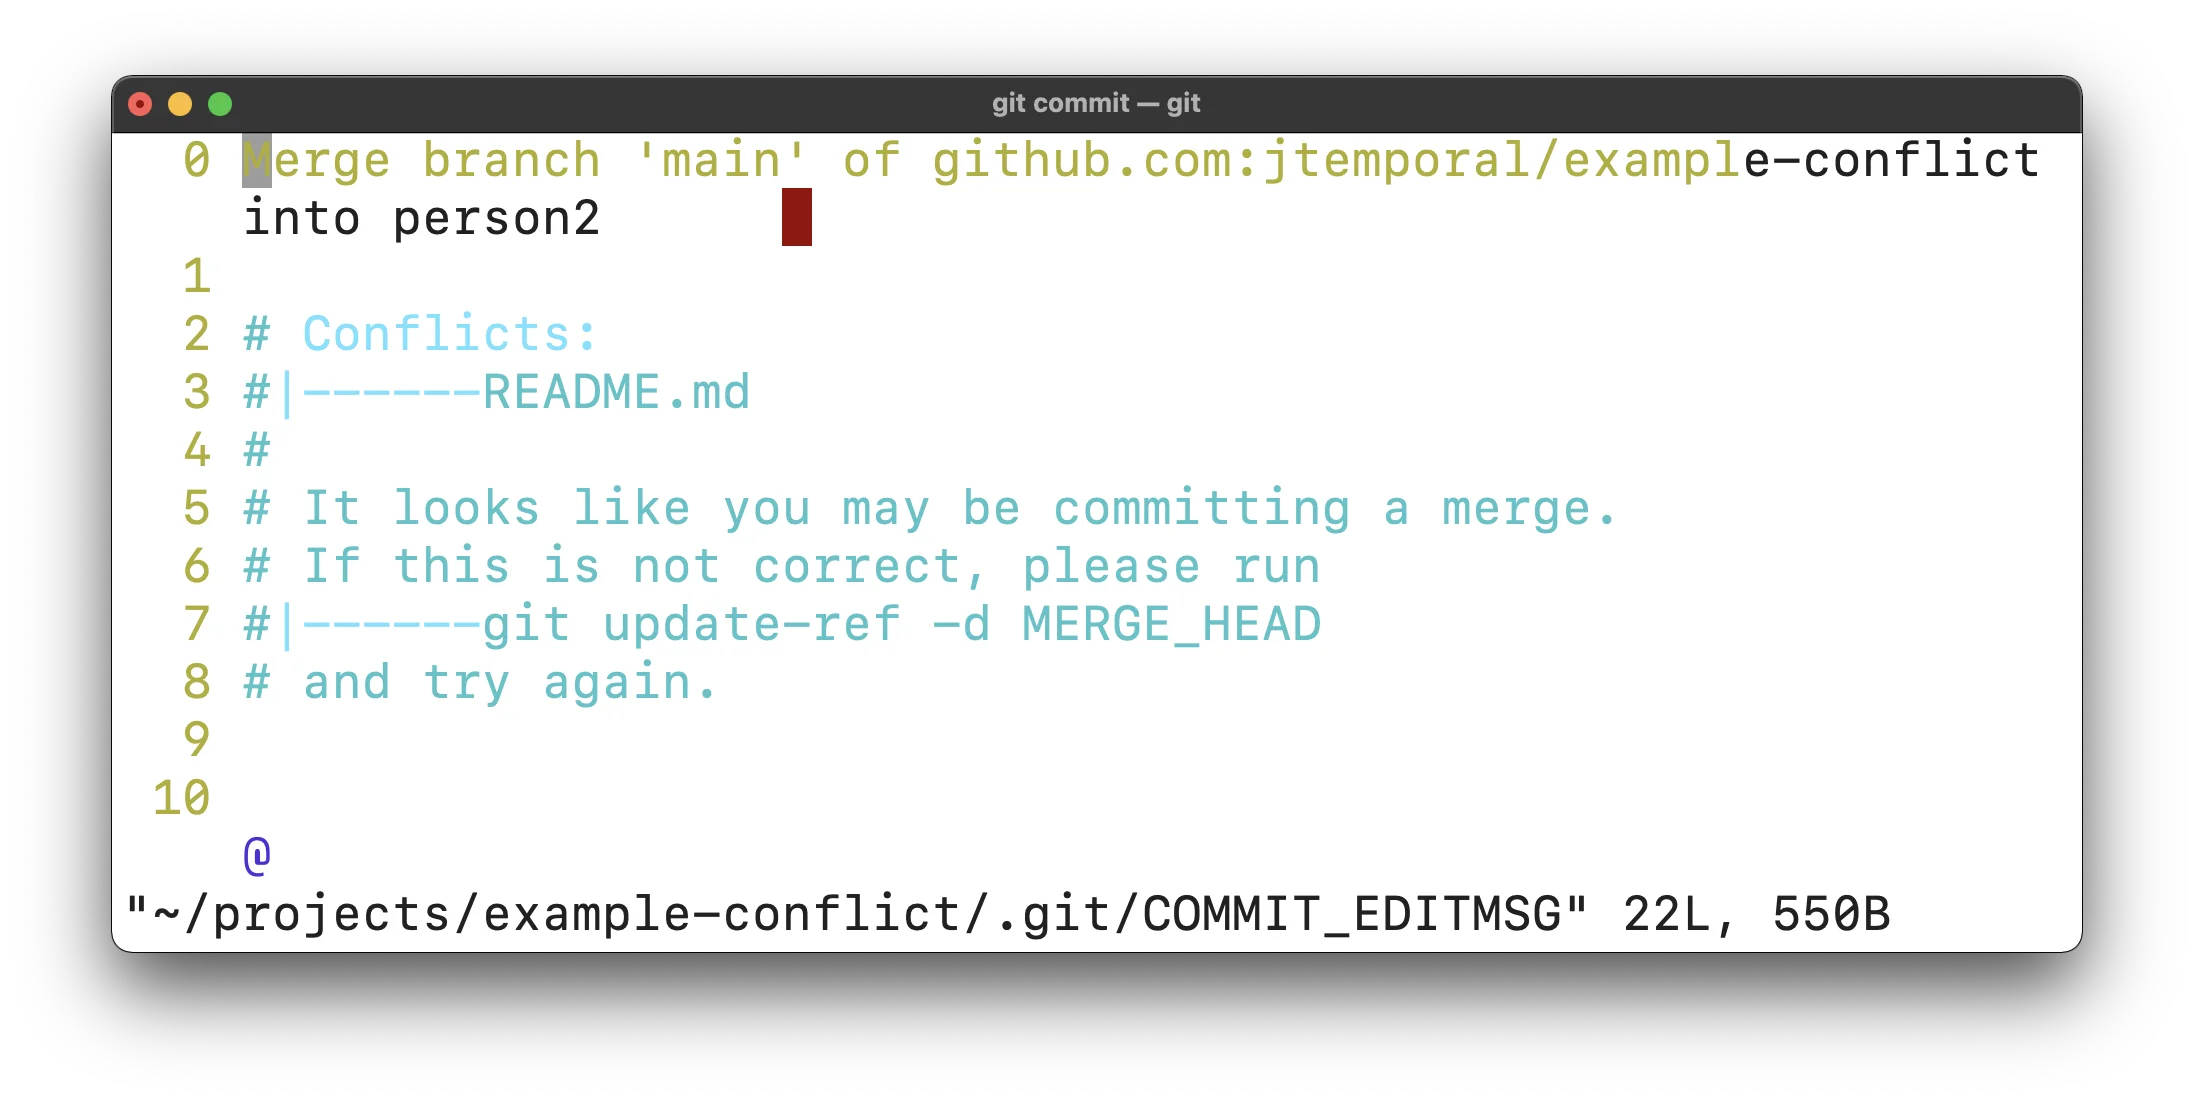
And commit the changes in your preferred way. Note that when committing, if you use editors to write the commit message, it is possible that this message comes pre-populated as in the image below:
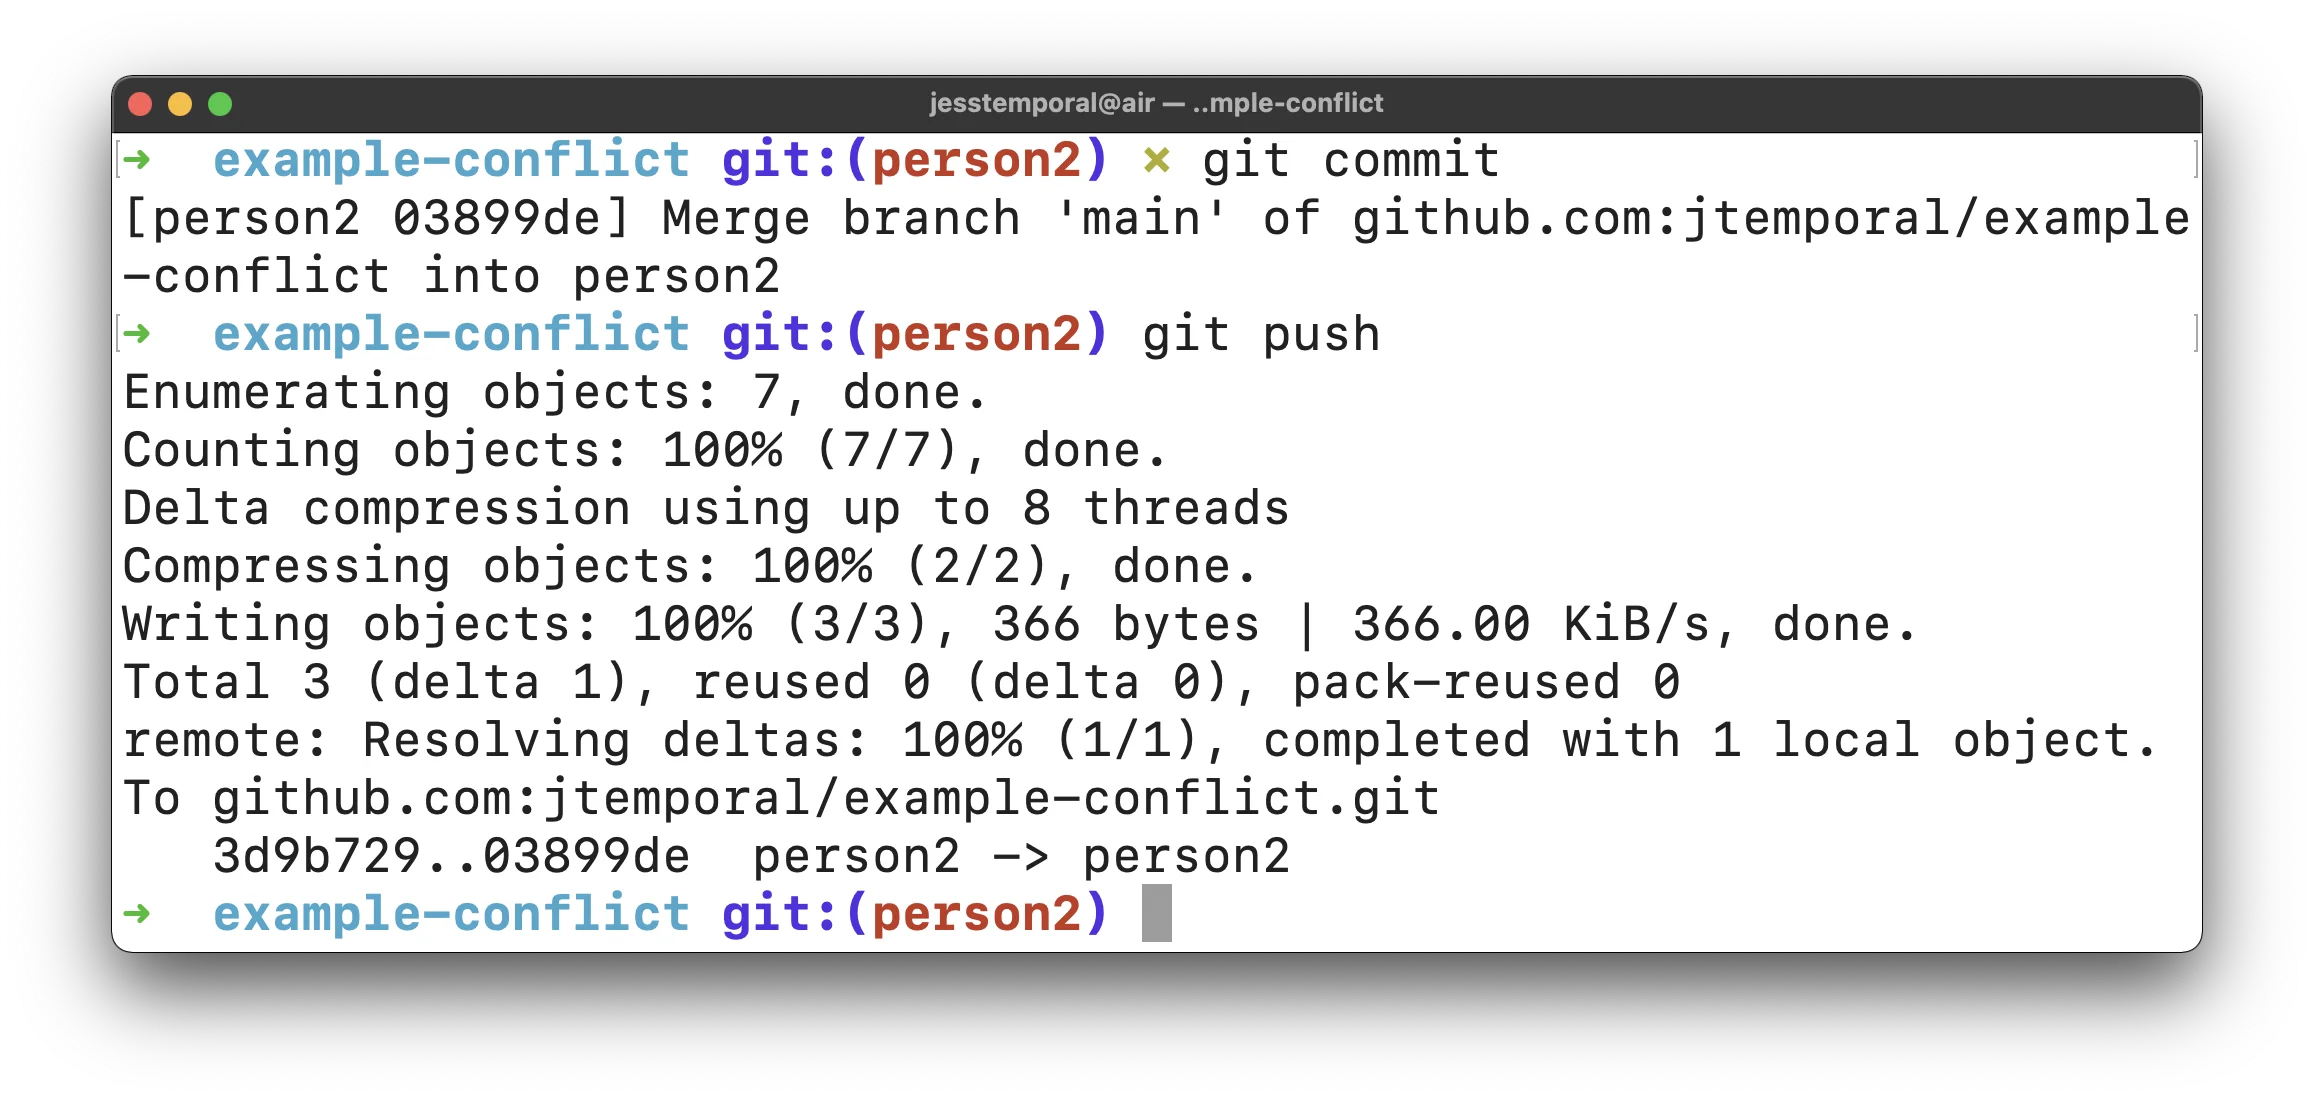
You can customize the message or leave it as is, and when you’re done committing, push those changes to GitHub with a git push:
Now if you reload the pull request page you should see that the conflict is resolved, check it out:
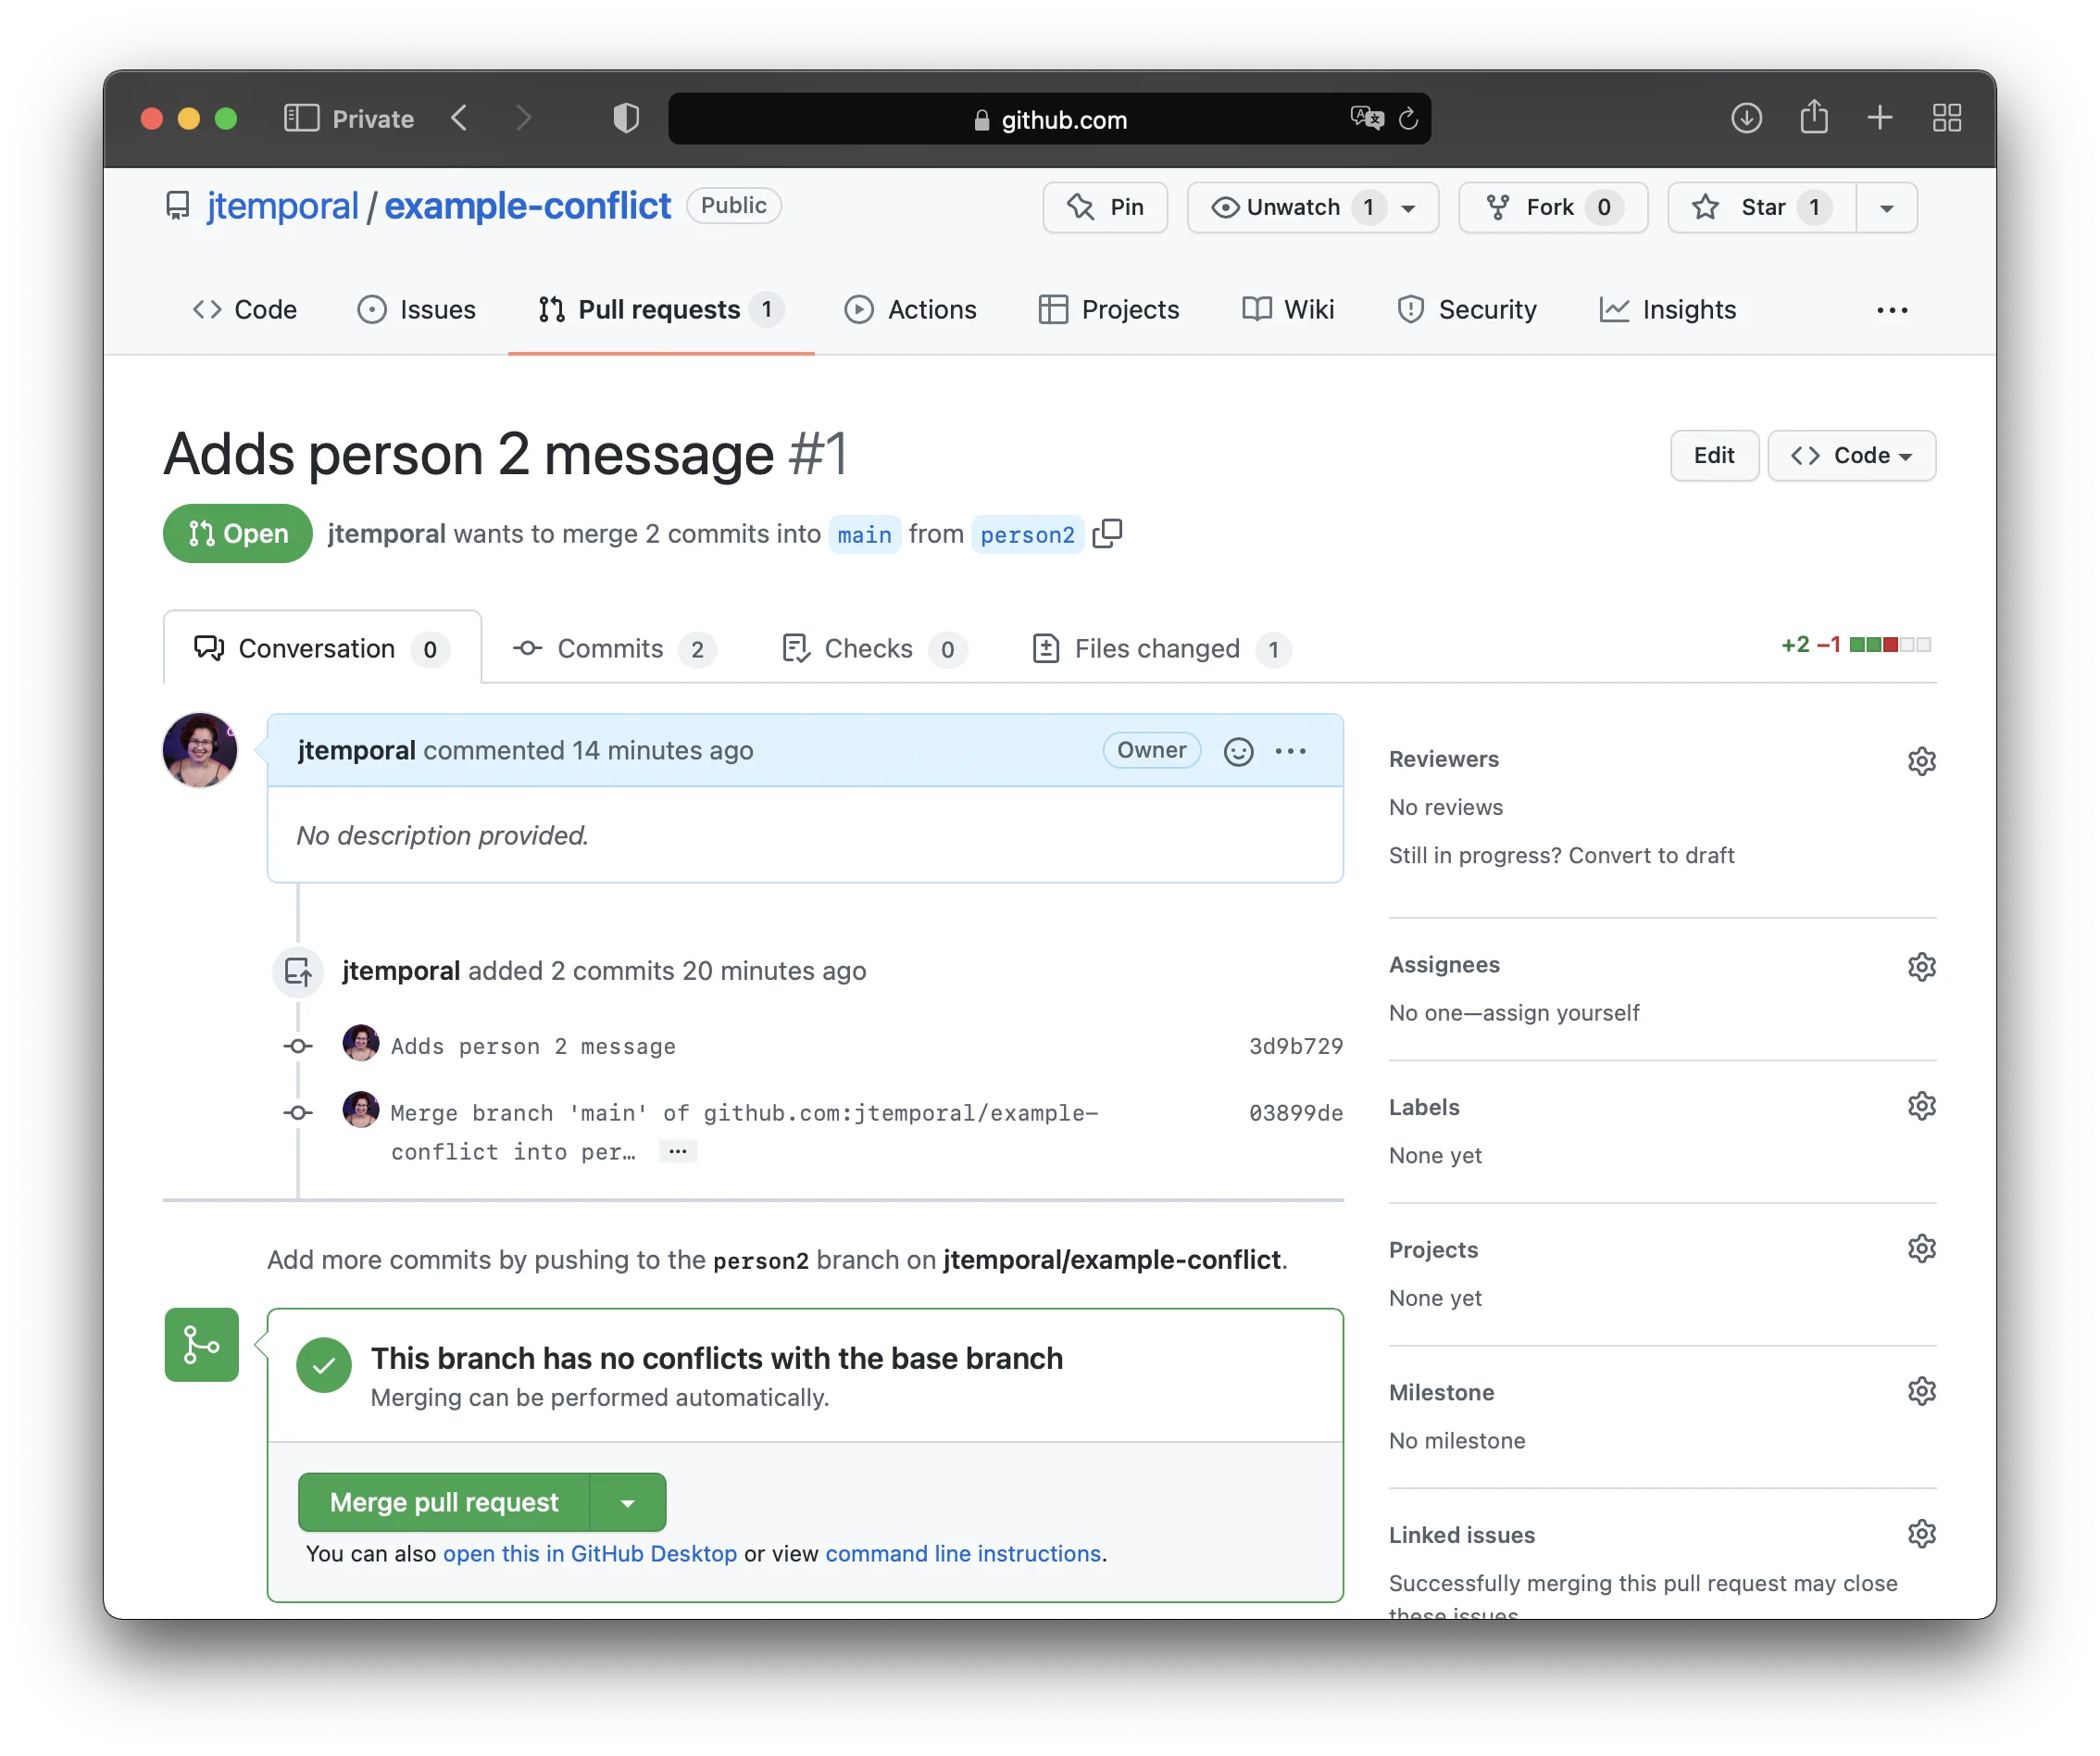
And we can finally merge this pull request! Victory! 🎉🎉
Wrapping up
You now understand how conflicts happen and you also know all the steps involved in resolving conflicts.
Here is the simple list of all commands and steps to resolve conflicts, remember to replace the <> notations accordingly:
git checkout <name of the branch in conflict>git pull origin main- open the file in conflict and resolve it
- save the file
git add <name of the altered file>git commitgit push
I hope this article helps you resolve any git conflicts you may encounter going forward. 😉
Extra reading
Here are some more documentation and tips for you to learn about conflict resolution in git: