If you use MongoDB, you probably understand all there’s to know about it, so I recommend you skip this blog post here, but if you are starting with MongoDB, see this blog post as a gentle introduction 😉.
Before starting
This blog post assumes you already have an account set up with MongoDB. Remember that if you don’t have one yet, you can create one for free here, and MongoDB has a free tier you can set up while creating your account.
You’ll be using the sample data from MongoDB to learn how to do an aggregation and create a new collection.
Getting acquainted with the data
In Mongo, a dataset is called a collection; think of it as a special spreadsheet. Whereas the records in a spreadsheet are lines, in MongoDB, a record is called a document. You’ll use the collection sample_mflix that contains movies, comments, users, etc.
Make a basic filter
Your objective is to create a collection containing all the comments each movie received in August 2002.
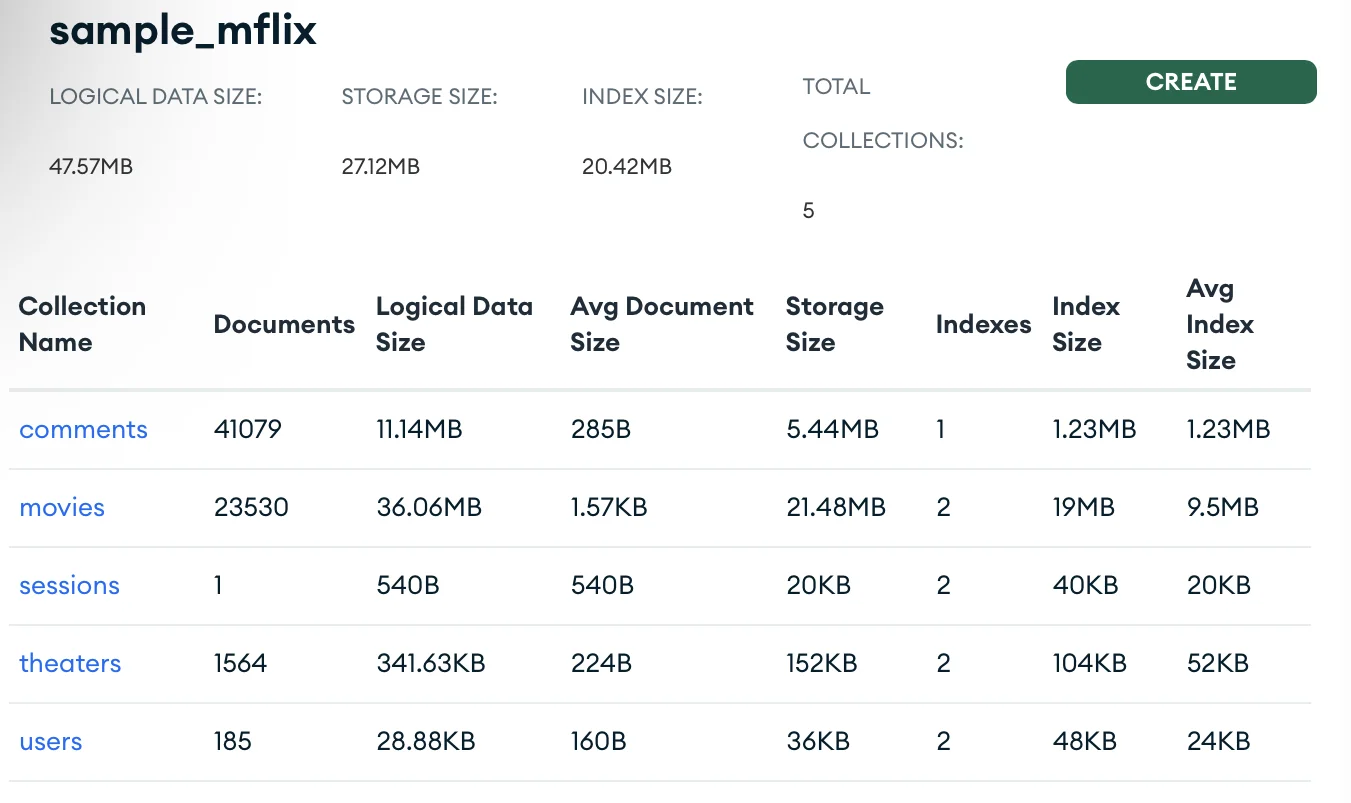
Start by going into the project’s database. My project is called “Project 0” and has the “Example” database comprising three databases and 15 collections.
Each project has a set of tabs, one of which is the “Collections” tab, where you can see the databases and the documents in each collection, as shown in the image above. From within the Collections tab, you can see the data and make simple queries if you want.
|
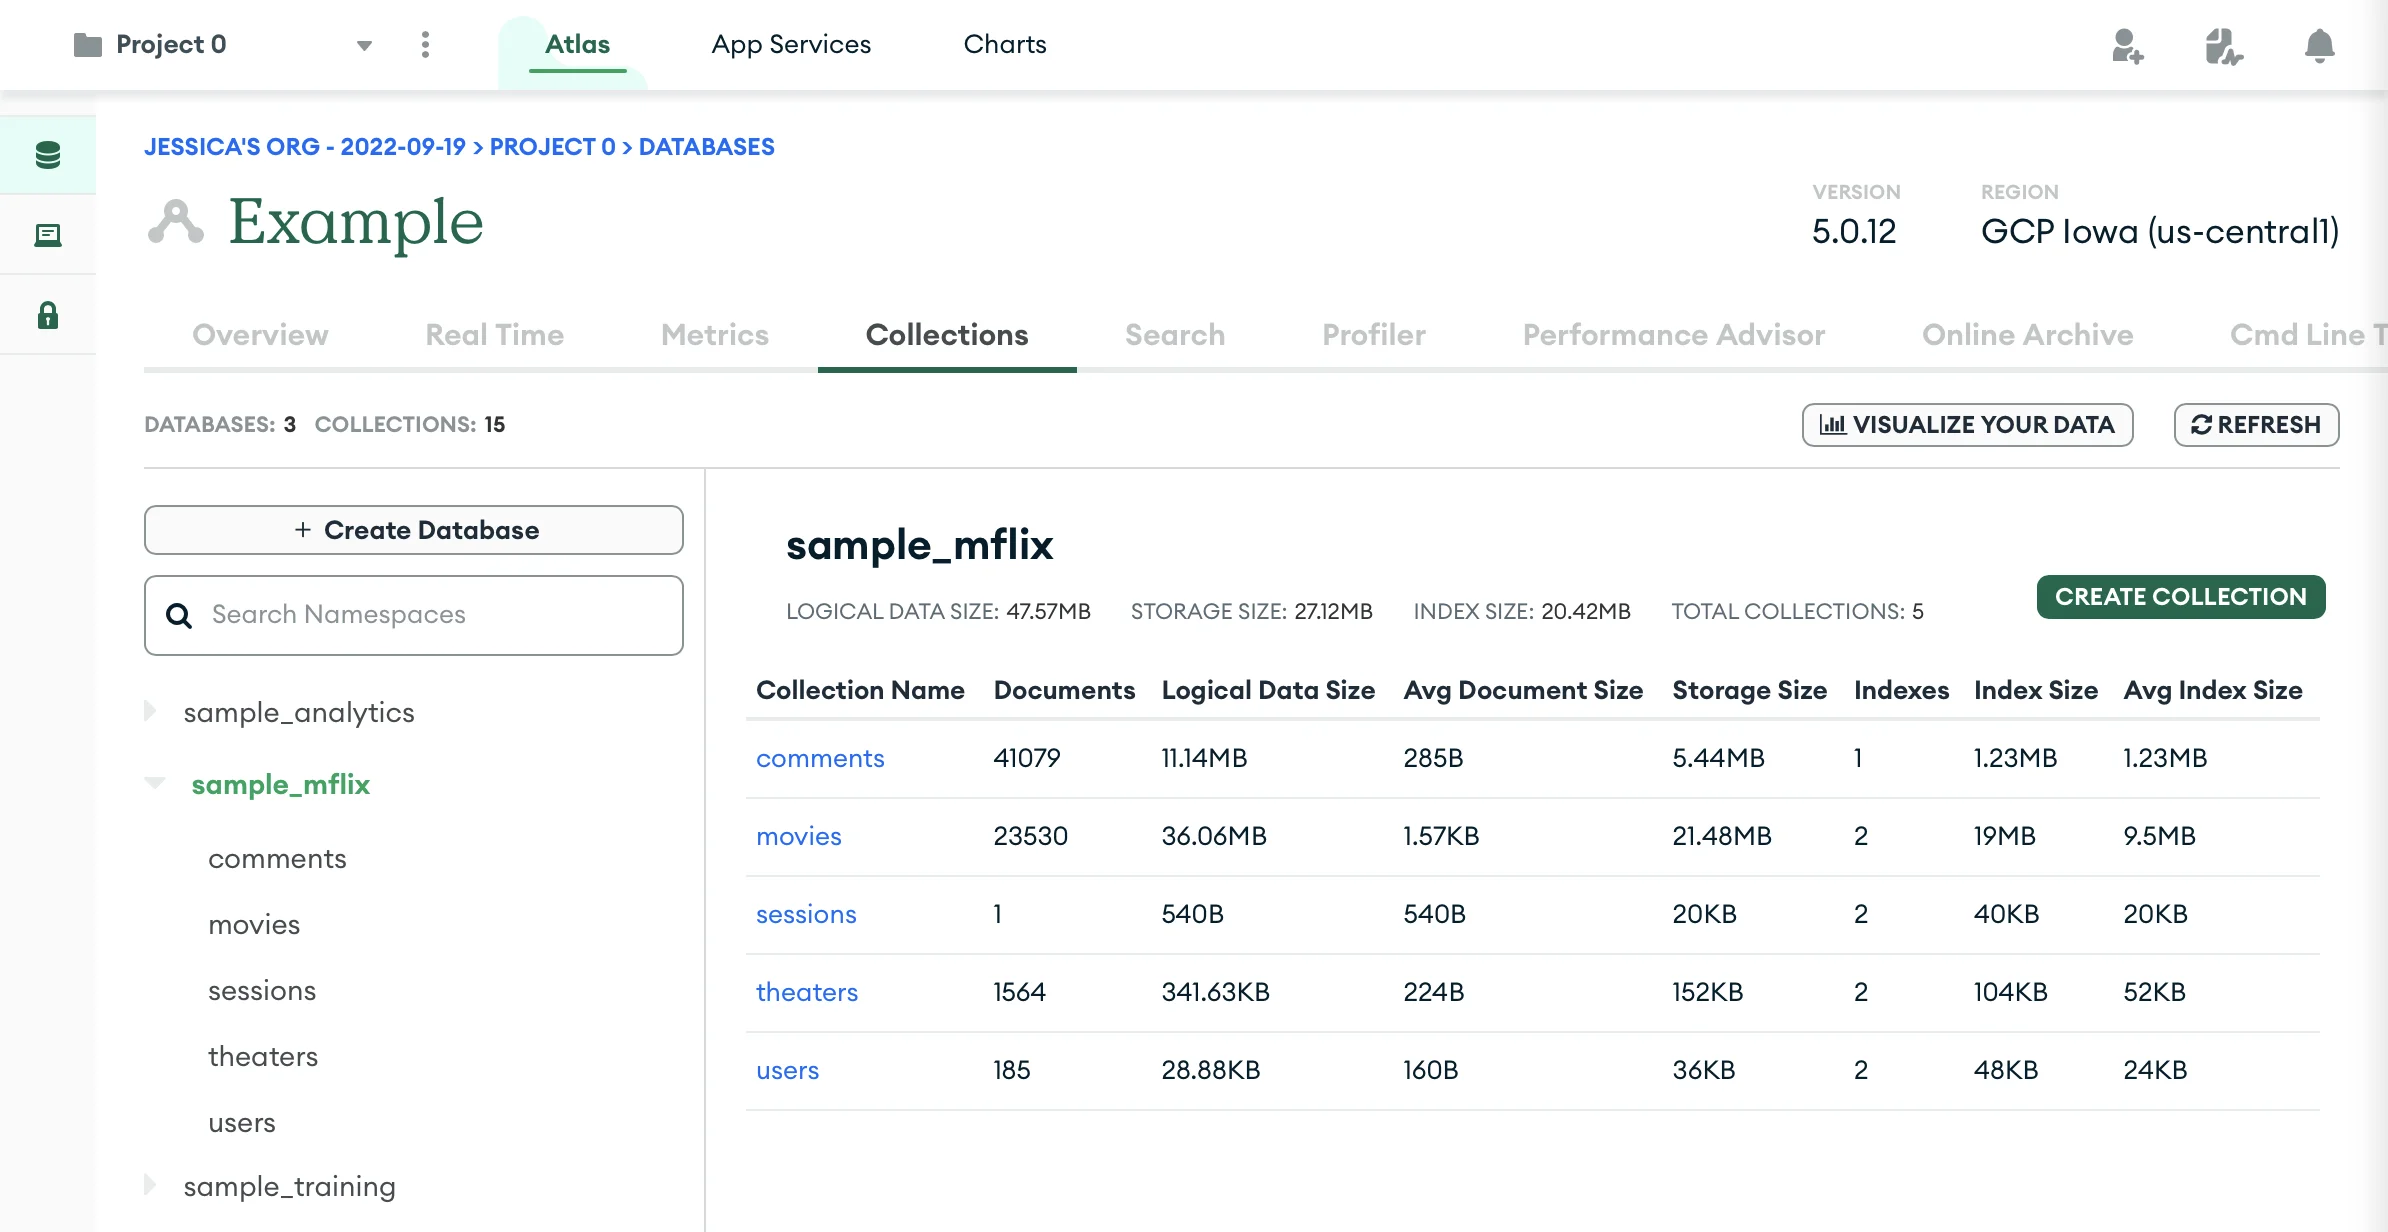
For example, the query above shows every document with a date value later than August 18th, 2002.
Using queries like that is great to see the preliminary results of the collection you are trying to build. But to actually create the collection, we need to use aggregations.
Constructing the aggregation
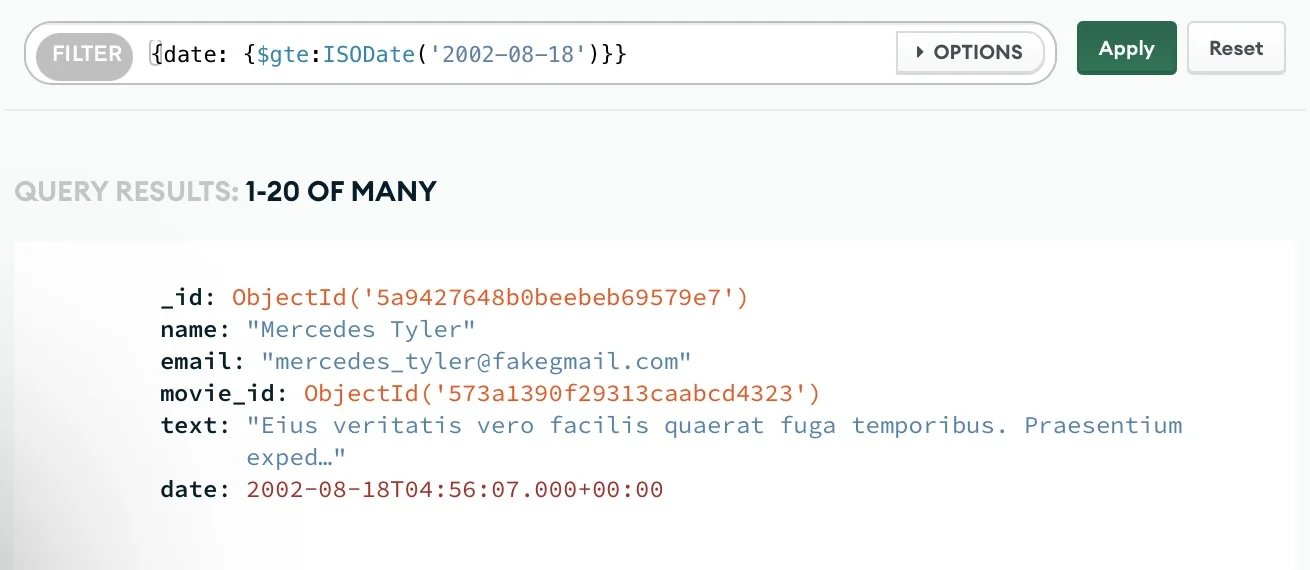
Aggregations are one way you can build collections inside MongoDB, and there’s a tab for that, as shown in the image below.
To see the Aggregation tab, you need to click on the collection you want to investigate or use as the basis for your new collection. On the aggregation tab, you’ll see the pipeline builder. A pipeline is a set of steps; each step is called a stage; each stage does one thing and one thing only. You will do three stages:
- Filter comments based on a date;
- Add the movie’s details into each comment;
- Output the results into a brand new collection.
Filter comments
To avoid dealing with unnecessary data, that is, data outside of your interest date window, the first thing you’ll want to do is find the comments in that particular period (August 2002).
On the drop-down menu for the first stage, select the $match operator; this operator will allow you to filter the records based on the date. Note that once you select the operator, Mongo will auto-populate the editable field with the standard structure for that operator.
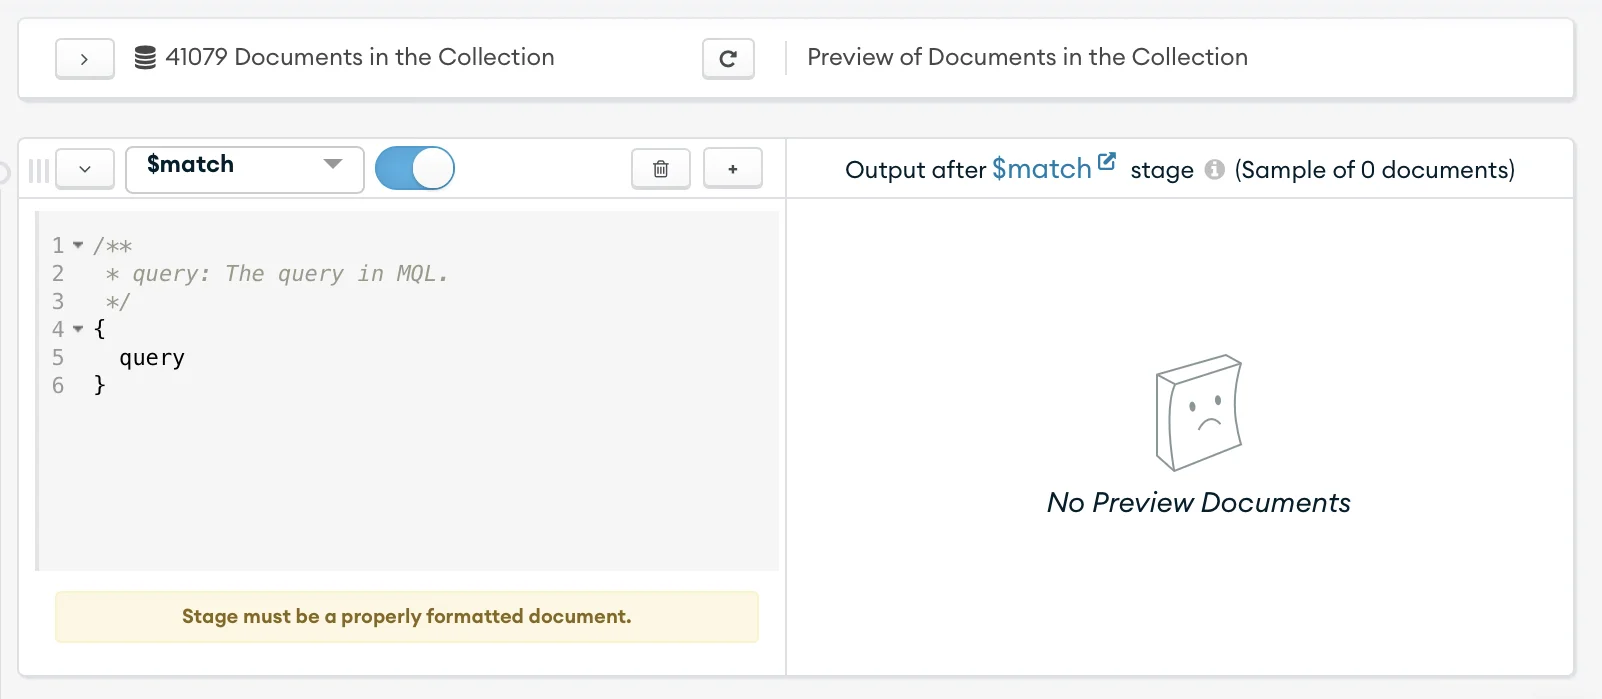
Now you need to add the following code in the query section there:
Once that is done, you’ll see that the sample result will start displaying.

Now let’s break down each step of that operation, shall we?
- Lines 1-4: Just comments, mainly to explain what the operator is. Note that MQL stands for MongoDB Query Language;
- Lines 6 (
date:): corresponds to the field you want to use to filter your date; - Line 7 (
$gte:ISODate("2002-08-01")): this line uses the$gteoperator to grab all dates after the date returned in ISODate format; - Line 8 (
$lt:ISODate("2002-08-31")): this line uses the$ltoperator to grab all dates before the date returned in ISODate format.
This operator result will be all the documents between August 1st and August 31st 2002.
Adding movie information to each comment
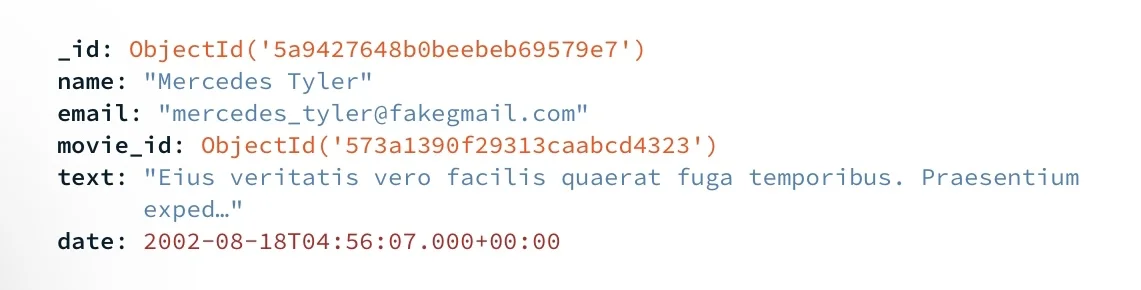
You’ll notice that the comments don’t have the movie information, but the movie identification number (ID) is present, as shown in the image below.
Including the movie information in the filtered comments you just got from the first stage is the second step of our aggregation. Click the “Add stage” button below the first stage to start working on adding the movie information to the collection using the $lookup operator.
The $lookup operator does a “left outer join”. Think of it as a “filtered join”. Based on the collection on the “left” (comments), select the documents on the “right” (movies) that match a given field in both, in this case, the movie id. This way, we don’t have to care about removing movies without comments, but all comments from the time window.
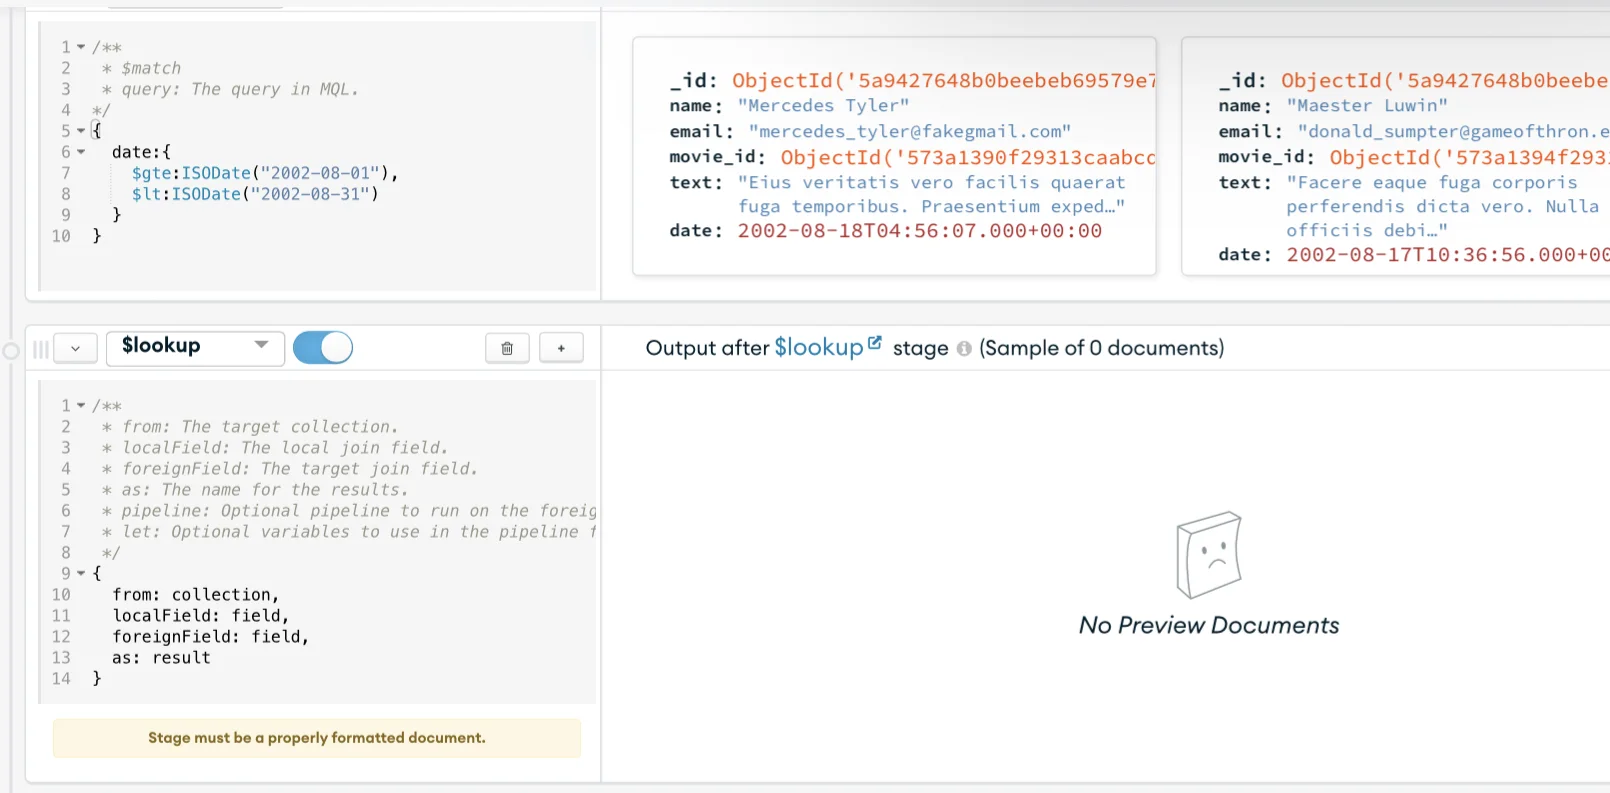
On the drop-down menu for the second stage, select the $lookup operator, as shown in the image above. Once again, Mongo will pre-fill the operator sample code, and you can update the code section with the code below.
Once more, let’s break down each step of that operation:
- Lines 1-9: Just comments, mainly to explain what the operator is;
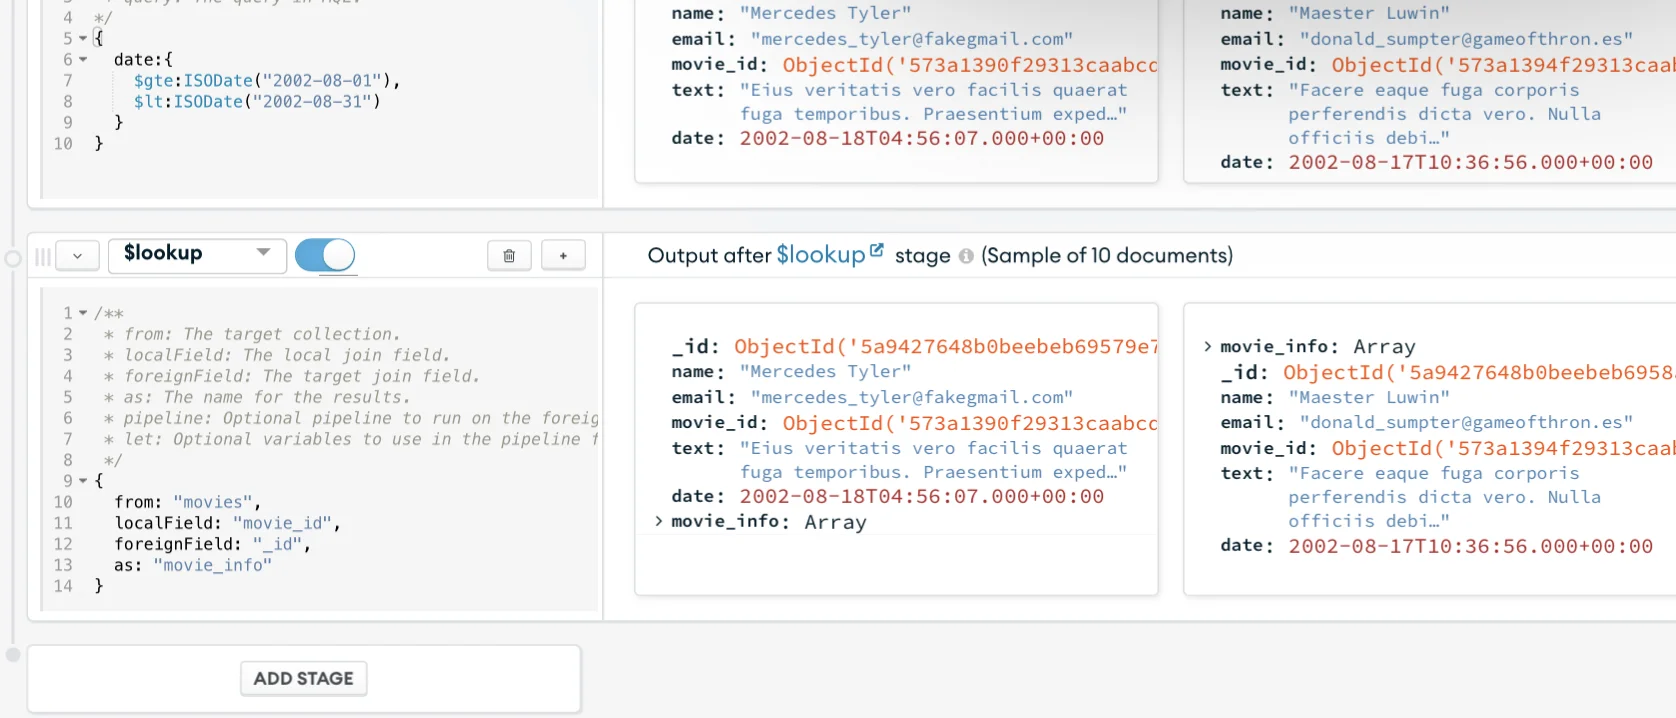
- Line 11 (
from: "movies",): Since the left side in the dashboard is the collection from which you are running the pipeline, this is where you define the “right” side of the join, so you chose the “movies” collection to add the movie information into the comments; - Line 12 (
localField: "movie_id",): the field on the current collection (comments) that correspond to a field in the other (movies) collection; - Line 13 (
foreignField: "_id",): the field on the other collection; - Line 14 (
as: "movie_info"): the field name to add information in, note that the lookup will add the information as an array.
And you should see the results show up like in the image below.
All the data manipulation is done. Time to save the results and actually create your new collection.
Save the results
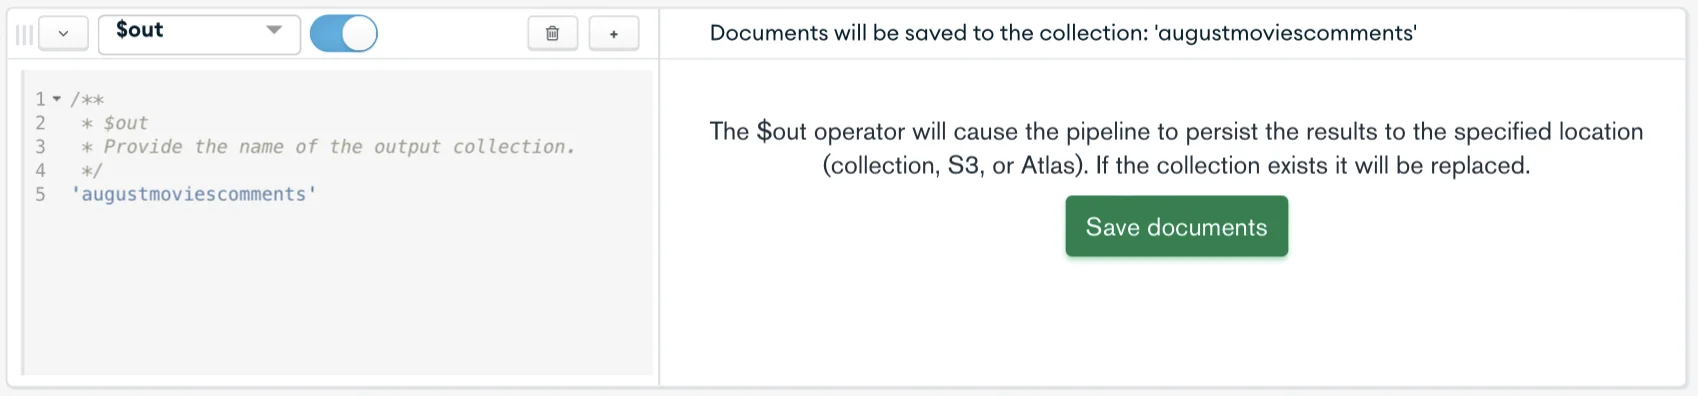
Once again, click the “Add stage” button to create a stage that outputs the result into a new collection, and on the drop-down menu for the third stage, select the $out operator.
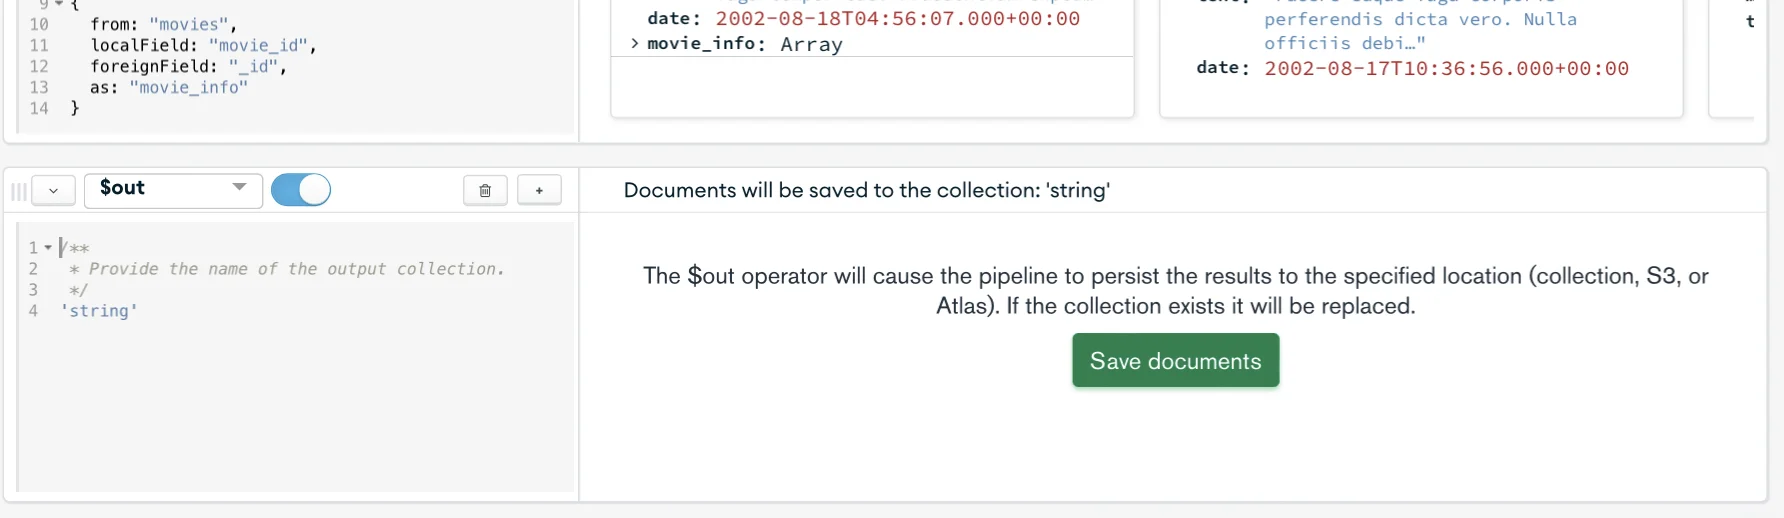
Now update the code in the code field in the out section with the code below.
Let’s break down this part.
- Lines 1-4: Just comments, mainly to explain what the operator is;
- Line 5 (
'augustmoviescomments'): is the name for the new collection;
After filling out the new collection’s name, you should click the “Save documents” button.
Once the collection is created (it might take a few seconds), you’ll see a message stating that documents were persisted in the collection and a “Go to collection” link that you should click.
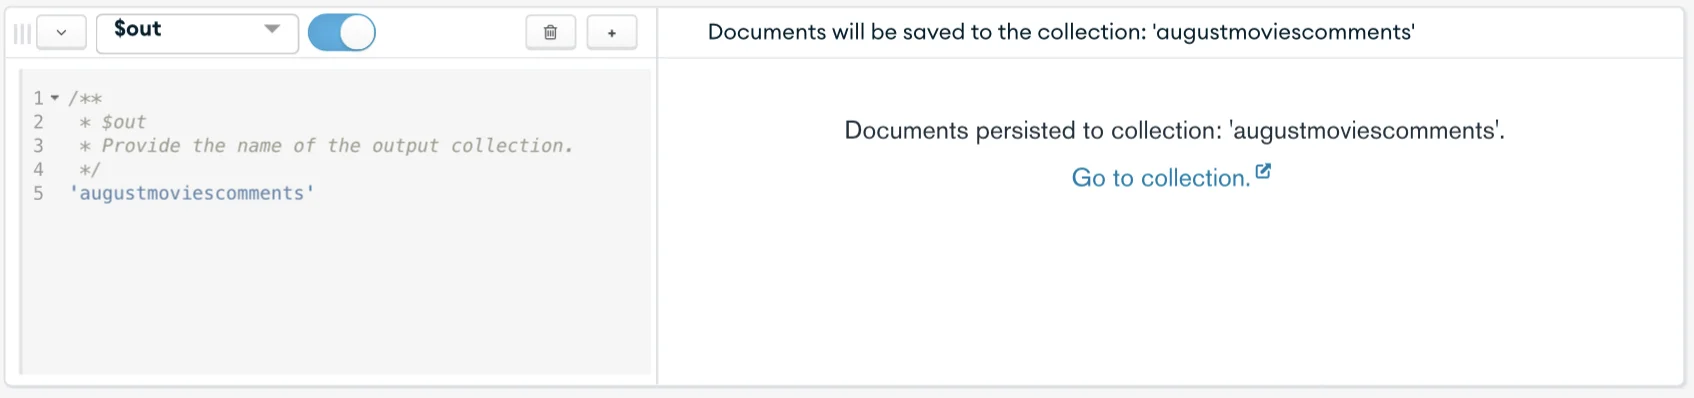
Clicking the “Go to collection” link will open a new tab. If you do not want to see another tab, refresh the page, and you’ll see the augustmoviecomments show up on the left-hand side menu.
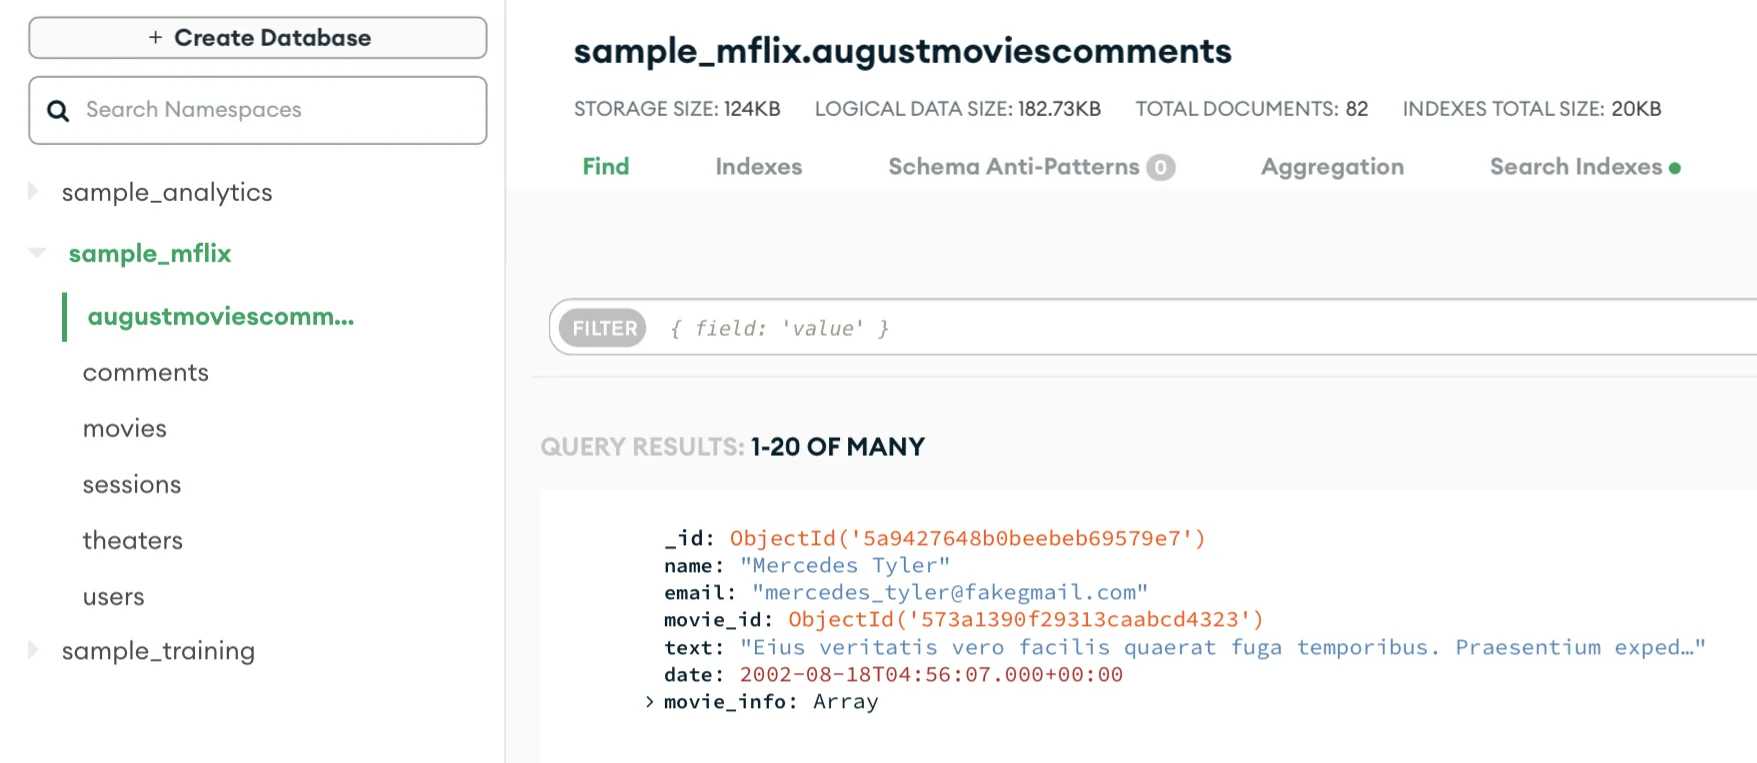
Now that your collection is ready, you can see the collection analytics data, like how many activities were logged and how much space that takes into our storage.
Recap
Now you know how to create collections by aggregating two other collections using pipelines. You also know:
- Datasets in MongoDB are called collections;
- One collection is a set of documents;
- To create collections by joining other collections, you can use pipelines;
- Pipelines are a set of steps called stages;
- Each stage does only one thing.
Now you can explore what else to use pipelines for.
